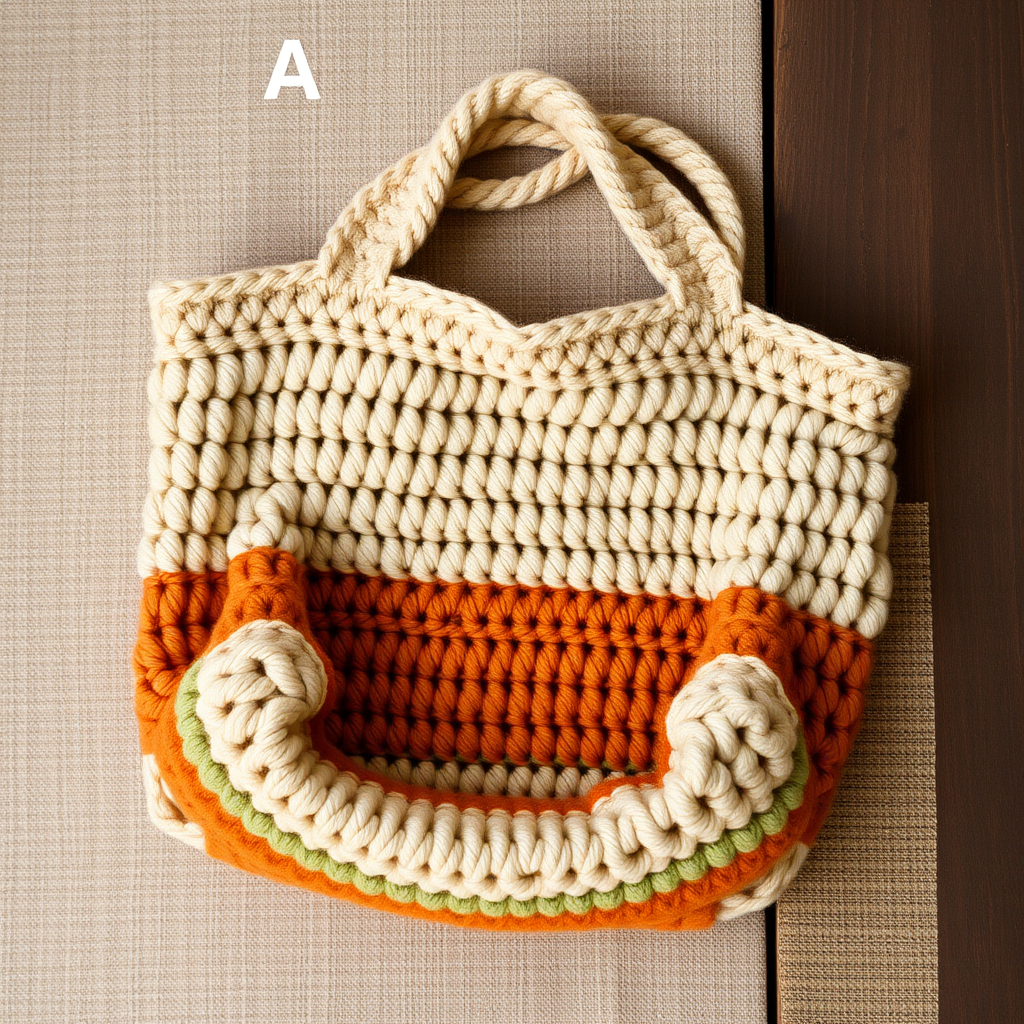
The Woven Willow Market Tote: A Free Crochet Pattern for a Textured, Modern Crossbody Bag

Introducing the Woven Willow Market Tote
This isn't your average market bag; the Woven Willow Tote features a stunning, sculptural woven stitch that creates a dense, durable fabric perfect for everyday use. The earthy color palette and elegant leather strap elevate it from simple accessory to a statement piece. Whether you're heading to the farmer's market or just need a chic everyday carryall, this modern, boho-inspired bag is the perfect handmade companion.
Materials Needed
- Yarn: Worsted weight cotton yarn (e.g., Lion Brand 24/7 Cotton) in two colors:
- Main Color (MC) - Oatmeal: Approx. 250 yards
- Contrast Color (CC) - Sage Green: Approx. 150 yards
- Hook: Size H/8 (5.0 mm) crochet hook
- Notions: Tapestry needle, scissors, stitch markers (optional)
- Gauge: 14 stitches and 10 rows in woven stitch pattern = 4 inches (10 cm). Exact gauge is not critical for this project, but consistency is important for size.
Step-by-Step Instructions
Important Notes Before You Begin
The bag is worked in two pieces (front and back) and seamed together. The woven stitch is created by working front post double crochet (fpdc) and back post double crochet (bpdc) in a repeating pattern. The strap is added after seaming. Take your time with the post stitches—they create the beautiful basket-weave texture that makes this bag special.
Front Panel (Make 1 with MC)
- Foundation Chain: Chain 31.
- Row 1 (Base Row): Double crochet (dc) in the 4th chain from the hook (the skipped chains count as the first dc) and in each chain across. You should have 29 double crochet stitches total.
- Row 2 (Woven Stitch Start): Chain 3 (this counts as the first double crochet of the row), turn your work. *Front post double crochet (fpdc) around the next double crochet, back post double crochet (bpdc) around the next double crochet; repeat from * across the row, ending with a double crochet in the top of the turning chain from the previous row. You should have 29 stitches: 1 dc (turning ch), 14 fpdc, 14 bpdc, 1 dc (end).
- Row 3 (Alternating Woven Stitch): Chain 3 (counts as first dc), turn. *Back post double crochet (bpdc) around the next front post double crochet, front post double crochet (fpdc) around the next back post double crochet; repeat from * across the row, ending with a double crochet in the top of the turning chain. This alternation creates the woven texture.
- Rows 4-25: Repeat Rows 2 and 3 for 22 more rows, or until the panel measures approximately 12 inches (30 cm) from the beginning. Keep your tension consistent—if you tend to crochet tightly, relax your grip slightly for the post stitches.
- Finish: Fasten off, leaving a 6-inch tail for weaving in later.
Back Panel (Make 1 with MC)
Repeat the instructions for the Front Panel exactly. Both panels should be identical in size and stitch count.
Assembly
- Seaming: With right sides facing out (the textured side you want visible), place the two panels together, aligning the edges. Using MC yarn and a tapestry needle, whip stitch the bottom edge and both side seams together. Work through both loops of each stitch for a secure seam. Leave the top edge open—this will be the bag opening.
- Top Edge Finishing: Join MC yarn with a slip stitch to any stitch on the top edge. Work 1 round of single crochet (sc) evenly around the entire top opening. Place 1 single crochet in each stitch across the front and back panels, and work 2 single crochet in each corner where the side seams meet the top edge. Join the round with a slip stitch to the first single crochet. You should have approximately 60 single crochet stitches total. Fasten off and weave in the end.
Strap (Make 1 with CC)
- Foundation Chain: Chain 101 (or adjust for your desired crossbody strap length—measure from one side seam, across your body, to the other side seam, and add 4 inches for seam allowance).
- Row 1: Single crochet (sc) in the 2nd chain from the hook and in each chain across. You should have 100 single crochet stitches.
- Row 2: Chain 1, turn. Single crochet in each single crochet across. (100 sc)
- Finish: Fasten off, leaving a long tail (at least 18 inches) for sewing the strap together and attaching it to the bag.
Attaching the Strap
- Create a Double-Thick Strap: Fold the strap in half lengthwise (bringing the long edges together). Using the long tail and a tapestry needle, whip stitch the long edges together, working through both layers. This creates a sturdy, comfortable strap that won't stretch out of shape.
- Position the Strap: Center one end of the strap on a side seam of the bag, about 2 inches (5 cm) down from the top edge. The strap should lie flat against the bag body. Repeat for the other end on the opposite side seam.
- Sew Securely: Using the remaining yarn tail, sew the strap ends to the bag with small, tight stitches. Go through the strap and the bag body several times to ensure it's secure. Weave the end into the inside of the bag.
Finishing Touches
- Weave in All Ends: Using a tapestry needle, weave all remaining yarn tails into the wrong side of the work, trimming any excess.
- Blocking (Optional): If desired, lightly block the bag to even out stitches and set the shape. Mist with water and gently pat into shape, then allow to dry flat.
Your Woven Willow Market Tote is complete! The dense woven stitch and sturdy cotton yarn make this bag perfect for carrying everything from groceries to your daily essentials. Enjoy your beautiful, handmade accessory!