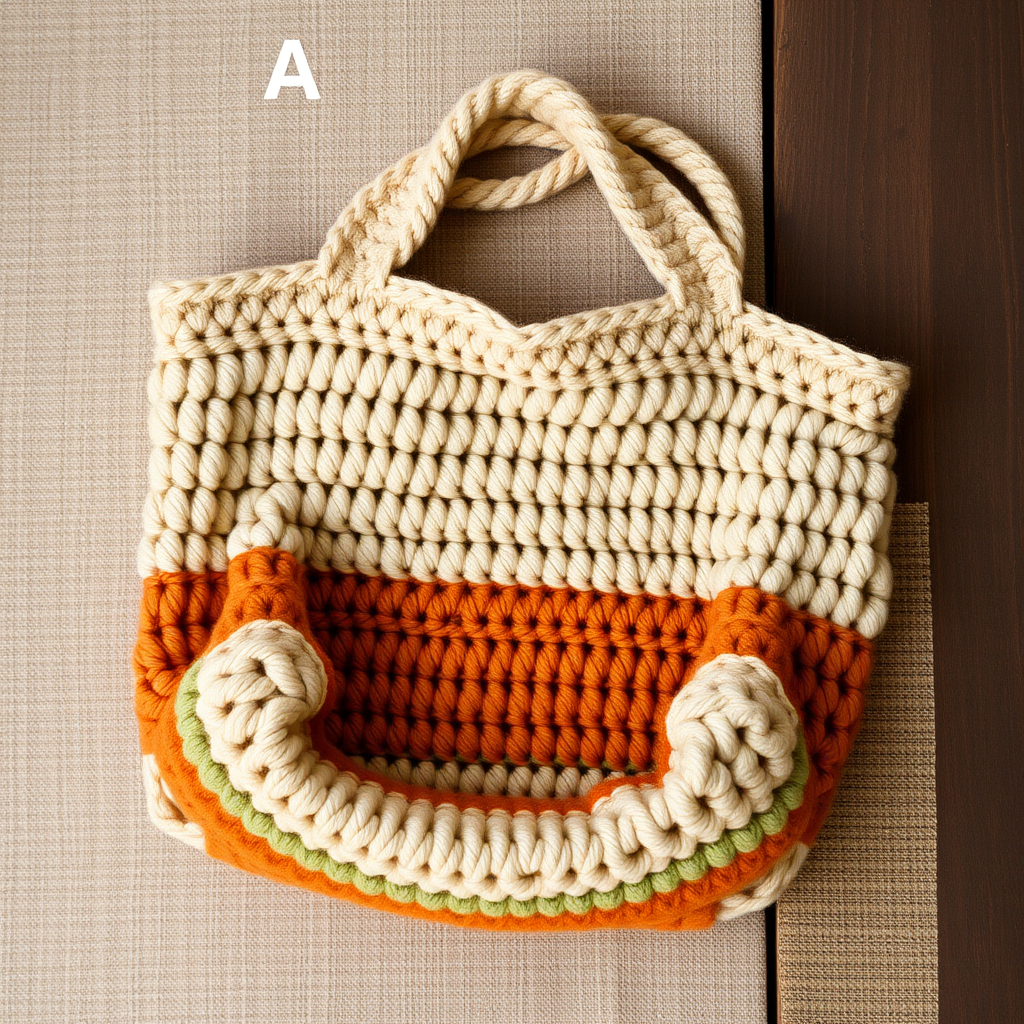
Whimsical Woodland Canteen Cozy Free Pattern

Whimsical Woodland Canteen Cozy: A Free Crochet Pattern for Nature Lovers
Embrace the beauty of the forest with this enchanting Whimsical Woodland Canteen Cozy! This free crochet pattern transforms an ordinary water bottle into a rustic accessory that's as functional as it is charming. Featuring a gorgeous textured leaf stitch and earthy autumn tones of forest green, rust orange, and cream, this bottle holder is perfect for nature lovers, hikers, and anyone who appreciates handmade craftsmanship. Whether you're heading to a picnic, the farmer's market, or simply want to add a touch of woodland whimsy to your daily routine, this cozy canteen cover is sure to become your favorite companion.
This pattern is designed with beginners in mind, using basic stitches and clear instructions to guide you through every step. The result is a sturdy, soft, and beautifully textured bag that fits most standard water bottles (approximately 4 inches in diameter and 7 inches tall). Let's gather our materials and start creating this delightful piece!
Materials Needed
Before we begin, let's make sure you have everything you need. This project uses simple, easy-to-find materials that come together to create a stunning finished piece.
- Yarn: Worsted weight cotton yarn in three colors:
- Forest Green (main color) – approximately 80 yards
- Rust Orange (contrast color) – approximately 50 yards
- Cream (accent color) – approximately 40 yards
- Crochet Hook: 4.5 mm (US size 7) crochet hook
- Stitch Marker: To keep track of your rounds
- Yarn Needle: For weaving in ends and finishing
- Scissors: For cutting yarn
- Optional: A small wooden bead or leaf-shaped button for extra charm on the drawstring
Gauge: 4 stitches x 3 rounds = 1 square inch. While gauge is important for fit, this pattern is quite forgiving. If your cozy turns out slightly larger or smaller, you can adjust by using a different hook size or simply choose a bottle that fits your finished piece.
Step-by-Step Instructions
This pattern is worked in continuous rounds from the bottom up. Important: Use a stitch marker to keep track of your rounds, as you will not be joining rounds with a slip stitch. Let's get started!
Part 1: The Base
The base of your canteen cozy needs to be flat and sturdy. We'll start with a magic ring and increase evenly to create a circle that measures about 4 inches in diameter.
Round 1: With forest green yarn, make a magic ring. Work 6 single crochet (sc) into the ring. Pull the tail to close the ring tightly. (6 stitches)
Round 2: Work 2 sc in each stitch around. (12 stitches)
Round 3: *Sc in the next stitch, 2 sc in the next stitch* — repeat from * to * around. (18 stitches)
Round 4: *Sc in the next 2 stitches, 2 sc in the next stitch* — repeat from * to * around. (24 stitches)
Round 5: *Sc in the next 3 stitches, 2 sc in the next stitch* — repeat from * to * around. (30 stitches)
Round 6: *Sc in the next 4 stitches, 2 sc in the next stitch* — repeat from * to * around. (36 stitches)
Round 7: *Sc in the next 5 stitches, 2 sc in the next stitch* — repeat from * to * around. (42 stitches)
Round 8: *Sc in the next 6 stitches, 2 sc in the next stitch* — repeat from * to * around. (48 stitches)
Round 9: Sc in each stitch around. (48 stitches)
Your base should now measure approximately 4 inches in diameter. If it's smaller, you can add another round of increases; if larger, consider using a smaller hook for the base.
Part 2: The Body
Now we'll build the walls of the cozy. This section features the beautiful leaf stitch pattern that gives this project its woodland charm.
Round 10: Working in the back loops only, sc in each stitch around. (48 stitches) This creates a neat, crisp edge at the base of the body.
Rounds 11-12: Sc in each stitch around. (48 stitches)
Round 13: Switch to rust orange yarn. Sc in each stitch around. (48 stitches)
Round 14: *Sc in the next stitch, double crochet (dc) in the next stitch* — repeat from * to * around. (48 stitches) This begins the leaf stitch pattern.
Round 15: *Dc in the next stitch (which was a sc in the previous round), sc in the next stitch (which was a dc in the previous round)* — repeat from * to * around. (48 stitches) By offsetting the stitches, you create a beautiful woven leaf effect.
Rounds 16-17: Repeat Round 15. Continue the leaf pattern to create a textured band.
Round 18: Switch to cream yarn. Sc in each stitch around. (48 stitches)
Rounds 19-20: Sc in each stitch around. (48 stitches) These smooth cream rounds provide a lovely contrast to the textured leaf band.
Round 21: Switch to forest green yarn. Sc in each stitch around. (48 stitches)
Rounds 22-23: Sc in each stitch around. (48 stitches)
Round 24: Switch to rust orange yarn. Sc in each stitch around. (48 stitches)
Rounds 25-26: Repeat Round 15 to create another leaf stitch pattern band. (48 stitches)
Round 27: Switch to cream yarn. Sc in each stitch around. (48 stitches)
Rounds 28-29: Sc in each stitch around. (48 stitches)
Round 30: Switch to forest green yarn. Sc in each stitch around. (48 stitches)
Rounds 31-32: Sc in each stitch around. (48 stitches)
Your body should now measure approximately 7 inches in height from the base. If you have a taller bottle, you can add more rounds of forest green before the top band.
Part 3: The Top Band and Eyelets
This section creates a decorative ridge and the eyelets through which we'll thread the drawstring.
Round 33: Working in the front loops only, sc in each stitch around. (48 stitches) This creates a neat ridge that visually separates the body from the top band.
Rounds 34-35: Sc in each stitch around. (48 stitches)
Round 36: *Sc in the next 6 stitches, chain 1 (ch 1), skip 1 stitch* — repeat from * to * around. (48 stitches, 6 chain-1 spaces) These chain spaces will serve as eyelets for your drawstring.
Rounds 37-38: Sc in each stitch around, working sc into the chain-1 spaces as well. (48 stitches) This closes up the eyelet row while keeping the holes open.
Fasten off and weave in all loose ends securely.
Part 4: The Drawstring
The drawstring not only cinches the cozy closed but also adds a charming finishing touch.
Step 1: With rust orange yarn, make a chain (ch) approximately 30 inches long. Tip: To ensure it's long enough, chain until it measures about 30 inches, then add a few extra chains for safety.
Step 2: Fasten off and weave in the ends at the very tips of the chain, or leave them for a fringed look.
Step 3: Starting at the front of the cozy, weave the chain drawstring through the eyelets created in Round 36. Thread it in and out of each eyelet until you return to the front.
Step 4: Pull both ends of the drawstring to cinch the top of the cozy around your bottle. Tie a small, neat bow.
Part 5: Finishing Touches
Your Whimsical Woodland Canteen Cozy is almost complete! Let's add those final details that make it truly special.
Step 1: Weave in any remaining loose ends with your yarn needle, making sure they're hidden securely within the stitches.
Step 2 (Optional): For an extra touch of woodland charm, slide a small wooden bead or a leaf-shaped button onto one end of the drawstring before tying the bow. This adds a beautiful, natural accent.
Step 3: Slip your water bottle inside the cozy. The stretchy cotton yarn will conform to the shape of your bottle, holding it snugly and securely.
Congratulations! You've created a beautiful, functional piece of art that combines the warmth of handmade craft with the beauty of nature. This Whimsical Woodland Canteen Cozy makes a wonderful gift for friends, family, or even yourself. The textured leaf stitch and earthy color palette are sure to draw compliments wherever you go.
Remember, this pattern is just a starting point. Feel free to experiment with different color combinations to match your personal style or the changing seasons. Happy crocheting, and may your adventures be filled with handmade warmth and woodland wonder!