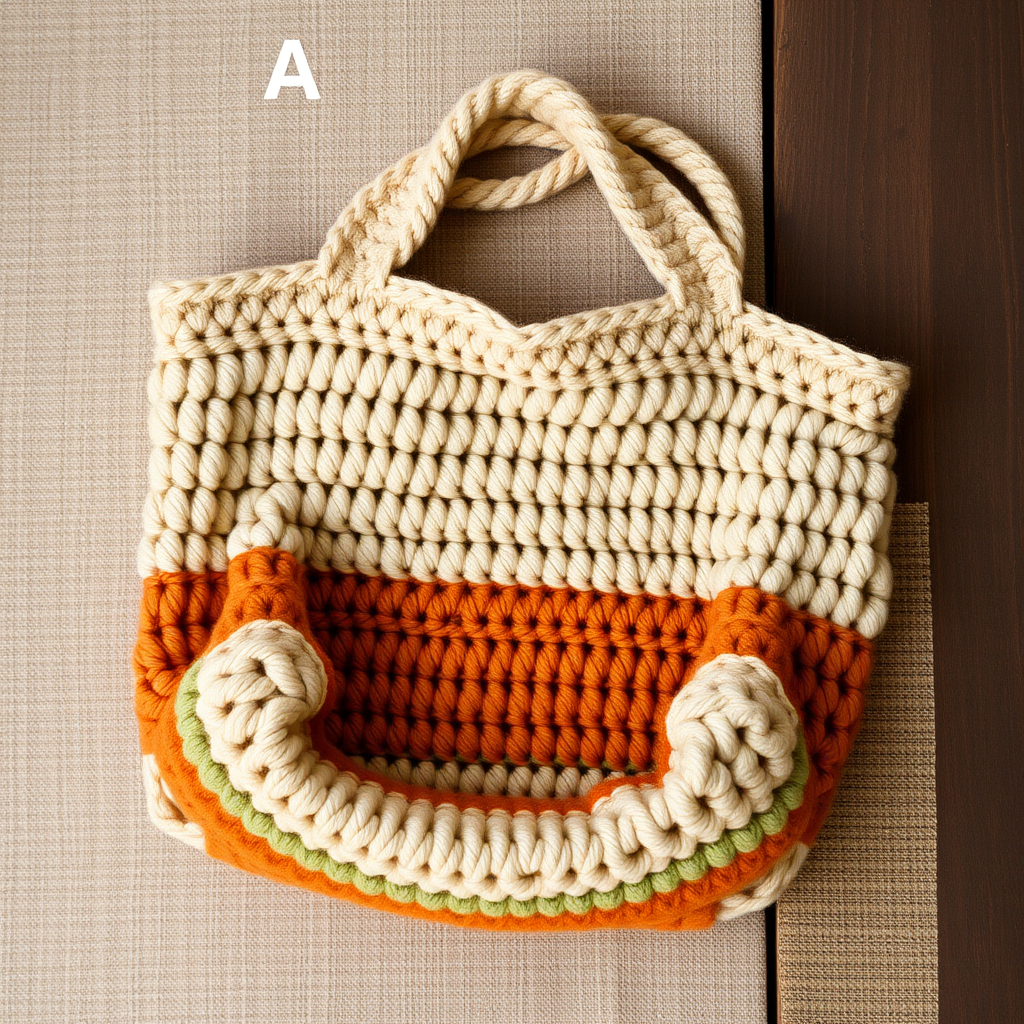
Meadow Breeze Market Bag Free Pattern

Meadow Breeze Market Bag: A Free Crochet Pattern for Summer
Carry a piece of summer wherever you go with this airy, textured crochet market bag. Designed for farmers' market hauls, beach days, or everyday errands, the Meadow Breeze Bag combines a unique stitch pattern with an earthy color palette of sage green, cream, and terracotta. This sustainable, handmade accessory is as stylish as it is functional—perfect for the eco-conscious crafter who loves boho aesthetics. Whether you're a seasoned crocheter or a confident beginner ready for a fun project, this free pattern will guide you through every step to create a beautiful, durable bag you'll be proud to carry.
Materials Needed
Before you begin, gather the following supplies. Using the recommended yarn ensures the correct gauge and a sturdy, long-lasting bag.
- Yarn: Worsted weight cotton yarn (e.g., Lion Brand 24/7 Cotton) in three colors:
- Main Color (MC) – Sage Green: approx. 300g
- Color A – Cream: approx. 100g
- Color B – Terracotta: approx. 100g
- Crochet Hook: 5.0 mm (H/8) crochet hook
- Notions: Yarn needle for weaving in ends, stitch markers (optional but helpful), scissors
- Gauge: 16 dc x 8 rows = 4 inches (10 cm) in pattern stitch. Always check your gauge to ensure the bag turns out the correct size.
Step-by-Step Instructions
Important Notes: The base is worked in continuous rounds (do not join unless specified), while the body is worked in joined rounds. Ch 3 counts as a double crochet (dc) throughout. Use stitch markers to keep track of the beginning of rounds, especially in the continuous base.
Base (Worked in MC – Sage Green)
This creates a flat, circular bottom for your bag.
- R1: Make a magic ring. Ch 3 (counts as dc), work 11 dc into the ring. Pull the ring tight. Join with a slip stitch (sl st) to the top of the ch-3. (12 dc)
- R2: Ch 3, dc in the same stitch (this is an increase). Work 2 dc in each stitch around. Join with a sl st to the top of the ch-3. (24 dc)
- R3: Ch 3, dc in the same stitch, dc in the next stitch. *2 dc in the next stitch, dc in the next stitch.* Repeat from * to * around. Join. (36 dc)
- R4: Ch 3, dc in the same stitch, dc in the next 2 stitches. *2 dc in the next stitch, dc in the next 2 stitches.* Repeat from * to * around. Join. (48 dc)
- R5: Ch 3, dc in the same stitch, dc in the next 3 stitches. *2 dc in the next stitch, dc in the next 3 stitches.* Repeat from * to * around. Join. (60 dc)
- R6: Ch 3, dc in the same stitch, dc in the next 4 stitches. *2 dc in the next stitch, dc in the next 4 stitches.* Repeat from * to * around. Join. (72 dc)
- R7: Ch 3, dc in the same stitch, dc in the next 5 stitches. *2 dc in the next stitch, dc in the next 5 stitches.* Repeat from * to * around. Join. (84 dc)
Body – Textured Ribbed Section (Joined Rounds, Do Not Turn)
This section creates the beautiful, stretchy ribbed texture using front post and back post double crochet.
- R8: Ch 3, dc in each stitch around. Join with a sl st to the top of the ch-3. (84 dc)
- R9: Ch 3, *front post double crochet (fpdc) around the next stitch, back post double crochet (bpdc) around the next stitch.* Repeat from * to * around, ending with a fpdc. Join. (84 sts)
- R10: Ch 3, *bpdc around the next stitch, fpdc around the next stitch.* Repeat from * to * around, ending with a bpdc. Join. (84 sts)
- R11-12: Repeat R9 and R10. After R12, cut MC and join Color A (Cream).
- R13-14: With Color A, repeat R9 and R10. Cut Color A and join Color B (Terracotta).
- R15-16: With Color B, repeat R9 and R10. Cut Color B and join MC.
- R17-18: With MC, repeat R9 and R10.
- R19: Ch 3, dc in each stitch around. Join. (84 dc)
Mesh Pattern (For the Upper Bag Body)
This open, airy mesh is perfect for a market bag. Pay close attention to the stitch placement.
- R20: Ch 4 (counts as dc + ch 1). Skip the next stitch, dc in the next stitch. *Ch 1, skip the next stitch, dc in the next stitch.* Repeat from * to * around, ending with ch 1, skip the last stitch. Join with a sl st to the 3rd ch of the ch-4. (42 dc, 42 ch-1 spaces)
- R21: Ch 3, dc in the next ch-1 space. *Ch 1, dc in the next dc, dc in the next ch-1 space.* Repeat from * to * around, ending with ch 1, skip the last dc. Join with a sl st to the top of the ch-3. (84 dc, 42 ch-1 spaces)
- R22: Ch 4, skip the next dc, dc in the next dc. *Ch 1, skip the next dc, dc in the next dc.* Repeat from * to * around, ending with ch 1. Join to the 3rd ch of the ch-4. (42 dc, 42 ch-1 spaces)
- R23-31: Repeat R21 and R22 alternately (R23=R21, R24=R22, etc.). After R31, cut MC and join Color A.
- R32-33: With Color A, repeat R21 and R22. Cut Color A and join Color B.
- R34-35: With Color B, repeat R21 and R22. Cut Color B and join MC.
- R36-40: With MC, repeat R21 and R22 (R36=R21, R37=R22, R38=R21, R39=R22, R40=R21).
Top Border & Scalloped Edge
This finishes the top of the bag neatly and adds a decorative scalloped detail.
- R41: Ch 3, dc in each dc and in each ch-1 space around. Join. (84 dc)
- R42: Ch 1, single crochet (sc) in the same stitch, sc in each stitch around. Join. (84 sc)
- R43: Ch 1, sc in the same stitch. *Ch 3, skip 2 stitches, sc in the next stitch.* Repeat from * to * around, ending with ch 3, skip the last 2 stitches. Join to the first sc. (28 ch-3 loops)
- R44: Sl st into the first ch-3 loop. Ch 1, sc in the loop. *Ch 3, sc in the next loop.* Repeat from * to * around, ending with ch 3. Join to the first sc. Fasten off and weave in the end.
Handles (Make 2)
These sturdy, rectangular handles are crocheted directly onto the bag and sewn securely.
- Attach MC to the top edge of the bag, approximately 4 inches from the side seam (where the rounds were joined).
- Row 1: Ch 1, sc in the same stitch, sc in the next 5 stitches (6 sc total). Turn.
- Row 2-40: Ch 1, sc in each stitch across. Turn. (6 sc each row)
- Fasten off, leaving a long tail (approx. 12 inches) for sewing.
- Sew the end of the handle to the opposite side of the bag, aligning it with the starting point. Ensure the handle is not twisted.
- Repeat the entire process for the second handle on the other side of the bag, placing it symmetrically.
- Weave in all remaining ends with your yarn needle.
Your Meadow Breeze Market Bag is now complete! Block it gently if desired to even out the stitches. This bag is not only a beautiful accessory but also a durable, eco-friendly alternative to plastic bags. Enjoy your handmade creation on your next outing!