Sunlit Meadow Tote Bag Free Pattern
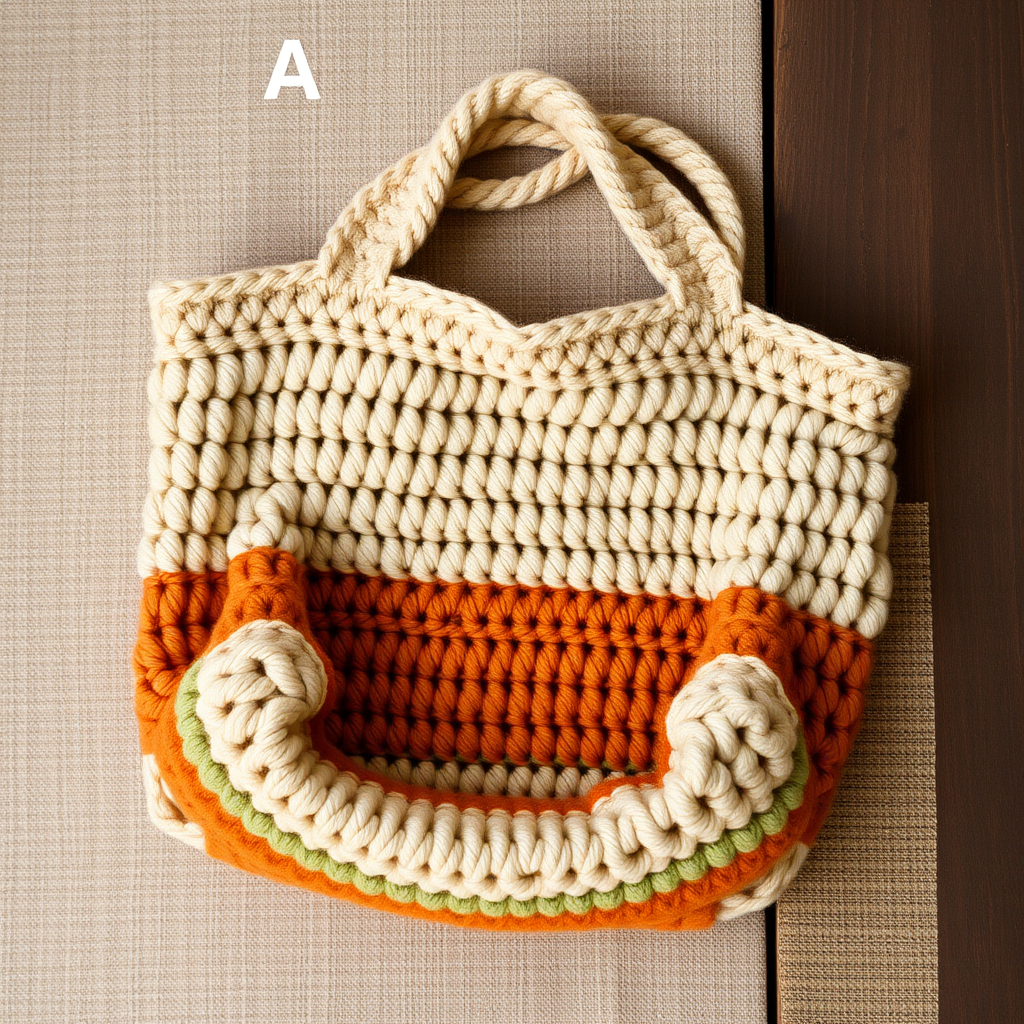
Sunlit Meadow Tote Bag: A Free Crochet Pattern for Summer
Imagine strolling through a sun-drenched farmers' market or strolling along the shore with a bag that feels as warm as the season itself. The Sunlit Meadow Tote Bag is a textured, earthy accessory that blends the softness of linen with the durability of cotton. Its open weave and sturdy straps make it the perfect companion for your summer adventures, whether you're gathering fresh produce or carrying a beach towel. This free crochet pattern is designed with beginners in mind, offering a relaxing, repetitive rhythm that results in a beautiful, functional piece. Let's dive into creating your own slice of summer!
Materials Needed
Before you begin, gather the following materials to ensure a smooth crocheting experience. This project is perfect for using up cotton yarns in earthy tones, but you can easily customize the palette to match your style.
- Yarn: Lion Brand 24/7 Cotton (worsted weight, 100% cotton) in the following colors:
- Sand (Color A) - 2 skeins
- Sage (Color B) - 2 skeins
- Terracotta (Color C) - 2 skeins
- Crochet Hook: G/6 (4.0 mm) crochet hook
- Other: Yarn needle for weaving in ends and sewing straps, scissors
Gauge: 14 sts x 10 rows = 4 inches in half double crochet. It's always a good idea to check your gauge to ensure your bag turns out the right size, but this pattern is forgiving if you're slightly off.
Step-by-Step Instructions
This tote is worked in continuous rounds from the bottom up, creating a seamless, sturdy base. The straps are crocheted separately and then securely attached. Follow these detailed instructions carefully, and you'll have a gorgeous bag in no time.
Bag Body
We'll start by creating the flat, circular base of the bag, then work our way up the sides. Remember to place a stitch marker at the beginning of each round to keep track of your place.
Round 1: With color A, make a magic ring. Ch 2 (this counts as your first half double crochet), work 10 hdc into the ring. Join with a sl st to the top of the ch-2. (11 sts)
Round 2: Ch 2, hdc in the same st (the base of the ch-2). *2 hdc in the next st*, repeat * to * around. Join with a sl st. (22 sts)
Round 3: Ch 2, hdc in the same st, hdc in the next st. *2 hdc in the next st, hdc in the next st*, repeat * to * around. Join. (33 sts)
Round 4: Ch 2, hdc in the same st, hdc in the next 2 sts. *2 hdc in the next st, hdc in the next 2 sts*, repeat * to * around. Join. (44 sts)
Round 5: Ch 2, hdc in the same st, hdc in the next 3 sts. *2 hdc in the next st, hdc in the next 3 sts*, repeat * to * around. Join. (55 sts)
Round 6: Ch 2, hdc in the same st, hdc in the next 4 sts. *2 hdc in the next st, hdc in the next 4 sts*, repeat * to * around. Join. (66 sts)
Round 7: Ch 2, hdc in the same st, hdc in the next 5 sts. *2 hdc in the next st, hdc in the next 5 sts*, repeat * to * around. Join. (77 sts)
Round 8: Ch 2, hdc in the same st, hdc in the next 6 sts. *2 hdc in the next st, hdc in the next 6 sts*, repeat * to * around. Join. (88 sts)
Round 9: Ch 2, hdc in the same st, hdc in the next 7 sts. *2 hdc in the next st, hdc in the next 7 sts*, repeat * to * around. Join. (99 sts)
Round 10: Ch 2, hdc in the same st, hdc in the next 8 sts. *2 hdc in the next st, hdc in the next 8 sts*, repeat * to * around. Join. (110 sts)
Round 11: Ch 2, hdc in the same st, hdc in the next 9 sts. *2 hdc in the next st, hdc in the next 9 sts*, repeat * to * around. Join. (121 sts)
Round 12: Ch 2, hdc in the same st, hdc in the next 10 sts. *2 hdc in the next st, hdc in the next 10 sts*, repeat * to * around. Join. (132 sts)
Your circle should now be flat and measure about 12 inches in diameter. Now, we will work even without increasing to build the height of the bag.
Rounds 13-20: Ch 2, hdc in each st around. Join with a sl st to the top of the ch-2. (132 sts each round)
Now we'll introduce the color-block pattern. When changing colors, complete the last yarn over of the final hdc of the old color with the new color, then ch 2 to start the next round.
Round 21: Change to color B. Ch 2, hdc in each st around. Join. (132 sts)
Rounds 22-23: With color B, ch 2, hdc in each st around. Join. (132 sts each round)
Round 24: Change to color C. Ch 2, hdc in each st around. Join. (132 sts)
Rounds 25-26: With color C, ch 2, hdc in each st around. Join. (132 sts each round)
Round 27: Change to color A. Ch 2, hdc in each st around. Join. (132 sts)
Rounds 28-35: With color A, ch 2, hdc in each st around. Join. (132 sts each round). Fasten off and weave in the end.
Your bag body is now complete! It should measure about 10 inches tall from the center of the base.
Straps (Make 2)
These sturdy straps are crocheted flat and then folded to create a strong, comfortable handle.
Row 1: With color A, ch 10. Hdc in the 3rd ch from the hook (the skipped chs count as your first hdc) and in each ch across. Turn. (8 sts)
Rows 2-60: Ch 2 (counts as first hdc), hdc in each st across. Turn. (8 sts each row)
Fasten off, leaving a long tail (about 18 inches) for sewing.
Assembly
Now it's time to bring your bag together. This step is crucial for a polished, durable finish.
- Fold the Straps: Take one finished strap and fold it in half lengthwise, so the short ends meet. This creates a double-thick strap that is strong and comfortable on your shoulder.
- Sew the Ends: Using the long tail and a yarn needle, sew the two short ends together securely. This forms a loop. Repeat for the second strap.
- Attach to Bag: Position the straps on the inside of the bag. Place the center of each strap's loop about 3 inches apart on each side of the bag's top edge. For example, if your bag has 132 stitches around, you'll want to find the center point on each side and place the straps 3 inches to the left and right of that center.
- Sew Securely: Using the yarn needle and the long tails, sew the straps to the inside of the bag. Use a strong, whipstitch or backstitch, going through both the strap and the bag fabric several times to ensure it's very secure. Weave in all ends.
Finishing Touches
Your Sunlit Meadow Tote is almost ready! To give it more structure and prevent items from slipping through the stitches, you can line it with fabric. However, it's perfectly beautiful and functional as is. If you'd like, you can gently block the bag to even out the stitches and give it a more polished shape. Simply wet it, shape it, and let it dry flat.
Congratulations! You've just created a beautiful, handmade tote that's perfect for carrying your summer essentials. The earthy colors and textured stitches make it a unique accessory you'll be proud to show off. Happy crocheting!


