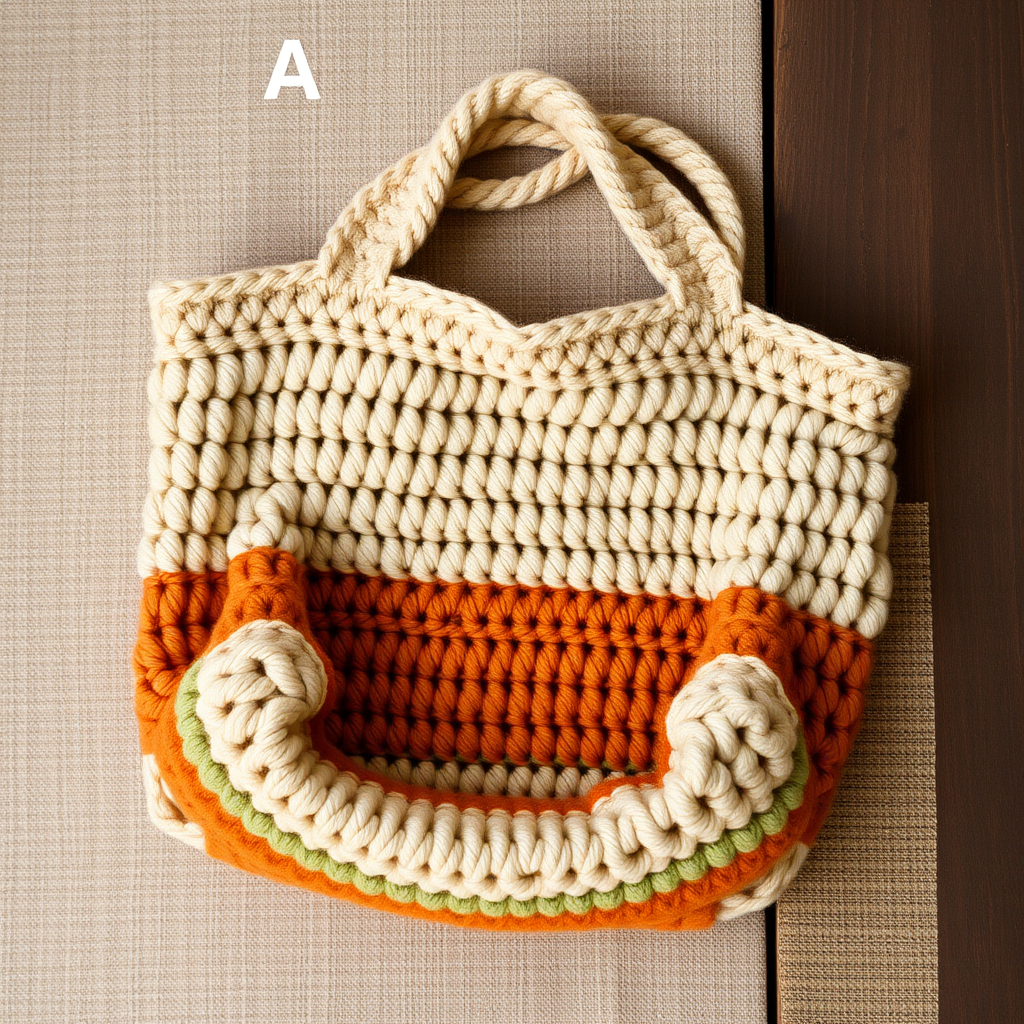
The Meridian Metro Tote Free Pattern – A Sculptural Crochet City Bag

The Meridian Metro Tote: A Sculptural Crochet City Bag (Free Pattern)
Imagine carrying a piece of the skyline with you—not in a literal sense, but in the form of a beautifully textured, architectural crochet tote. The Meridian Metro Tote is exactly that: a stunning, sculptural bag that mimics the grid of city blocks through a unique waffle stitch. Despite its sophisticated look, this pattern is surprisingly beginner-friendly, using only basic stitches and simple color changes. Whether you're heading to the farmer's market, commuting to work, or just running daily errands, this sturdy cotton tote is the perfect stylish companion. Let's dive into creating this modern masterpiece together.
Materials Needed
Before we begin, let's gather all the supplies you'll need for this project. The beauty of this pattern lies in its simplicity—you don't need fancy equipment, just quality materials that will make your bag durable and beautiful.
Yarn Requirements
- Yarn Weight: Worsted weight cotton yarn (e.g., Lion Brand 24/7 Cotton)
- Color A (Slate Gray): Approximately 100g – for the main body and handles
- Color B (Mustard Yellow): Approximately 75g – for the accent band
- Color C (Cream): Approximately 75g – for the second accent band
- Total Yarn Needed: Approximately 250g
Tools & Notions
- Crochet Hook: 5.0 mm (H-8) hook, or size needed to obtain gauge
- Yarn Needle: For weaving in ends and seaming
- Scissors: For cutting yarn
- Stitch Markers: Optional, but helpful for keeping track of rounds
Gauge Information
Gauge: 16 single crochet (sc) x 18 rows = 4 x 4 inches (10 x 10 cm). Always check your gauge before starting to ensure your bag turns out the correct size. If your gauge is too loose, try a smaller hook; if too tight, go up a hook size.
Step-by-Step Instructions
Now, let's get to the fun part! This bag is worked in one continuous piece, then folded and seamed. The waffle stitch creates that gorgeous textured grid pattern. Don't worry if it seems complex at first—once you get the rhythm, it's incredibly meditative and rewarding.
Bag Body (Worked Flat, Then Folded)
Foundation & Base Rows
Foundation Chain: With Color A (Slate Gray), chain 41.
Row 1: Single crochet (sc) in the 2nd chain from the hook and in each chain across. You should have 40 sc total. Chain 1, turn your work.
Rows 2-4: Sc in each stitch across. Chain 1, turn. (40 sc) These rows form the solid base of your bag, giving it structure and stability.
First Waffle Stitch Section (Color A)
Row 5 (Waffle Stitch Start): Chain 1, turn. Sc in the first stitch. *Front post double crochet (fpdc) in the next stitch, sc in the next stitch.* Repeat from * to * across the row, ending with a sc in the last stitch. You should have 20 fpdc and 20 sc. Chain 1, turn.
Pro Tip: A front post double crochet (fpdc) is worked by inserting your hook from front to back to front around the post of the stitch in the row below, rather than into the top loops. This creates the raised, sculptural texture.
Row 6: Chain 1, turn. Sc in each stitch across. (40 sc) This plain row separates the waffle rows and helps the texture pop.
Row 7: Chain 1, turn. Sc in first stitch, *fpdc in next stitch, sc in next stitch* repeat from * to * across, ending with sc in last stitch. (20 fpdc, 20 sc)
Rows 8-9: Repeat Rows 6 and 7. This gives you a nice, substantial waffle section.
Row 10: Chain 1, turn. Sc in each stitch across. (40 sc)
Color Change to Mustard Yellow (Color B)
Row 11 (Color Change): With Color B (Mustard Yellow), chain 1, turn. Sc in each stitch across. (40 sc) When changing colors, simply finish the last stitch of the previous row with the new color by pulling the new yarn through the final two loops of the last sc.
Rows 12-13: With Color B, repeat Rows 5-6 (the waffle stitch pattern). So Row 12 is the waffle row (sc, fpdc, sc...), and Row 13 is the plain sc row.
Row 14: With Color B, sc in each stitch across. (40 sc)
Color Change to Cream (Color C)
Row 15 (Color Change): With Color C (Cream), chain 1, turn. Sc in each stitch across. (40 sc)
Rows 16-17: With Color C, repeat Rows 5-6 (waffle stitch pattern).
Row 18: With Color C, sc in each stitch across. (40 sc)
Return to Slate Gray (Color A)
Row 19 (Color Change): With Color A, chain 1, turn. Sc in each stitch across. (40 sc)
Rows 20-21: With Color A, repeat Rows 5-6 (waffle stitch pattern).
Row 22: With Color A, sc in each stitch across. (40 sc)
Rows 23-24: Repeat Rows 19-20 (Color A waffle stitch). So Row 23 is the waffle row, and Row 24 is the plain sc row.
Row 25: With Color A, sc in each stitch across. (40 sc)
Row 26: Chain 1, turn. Sc in each stitch across. (40 sc)
Row 27: Chain 1, turn. Sc in each stitch across. (40 sc) Fasten off, leaving a long tail for seaming.
Folding and Seaming the Bag
Now comes the magical transformation from flat rectangle to three-dimensional bag!
Step 1: Lay your rectangle flat with the right side facing up. Fold it in half so the short ends meet. The folded edge will become the bottom of your bag.
Step 2: With your yarn needle and the long tail from Color A, whip stitch the two side seams together. Start at the bottom fold and work your way up to the top opening. Make sure your stitches are even and secure.
Step 3: Once both sides are seamed, turn the bag right side out. The waffle texture should now be on the outside, and your seams should be hidden inside.
Top Border
To give your bag a clean, finished edge, we'll add a simple border around the top opening.
Round 1: With Color A, attach your yarn to any stitch along the top opening. Single crochet evenly around the entire top edge. You should have approximately 80 sc total (40 from each side of the folded rectangle). Join with a slip stitch to the first sc.
Rounds 2-4: Chain 1, sc in each stitch around. Join with a slip stitch to the first sc at the end of each round.
After Round 4, fasten off and weave in this end securely.
Handles (Make 2)
These sturdy handles are crocheted flat and then attached to the bag. They're simple but strong enough to carry all your essentials.
Row 1: With Color A, chain 61. Sc in the 2nd chain from the hook and in each chain across. You should have 60 sc. Chain 1, turn.
Row 2: Sc in each stitch across. (60 sc) Fasten off, leaving a long tail (at least 18 inches) for attaching to the bag.
Pro Tip: For extra durability, you could work a third row of sc, but two rows are sufficient for this pattern.
Attaching the Handles
Step 1: Fold each handle in half to find the center point. Mark this with a stitch marker or a piece of scrap yarn.
Step 2: Position one handle on the front of the bag. The center of the handle should align with the center of the bag's front panel. Place the handle so its ends are 8 stitches in from each side seam. This ensures the handle is centered and balanced.
Step 3: Using the long tail from the handle, whip stitch the handle securely to the inside of the bag. Work through both the handle and the bag fabric, making sure your stitches are tight and even. Repeat for the other end of the same handle.
Step 4: Repeat Steps 2-3 for the second handle on the back of the bag, making sure it aligns with the front handle.
Step 5: Weave in all remaining ends with your yarn needle. Trim any excess yarn.
Final Thoughts & Styling Tips
Congratulations! You've just completed your very own Meridian Metro Tote. This bag is as functional as it is beautiful—the cotton yarn makes it sturdy enough for groceries, books, or beach essentials, while the waffle stitch texture adds a touch of modern sophistication to any outfit.
The color blocking is completely customizable. Try using your city's colors, or go for a monochromatic look with different shades of the same hue. You could even add a fabric lining or a magnetic snap closure for extra polish.
Remember, the waffle stitch gets easier with practice. Don't be discouraged if your first few rows feel slow—soon you'll be crocheting this textured pattern with confidence and speed. This pattern is perfect for gifting, and once you've mastered it, you'll want to make one in every color combination!
Happy crocheting, and may your new tote carry you through many wonderful adventures!