The Enchanted Bramble Celtic Weave Hobo Bag Free Pattern

The Enchanted Bramble Celtic Weave Hobo Bag: A Free Crochet Pattern
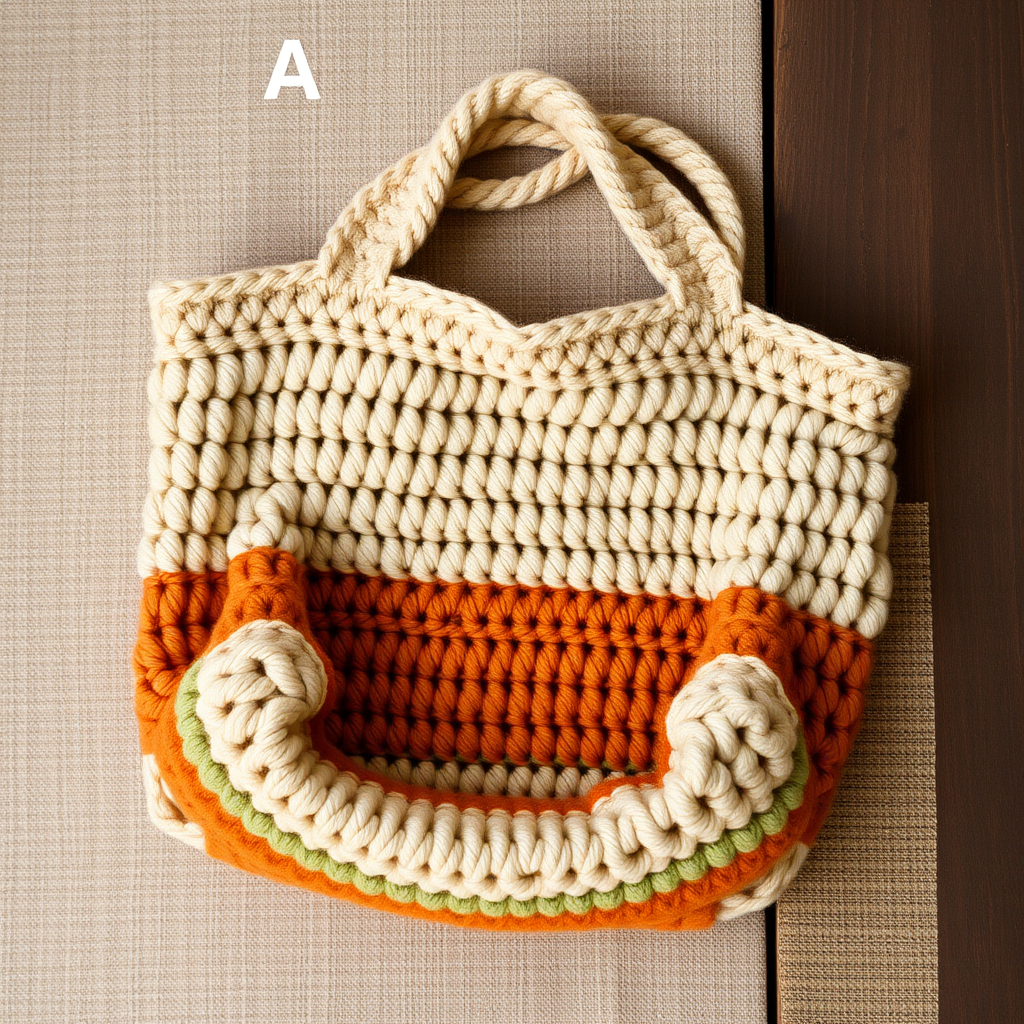
Carry a piece of ancient woodland magic with this richly textured crochet hobo bag. The Enchanted Bramble features a dimensional Celtic weave that drapes beautifully over the shoulder, creating a cozy, heirloom-quality accessory. With deep forest green, heather purple, and rustic brown color blocks, this bag evokes the feeling of a misty forest floor—earthy, artisanal, and utterly unique. Whether you're a seasoned crocheter or a confident beginner ready for a textured challenge, this pattern will guide you through creating a stunning, slouchy bag that elevates any outfit.
This free pattern is designed to be approachable while teaching you the beautiful Celtic weave stitch—a braided effect created with front post and back post double crochets. The result is a dense, sturdy fabric that holds its shape beautifully. Let's gather our materials and begin this enchanting project!
Materials Needed
Before you begin, ensure you have all the necessary supplies. The quality of your yarn will greatly affect the final look and durability of your bag.
- Yarn: Worsted weight (#4) cotton or cotton-blend yarn in three colors:
- Main Color (MC) - Deep Forest Green: Approximately 350g (about 700 yards)
- Contrast Color A - Heather Purple: Approximately 150g (about 300 yards)
- Contrast Color B - Rustic Brown: Approximately 100g (about 200 yards)
- Crochet Hooks:
- 5.5mm (I-9) crochet hook for the main body
- 4.5mm hook for the strap edging
- Other Tools: Yarn needle for weaving in ends, scissors, stitch markers (optional but helpful), and a measuring tape.
Gauge: 14 dc x 8 rows = 4 inches (10 cm) in Celtic Weave pattern (after blocking). Always check your gauge to ensure your bag turns out the correct size.
Step-by-Step Instructions
This bag is worked in two identical side panels, then seamed together and finished with a sturdy strap. The Celtic weave pattern creates a beautiful braided effect using front post and back post double crochets. Follow along carefully, and you'll have a gorgeous bag in no time.
Special Stitches
Master these three stitches, and you'll be ready to tackle the pattern. Practice them on a small swatch first if you're new to post stitches.
- FPdc (Front Post Double Crochet): Yarn over, insert hook from front to back around the post of the indicated stitch (the vertical part of the stitch below), yarn over and pull up a loop, complete as a double crochet (yarn over, pull through two loops, yarn over, pull through two loops).
- BPdc (Back Post Double Crochet): Yarn over, insert hook from back to front around the post of the indicated stitch, yarn over and pull up a loop, complete as a double crochet.
- Celtic Weave Stitch (worked over a multiple of 4 + 2):
- Row 1 (RS): 1 dc in 4th ch from hook and in each ch across. Turn.
- Row 2: Ch 2 (counts as hdc), skip first st, *FPdc around next st, BPdc around next st, FPdc around next st, BPdc around next st* repeat across, hdc in top of turning ch. Turn.
- Row 3: Ch 2, skip first st, *BPdc around next st, FPdc around next st, BPdc around next st, FPdc around next st* repeat across, hdc in top of turning ch. Turn.
- Rows 4-5: Repeat Rows 2-3.
Panel 1 (Make 2)
This is the main body of the bag. You'll make two identical panels using the Main Color (Deep Forest Green).
- With MC and 5.5mm hook, ch 42 loosely.
- Row 1: Dc in 4th ch from hook and in each ch across (40 dc). Turn.
- Row 2: Work Row 2 of Celtic Weave pattern across (40 sts). Turn.
- Row 3: Work Row 3 of Celtic Weave pattern. Turn.
- Repeat Rows 2-3 until piece measures 14 inches from the beginning, ending with a Row 3 repeat. Fasten off and weave in ends.
Panel 2 (Make 2)
These panels feature the beautiful color gradient. You'll work the same Celtic Weave pattern but change colors at specific intervals.
- Work exactly as Panel 1, but use Color A (Heather Purple) for the first 4 inches.
- Then switch to MC (Deep Forest Green) for the next 6 inches.
- Finally, switch to Color B (Rustic Brown) for the final 4 inches.
- To change colors: Work the last yarn over of the final stitch of the old color with the new color. This creates a seamless transition. Carry the unused yarn up the side or cut and weave in ends—carrying is easier and creates less bulk.
Seaming
Now we'll assemble the bag body. This step creates the slouchy hobo shape.
- Place two panels together with right sides facing out (the wrong sides will be inside the bag).
- Using MC and a 5.5mm hook, single crochet through both layers along the bottom and one side edge, leaving the top open. Repeat for the other two panels.
- You will now have a bag shape with two open sides.
Side Gussets (Optional but Recommended for Shape)
These small rectangles give the bag a flat bottom and structured sides, making it more practical and professional-looking.
- With MC, ch 8.
- Work sc in each ch across, then sc in each sc across until the gusset measures 6 inches. Fasten off.
- Sew or crochet one gusset to each side opening, matching the bottom corners. This will create a rectangular base.
Top Edging
A neat, sturdy edge is essential for a polished look and to prevent stretching.
- With right side facing, join MC with a slip stitch at the top edge of one side.
- Work 1 round of sc evenly around the entire top opening (about 80 sc).
- Then work 1 round of reverse sc (crab stitch) for a neat, sturdy edge. To work reverse sc, work sc in the opposite direction (left to right if you're right-handed). Fasten off.
Strap
A wide, comfortable strap is key for a hobo bag. This one is reinforced with a decorative border.
- With MC and 5.5mm hook, ch 150 (or desired length).
- Row 1: Sc in 2nd ch from hook and in each ch across. Turn.
- Row 2: Ch 1, sc in each sc across. Fasten off.
- With Color A, using 4.5mm hook, join yarn at one end of the strap and work a round of sc evenly around the entire strap edge (both long sides and ends) to reinforce and add a decorative border. Fasten off and weave in ends.
Attach Strap
Proper strap attachment ensures your bag hangs correctly and carries weight securely.
- Fold the strap in half to find the center.
- Attach the center of the strap to the center of the top edge of one side of the bag using a slip stitch and a few secure stitches.
- Repeat for the other side, ensuring the strap is not twisted. Weave in all ends securely.
Finishing
The final touches make all the difference in creating a professional, heirloom-quality piece.
- Block the bag gently to shape. This helps even out the stitches and set the color changes.
- If desired, add a fabric lining or a magnetic snap closure for extra security. A lining is especially nice for a bag with open post stitches, as it prevents small items from slipping through.
Congratulations! You've completed your Enchanted Bramble Celtic Weave Hobo Bag. This beautiful, textured accessory is perfect for everyday use or as a thoughtful handmade gift. The rich forest colors and dimensional weave make it a true statement piece. Enjoy your new favorite bag, and happy crocheting!