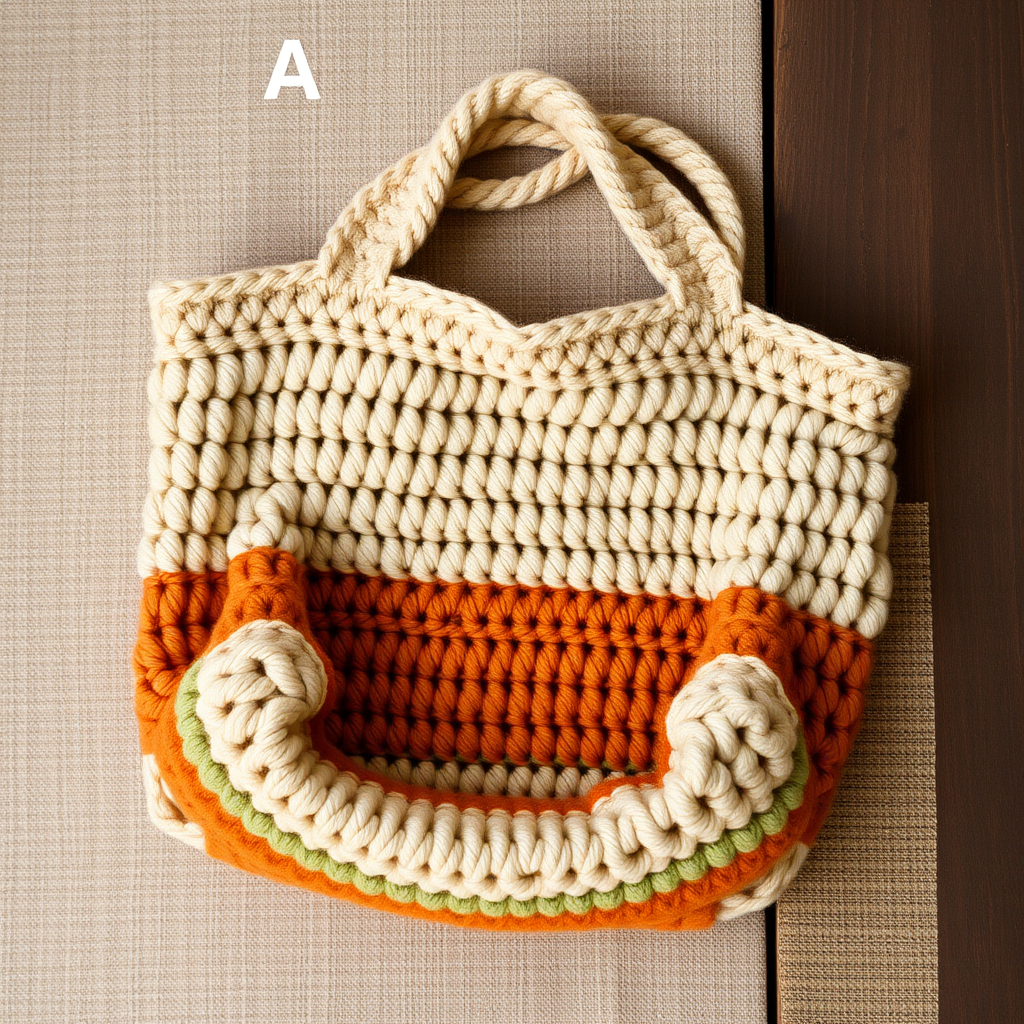
Enchanted Meadow Mosaic Crochet Tote Bag Free Pattern

Carry a Sun-Drenched Meadow: The Enchanted Meadow Mosaic Crochet Tote
Imagine a bag that captures the golden warmth of a late summer meadow, the earthy scent of dried grasses, and the intricate beauty of a hand-woven tapestry. That is the magic of the Enchanted Meadow Mosaic Crochet Tote. This isn't just a bag; it's a statement piece that blends bohemian charm with modern craftsmanship. Using the stunning mosaic crochet technique, you'll create a rich, geometric pattern in a palette of cream, sage, terracotta, mustard, and rust. The final step—felting—transforms your work into a dense, sturdy, and beautifully textured fabric that's perfect for farmers' markets, beach days, or everyday errands. This pattern is designed to be accessible, guiding you through every step to create a heirloom-quality accessory you'll be proud to carry.
Materials Needed: Gathering Your Tapestry of Yarn
Before you begin, gather your supplies. The quality of your yarn is crucial, as it will be felted to create the bag's signature dense texture. Here’s what you'll need:
- Yarn: Worsted weight 100% wool yarn in 5 colors. The felting process requires 100% wool; other fibers will not felt properly.
- Color A (Cream): Approximately 200g (for the base, main body rows, and strap).
- Color B (Sage Green): Approximately 150g.
- Color C (Terracotta): Approximately 100g.
- Color D (Mustard Yellow): Approximately 100g.
- Color E (Deep Rust): Approximately 100g.
- Crochet Hooks:
- A 5.5mm (I-9) hook for the main body of the bag.
- A 4.5mm hook for the strap (this smaller hook creates a denser, stronger strap).
- Other Supplies: Yarn needle for weaving in ends, stitch markers, scissors, a pillowcase for felting, and mild detergent.
Gauge: Before felting, 14 stitches and 16 rows = 4 inches in single crochet (sc) with the 5.5mm hook. Note: Your gauge will change significantly after felting, which is expected and desired.
Step-by-Step Instructions: Crafting Your Enchanted Meadow
This pattern is worked in the round from the bottom up. We'll start with a simple base, then move to the mosaic body, and finish with the strap and felting. Take your time, and enjoy the process!
Part 1: The Base (Worked in a Continuous Spiral with Color A)
We'll create a flat, oval base using simple increases. Work in a continuous spiral without joining at the end of each round. Use a stitch marker to keep track of your rounds.
- Round 1: Make a magic ring. Chain 1, then work 6 single crochet (sc) into the ring. Pull the tail to tighten the ring closed. (6 stitches)
- Round 2: Work 2 sc in each stitch around. (12 stitches)
- Round 3: *Work 2 sc in the next stitch, sc in the next stitch*; repeat from * to * around. (18 stitches)
- Round 4: *Work 2 sc in the next stitch, sc in the next 2 stitches*; repeat from * to * around. (24 stitches)
- Round 5: *Work 2 sc in the next stitch, sc in the next 3 stitches*; repeat from * to * around. (30 stitches)
- Rounds 6-10: Continue increasing in this manner, adding one more sc between increases each round. For example, Round 6 would be *2 sc in next st, sc in next 4 sts*, Round 7 would be *2 sc in next st, sc in next 5 sts*, and so on. After Round 10, you will have 60 stitches.
- Round 11: Work 1 sc in each stitch around without increasing. Slip stitch (sl st) to join the round, then turn your work. This creates a clean edge for the body to begin.
Part 2: The Body (Mosaic Pattern in Joined, Turned Rounds)
Now for the fun part! The mosaic pattern is created using overlay single crochet and by turning your work after each round. This creates the beautiful, textured geometric design. The pattern is based on a 10-round repeat.
Understanding the Mosaic Technique: In the "pattern" rounds (like Round 3), you will work a sc in a stitch and then chain 1, skipping the next stitch. In the following "fill-in" round (like Round 4), you will work a sc into the chain-1 space from the previous round. This creates the overlay effect.
- Round 1 (Color A): Ch 1, sc in each stitch around, sl st to join, turn.
- Round 2 (Color B): Ch 1, sc in each stitch around, sl st to join, turn.
- Round 3 (Color A): Ch 1, *sc in the next stitch, ch 1, skip the next stitch*; repeat from * to * around, sl st to join, turn.
- Round 4 (Color C): Ch 1, *sc in the next ch-1 space, sc in the next stitch*; repeat from * to * around, sl st to join, turn.
- Round 5 (Color A): Ch 1, sc in each stitch around, sl st to join, turn.
- Round 6 (Color D): Ch 1, sc in each stitch around, sl st to join, turn.
- Round 7 (Color A): Ch 1, *sc in the next 2 stitches, ch 1, skip the next stitch*; repeat from * to * around, sl st to join, turn.
- Round 8 (Color E): Ch 1, *sc in the next stitch, sc in the next ch-1 space, sc in the next stitch*; repeat from * to * around, sl st to join, turn.
- Round 9 (Color A): Ch 1, sc in each stitch around, sl st to join, turn.
- Round 10 (Color B): Ch 1, sc in each stitch around, sl st to join, turn.
- Rounds 11-30: This is where the magic happens. You will repeat Rounds 3-10, but you will shift the pattern by 1 stitch each time you start a new 10-round repeat. To do this, simply skip the first stitch of the round and begin your pattern from the second stitch. At the end of the round, you will work the final pattern element into that skipped first stitch. This diagonal shift creates the stunning, interlocking diamond and zigzag mosaic effect. Continue this shifting process for each 10-round repeat until your bag measures approximately 12 inches tall from the base.
- Final Round (Color A): Ch 1, sc in each stitch around, sl st to join. Do not turn. Fasten off and weave in the end.
Part 3: The Strap (Worked Flat with Color A and 4.5mm Hook)
A sturdy, felted strap is essential for a tote bag. Using the smaller hook will make it extra strong.
- Chain 10. Work 1 sc in the 2nd chain from the hook and in each chain across. (9 stitches)
- Chain 1, turn. Work 1 sc in each stitch across. Repeat this row until the strap measures 30 inches long. Fasten off and weave in the ends.
Part 4: Assembly and Felting
This is where your bag truly comes to life!
- Weave in all ends securely with your yarn needle to ensure they don't come loose during felting.
- Shape the base: Fold the bag flat so the base forms a rectangle. Sew the bottom corners together to create a flat, defined bottom. This step is optional but helps the bag stand up nicely.
- Attach the strap: Center the strap on the inside of the bag at the top edge, on both the front and back sides. Sew it on securely with your yarn needle and a length of Color A yarn.
- Prepare for felting: Place the entire bag and strap inside a pillowcase and tie it closed securely. This protects your washing machine from wool fibers.
- The felting process: Put the pillowcase in the washing machine. Add a small amount of mild detergent. Set the machine to a hot water, low agitation, and short cycle.
- Check frequently: Stop the machine every 5 minutes to check the progress. The bag is felted when the stitches are no longer clearly visible and the fabric feels dense and firm. This typically takes 10-20 minutes, depending on your machine and wool.
- Rinse and dry: Once felted, remove the bag from the pillowcase. Rinse it in cold water and gently squeeze out excess water. Do not wring.
- Shape and dry: While the bag is still damp, shape it by pulling it into your desired form. To help it hold its shape, stuff the bag with towels or plastic bags and allow it to dry completely. This may take 24-48 hours.
And there you have it—your very own Enchanted Meadow Mosaic Crochet Tote. A beautiful, functional piece of art that's as unique as you are. Happy crocheting!