Whimsical Woodland Gnome Worry Worm Free Pattern – A Knitted Forest Companion
Whimsical Woodland Gnome Worry Worm – A Free Knitting Pattern for a Cozy Forest Companion
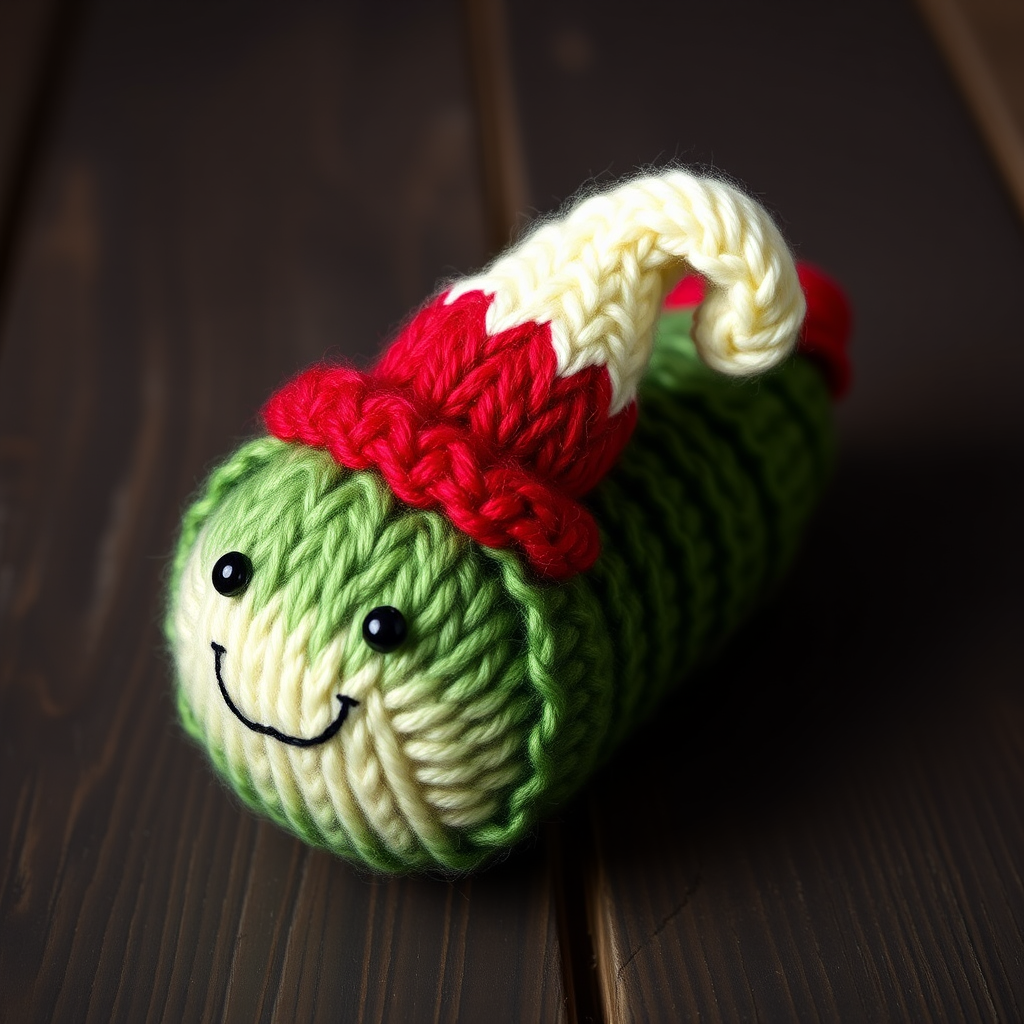
Bring a touch of forest magic to your holiday season with this charming knitted Gnome Worry Worm. This quick and delightful project is perfect for crafters of all levels, creating a soft, textured companion that’s ideal for festive decor, gift-giving, or simply adding a bit of whimsy to your shelf. With its plush green body and a cone-shaped hat that transitions from cream to vibrant red, this little creature is sure to become a treasured handmade keepsake.
Whether you’re looking for a fun weekend project or a heartfelt handmade gift, this pattern is designed to be approachable and enjoyable. The finished worry worm stands about 4 inches tall, making it perfect for tucking into stockings, adorning a mantel, or gifting to someone who needs a little forest friend.
Materials Needed
Before you begin, gather the following materials to ensure a smooth knitting experience:
- Yarn: Worsted weight yarn in three colors:
- Forest Green (MC) – for the body
- Cream (CC1) – for the base of the hat
- Red (CC2) – for the tip of the hat
- Small amount of black yarn – for embroidering the face
- Needles: US 6 (4.0 mm) knitting needles (for working in the round and flat)
- Notions: Tapestry needle for weaving in ends and sewing seams
- Stuffing: Polyester fiberfill for a plush, huggable body
Gauge: 20 stitches and 28 rows = 4 inches in stockinette stitch. Gauge is important for achieving the correct size, but this project is forgiving—slight variations won’t ruin the final result.
Abbreviations
- CO: Cast on
- K: Knit
- P: Purl
- K2tog: Knit two stitches together (decrease)
- Kfb: Knit front and back (increase)
- St(s): Stitch(es)
- Rnd: Round
Step-by-Step Instructions
Body (Worked in the Round)
The body is worked seamlessly in the round, starting from the bottom and shaping upward. Follow these steps carefully:
- With forest green yarn (MC), cast on 6 stitches. Join in the round, being careful not to twist the stitches. Place a stitch marker to mark the beginning of the round.
- Rnd 1: Knit all stitches (6 sts).
- Rnd 2: Kfb into each stitch around (12 sts). This doubles your stitch count.
- Rnd 3: Knit all stitches (12 sts).
- Rnd 4: *K1, kfb* repeat from * to * around (18 sts).
- Rnd 5: Knit all stitches (18 sts).
- Rnd 6: *K2, kfb* repeat from * to * around (24 sts).
- Rnds 7-12: Knit all stitches (24 sts). This creates the straight sides of the body.
- Rnd 13: *K2, k2tog* repeat from * to * around (18 sts). This begins the shaping for the top of the body.
- Rnd 14: Knit all stitches (18 sts).
- Rnd 15: *K1, k2tog* repeat from * to * around (12 sts).
- Now is the time to stuff the body firmly with polyester fiberfill. Use a pencil or the blunt end of a tapestry needle to push the stuffing into the corners, ensuring a plump, rounded shape.
- Rnd 16: K2tog around (6 sts).
- Cut the yarn, leaving a 6-inch tail. Thread the tail onto a tapestry needle, pass it through the remaining 6 stitches, and pull tight to close the opening. Weave in the end securely.
Gnome Hat (Worked Flat)
The hat is knitted flat in rows, then seamed to form a cone. The color transition from cream to red adds a festive touch.
- With cream yarn (CC1), cast on 24 stitches.
- Row 1 (Right Side): Knit all stitches (24 sts).
- Row 2: Purl all stitches (24 sts).
- Row 3: K2tog, knit to the last 2 stitches, K2tog (22 sts). This decreases one stitch at each edge.
- Row 4: Purl all stitches (22 sts).
- Row 5: K2tog, knit to the last 2 stitches, K2tog (20 sts).
- Row 6: Purl all stitches (20 sts).
- Switch to red yarn (CC2).
- Row 7: K2tog, knit to the last 2 stitches, K2tog (18 sts).
- Row 8: Purl all stitches (18 sts).
- Row 9: K2tog, knit to the last 2 stitches, K2tog (16 sts).
- Row 10: Purl all stitches (16 sts).
- Row 11: K2tog, knit to the last 2 stitches, K2tog (14 sts).
- Row 12: Purl all stitches (14 sts).
- Row 13: K2tog, knit to the last 2 stitches, K2tog (12 sts).
- Row 14: Purl all stitches (12 sts).
- Row 15: K2tog, knit to the last 2 stitches, K2tog (10 sts).
- Row 16: Purl all stitches (10 sts).
- Row 17: K2tog, knit to the last 2 stitches, K2tog (8 sts).
- Row 18: Purl all stitches (8 sts).
- Row 19: K2tog, knit to the last 2 stitches, K2tog (6 sts).
- Row 20: Purl all stitches (6 sts).
- Cut the yarn, leaving a long tail (about 12 inches). Thread the tail through the remaining 6 stitches and pull tight to gather the tip of the hat.
- Use the same tail to sew the side seam of the hat, creating a cone shape. Start from the gathered tip and sew down to the cast-on edge. Weave in the end.
- Attach the hat to the top of the body by sewing it securely around the base of the hat, positioning it slightly off-center for a whimsical look.
Face
Bring your worry worm to life with a simple, endearing face:
- Using black yarn and a tapestry needle, embroider two small French knots for the eyes. Position them about 2 inches below the hat, spaced about 1 inch apart.
- If you’d like a smile, use a few backstitches to create a small, curved line below the eyes. Keep it subtle for a sweet expression.
Finishing Touches
- Weave in all loose ends with a tapestry needle, ensuring they are securely hidden inside the work.
- Optional: Add a small loop of yarn at the top of the hat for hanging. Simply thread a 6-inch piece of yarn through the tip, tie it in a knot, and trim the ends.
- Give your worry worm a gentle squeeze to fluff it into shape, and it’s ready to bring forest magic to your home!
This Whimsical Woodland Gnome Worry Worm is a delightful project that combines quick knitting with charming results. Perfect for beginners and experienced knitters alike, it’s a wonderful way to add a handmade touch to your holiday celebrations. Enjoy crafting your new forest companion!