Cozy Cabin Stocking Free Pattern
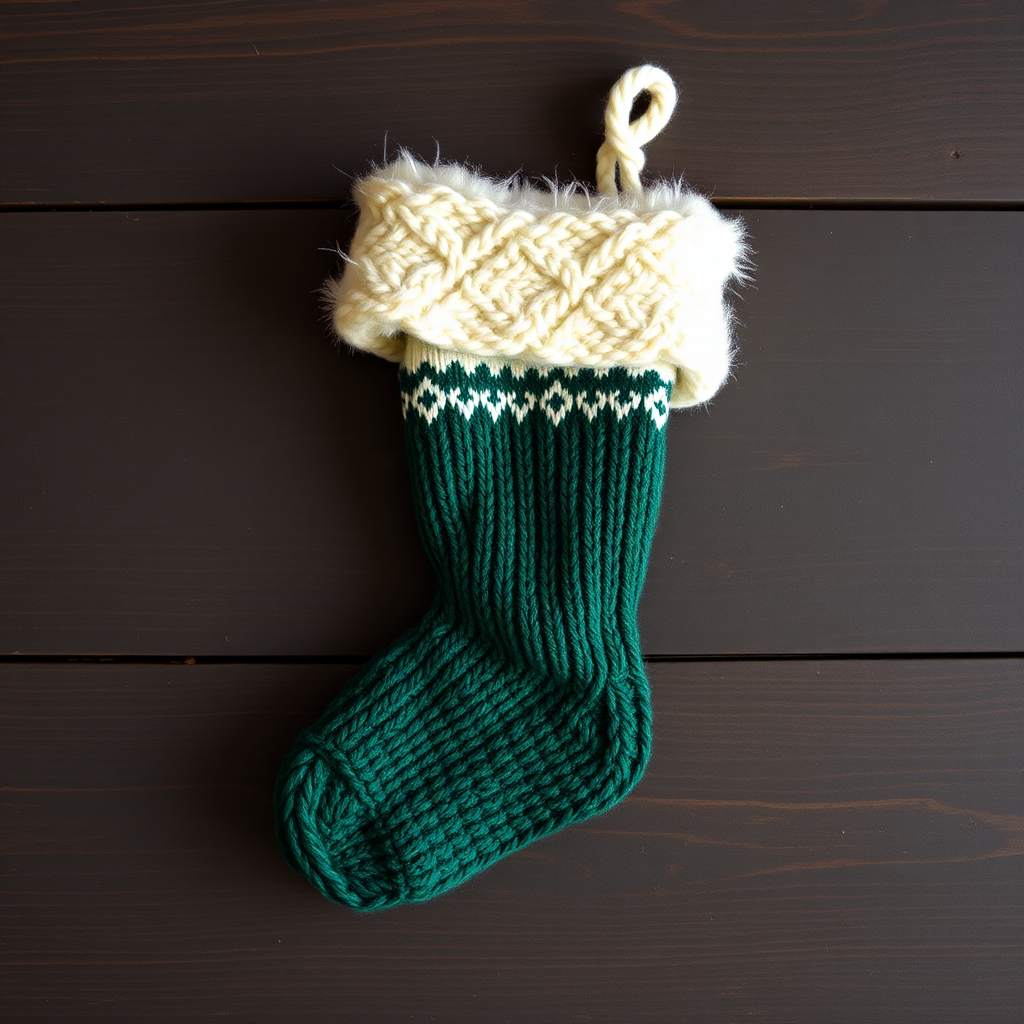
Cozy Cabin Stocking Free Pattern: A Rustic Holiday Knit
There's nothing quite like the warmth of a hand-knit stocking hanging by the fireplace. This Cozy Cabin Stocking pattern brings rustic, cabin-inspired charm to your holiday decor with its chunky worsted weight yarn, classic Fair Isle-inspired band, and a plush faux fur cuff that adds a touch of luxury. Whether you're a seasoned knitter or a beginner looking for a rewarding project, this stocking works up quickly and makes a stunning statement piece. Let's get started on creating a holiday heirloom you'll be proud to display year after year.
Materials Needed
Before you begin, gather the following supplies. This project is designed to be approachable, so you won't need anything fancy—just the basics to create a beautiful, durable stocking.
- Yarn: Worsted weight yarn in two colors:
- Main Color (MC): Forest Green (approx. 200-250 yards)
- Contrast Color (CC): Cream (approx. 50-75 yards)
- Faux Fur Yarn: 1 skein of bulky faux fur yarn (for the cuff)
- Needles: US 8 (5 mm) knitting needles (straight or circular, as preferred)
- Notions: Tapestry needle (for seaming and weaving in ends), stitch markers (optional), crochet hook (for the hanging loop)
Gauge
18 stitches and 24 rows = 4 inches in stockinette stitch (knit on RS, purl on WS). Always take time to check your gauge to ensure your stocking comes out the correct size. If your gauge is off, adjust your needle size accordingly.
Step-by-Step Instructions
This pattern is worked flat (back and forth) from the top down. Don't worry if you're new to short rows—the instructions below break down the heel shaping into simple, manageable steps. Follow along carefully, and you'll have a perfectly shaped stocking in no time.
Leg (Worked Back and Forth)
With your Main Color (MC) yarn, cast on 36 stitches.
- Row 1 (RS): Knit all stitches.
- Row 2 (WS): Purl all stitches.
Repeat these two rows until the piece measures 6 inches from the cast-on edge, ending with a wrong-side (WS) row. This forms the main body of the stocking leg.
Fair Isle Band
Now we'll add the decorative cream band. Switch to your Contrast Color (CC) yarn.
- Rows 1-4: Work in stockinette stitch (knit on RS, purl on WS) for 4 rows.
Next, we'll create the geometric diamond pattern by alternating colors. Keep your yarns loose on the back to avoid puckering.
- Row 5 (RS): With MC, knit 2. *With CC, knit 2. With MC, knit 2.* Repeat from * to * across the row.
- Row 6 (WS): With MC, purl 2. *With CC, purl 2. With MC, purl 2.* Repeat from * to * across the row.
- Rows 7-8: Repeat Rows 5 and 6 once more.
Finish the band by working 4 rows in stockinette stitch with CC. This completes the Fair Isle-inspired section.
Heel Shaping
Switch back to your Main Color (MC). We'll now shape the heel using short rows, working on only half of the stitches (18 stitches). This creates a rounded, comfortable heel.
Heel Flap (Decreasing):
- Row 1 (RS): Knit 18, turn your work.
- Row 2 (WS): Slip 1 stitch purlwise, purl 17, turn.
- Row 3: Slip 1, knit 16, turn.
- Row 4: Slip 1, purl 15, turn.
Continue in this manner, working one fewer stitch each row, until you have 6 stitches left in the center of the heel, ending with a WS row. You'll notice the heel cup forming.
Heel Flap (Increasing):
Now we'll work back out, picking up stitches along the side of the heel flap to return to the full stitch count.
- Row 1 (RS): Knit 6, pick up and knit 1 stitch from the side of the heel flap, turn.
- Row 2 (WS): Slip 1, purl 7, pick up and purl 1 stitch from the side, turn.
- Row 3: Slip 1, knit 8, pick up and knit 1, turn.
Continue this pattern, adding one stitch each row, until you have 18 stitches again, ending with a WS row. Your heel is now complete!
Foot
With MC, work in stockinette stitch (knit on RS, purl on WS) across all 36 stitches for 5 inches, or until the foot measures 2 inches less than your desired total length. This gives you room for the toe shaping.
Toe Shaping
We'll now decrease to close the toe.
- Row 1 (RS): K1, k2tog (knit two together), knit to the last 3 stitches, ssk (slip, slip, knit), k1. (You now have 34 stitches.)
- Row 2 (WS): Purl all stitches.
Repeat these two rows until 10 stitches remain. Cut your yarn, leaving a long tail (about 12 inches). Thread the tail through a tapestry needle, slide it through the remaining stitches, pull tight to close the toe, and secure with a knot.
Finishing
Fold the stocking in half with the right sides together. Using your tapestry needle and the yarn tail, sew the back seam from the toe up to the top of the leg. Weave in all loose ends securely.
Faux Fur Cuff
Turn the stocking right side out. With your faux fur yarn, pick up and knit 36 stitches around the top edge of the stocking. Work in stockinette stitch for 3 inches. Bind off loosely (use a larger needle if needed to keep it stretchy). Fold the cuff down over the stocking for that cozy, fluffy look.
Hanging Loop
Using your MC yarn and a crochet hook, make a chain of 20 stitches. Slip stitch into a loop to form a circle, and securely attach it to the top corner of the stocking (on the inside or outside, as you prefer). Weave in the ends.
And there you have it—a beautiful, rustic Cozy Cabin Stocking ready to hang! This pattern is perfect for using up worsted weight scraps and makes a thoughtful handmade gift. The combination of the chunky knit, the classic colorwork, and the plush fur cuff creates a timeless piece that will look wonderful on any mantel. Happy knitting, and enjoy the warmth of your creation this holiday season!


