Whimsical Meadow Blossom Free Pattern
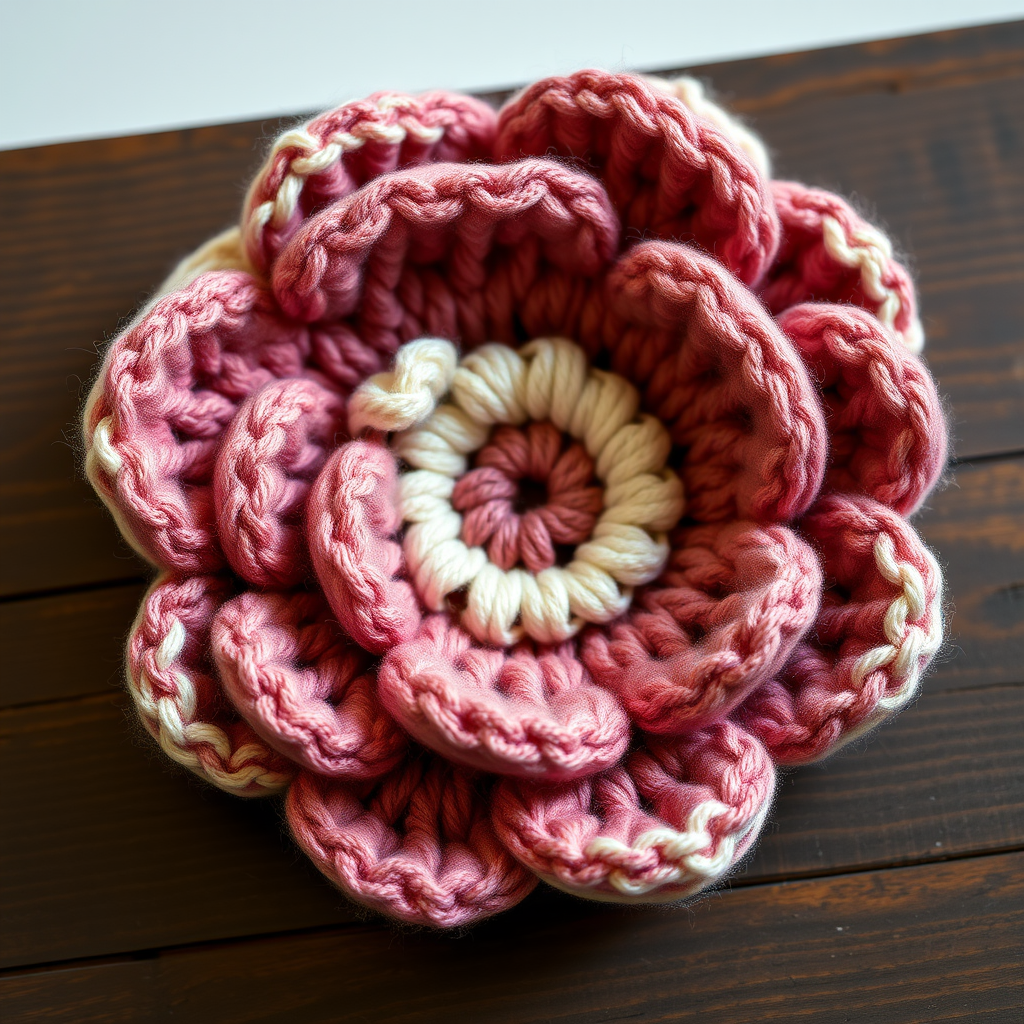
Whimsical Meadow Blossom: A Free Crochet Flower Pattern for Rustic Charm
There’s something truly magical about adding a handmade touch to your everyday accessories. Whether you’re looking to embellish a favorite hat, breathe new life into a plain scarf, or add a rustic flourish to a tote bag, this Whimsical Meadow Blossom pattern is your perfect companion. This quick and easy crochet project creates a charming, dimensional flower that looks like it was plucked straight from a sun-drenched meadow. With its two-tone petals and soft, textured finish, this blossom is an ideal weekend project for beginners and seasoned crocheters alike. Let’s dive into this delightful free pattern and create a little piece of nature to carry with you.
Materials Needed
Before we begin our crafting journey, let's gather all the necessary supplies. This project is wonderfully portable and requires minimal materials, making it perfect for on-the-go crafting.
- Yarn: Worsted weight yarn in two colors:
- Color A (Main): Dusty rose or any shade you prefer for the inner petals
- Color B (Accent): Cream or a contrasting color for the outer petals
- Crochet Hook: 5.5 mm (I/9) crochet hook
- Yarn Needle: For weaving in ends and finishing
- Scissors: For cutting yarn
Gauge: Not critical for this project. The finished flower will measure approximately 3 inches in diameter, but slight variations are perfectly fine and add to the organic charm.
Step-by-Step Instructions
Follow these detailed instructions carefully, and you'll have a beautiful Whimsical Meadow Blossom in no time. Remember to work at a relaxed pace and enjoy the process!
Round 1: The Magic Ring Foundation
With Color A, begin by making a magic ring. If you're unfamiliar with this technique, here's a quick refresher: wrap the yarn around your finger twice, insert your hook into the loop, yarn over, and pull through. Chain 1 to secure. Now, work 10 single crochet (sc) into the center of the magic ring. Once complete, gently pull the tail to tighten the ring closed, creating a neat circle. Join with a slip stitch to the first single crochet to close the round. You should now have 10 single crochet stitches.
Round 2: Increasing the Base
Chain 1 (this counts as your first stitch for this round). Now, work 2 single crochet in each stitch around the entire circle. This doubling effect will expand your circle nicely. When you reach the end of the round, join with a slip stitch to the first single crochet of this round. You will now have 20 single crochet stitches.
Round 3: Further Expansion
Chain 1. For this round, we'll create a pattern of increases. *Work 1 single crochet in the next stitch, then 2 single crochet in the following stitch.* Repeat this sequence from * to * all the way around the circle. This gradual increase keeps your work flat and even. Join with a slip stitch to the first single crochet. You should now have 30 single crochet stitches total.
Round 4: Creating the Inner Petal Loops
This is where the magic begins! We're going to create the foundation loops for our inner petals. *Chain 4. Then, skip the next 2 stitches and work 1 slip stitch into the following stitch.* Repeat this sequence from * to * around the entire round. You will create a total of 10 chain loops. To finish, join with a slip stitch to the first chain of the round to secure the loop formation.
Round 5: Forming the Inner Petals
Now we'll transform those simple loops into beautiful, textured petals. For each chain loop from Round 4, you will work the following sequence of stitches into the space of the loop:
- 1 slip stitch
- 1 single crochet
- 1 half double crochet
- 1 double crochet
- 1 half double crochet
- 1 single crochet
- 1 slip stitch
This creates a lovely, rounded petal shape. After completing each petal, work a slip stitch into the stitch at the base of the loop to secure it firmly. Repeat this for all 10 loops. You will now have 10 beautiful inner petals forming a full circle.
Round 6: Preparing for Outer Petals
Time to introduce Color B! Join Color B with a slip stitch in any stitch located between two inner petals. *Chain 5. Then, skip to the next space between petals and work a slip stitch.* Repeat this sequence from * to * around the entire flower. You will create 10 larger chain loops that sit behind the inner petals, ready for the next round.
Round 7: Crafting the Outer Petals
For the final flourish, we'll create larger, more dramatic outer petals. In each chain loop from Round 6, work the following sequence:
- 1 slip stitch
- 1 single crochet
- 1 half double crochet
- 2 double crochet
- 1 half double crochet
- 1 single crochet
- 1 slip stitch
This creates a fuller, wider petal that beautifully frames the inner layer. After completing each outer petal, work a slip stitch into the stitch at the base of the loop to secure it. Repeat for all 10 loops. You'll now have a stunning two-layered flower.
Finishing Touches
Once all petals are complete, fasten off your yarn, leaving a tail long enough to weave in. Using your yarn needle, carefully weave in all loose ends on the back of the flower to ensure a clean finish. Finally, gently shape the flower by pulling the petals outward and adjusting them to your liking. This helps give the blossom its natural, organic, and dimensional look.
Congratulations! Your Whimsical Meadow Blossom is complete. Admire your handiwork—a beautiful, textured flower with a raised center and soft, cupped petals. Attach it to a hair clip, sew it onto a bag, or use it as a charming brooch. The possibilities are endless, and this pattern is so quick that you'll want to make a whole bouquet! Happy crocheting!


