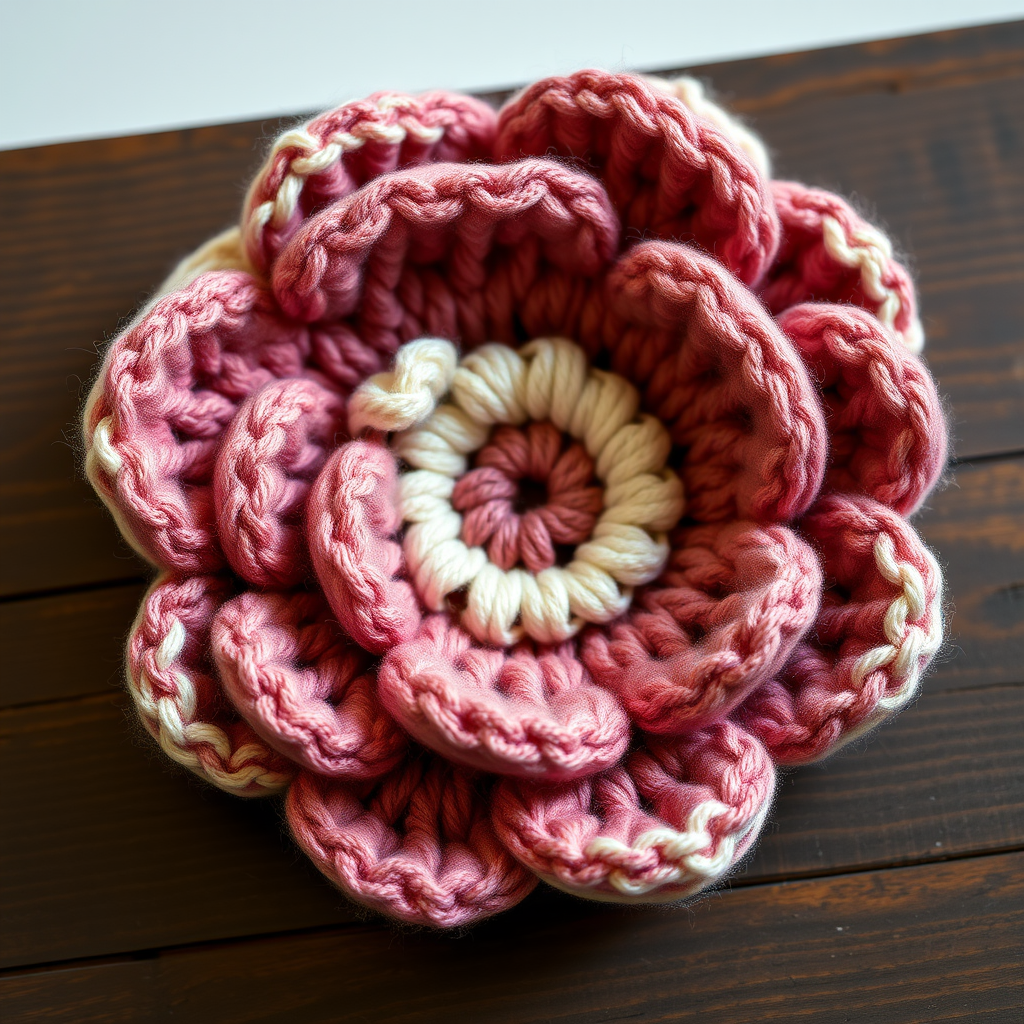
Radiant Crochet Rose Bouquet Free Pattern

Radiant Crochet Rose Bouquet Free Pattern
Imagine a garden in full bloom that never wilts—that's the magic of this Radiant Crochet Rose Bouquet. This pattern guides you through crafting lifelike, layered petals and delicate leaves that come together into a stunning, everlasting centerpiece. Whether you're looking for a heartfelt handmade gift or a beautiful piece of yarn art for your own home, this project is both rewarding and beginner-friendly. The tight, firm fabric created by the single crochet stitches ensures your roses hold their shape beautifully, making them look almost real. Let's pick up our hooks and create a bouquet that captures beauty forever.
Materials Needed
Before you begin, gather the following supplies. The gauge is not critical for this project, but you should aim for a tight, firm fabric to help the petals hold their shape.
- Yarn: Worsted weight cotton yarn in shades of deep crimson, blush pink, cream, and forest green. (A small amount of each color is needed—approximately 50g of each petal color and 100g of green for stems and leaves.)
- Crochet Hook: 3.5mm (E) crochet hook
- Other: Yarn needle for sewing pieces together, scissors, stitch markers (optional), and a small amount of fiberfill (optional, for stuffing the center bud).
Step-by-Step Instructions
Rose Petals (Make 5 Large, 5 Medium, 5 Small)
You will create three different sizes of petals to build the rose from the inside out. Each petal is worked in continuous rounds (spiral) without joining, unless otherwise noted. Use a stitch marker to keep track of your rounds.
Small Petal (Make 5)
- Round 1: Make a magic ring, work 6 single crochet (sc) into the ring. (6 stitches)
- Round 2: Work 2 sc in each stitch around (increase in every stitch). (12 stitches)
- Round 3: *Sc in the next stitch, 2 sc in the next stitch (increase)*; repeat from * to * around. (18 stitches)
- Round 4: *Sc in the next 2 stitches, 2 sc in the next stitch*; repeat from * to * around. (24 stitches)
- Finish: Fasten off, leaving a long tail (about 12 inches) for sewing the petal to the rose.
Medium Petal (Make 5)
- Rounds 1-4: Follow the exact same instructions as the Small Petal (Rounds 1-4). You will have 24 stitches.
- Round 5: *Sc in the next 3 stitches, 2 sc in the next stitch*; repeat from * to * around. (30 stitches)
- Finish: Fasten off, leaving a long tail for sewing.
Large Petal (Make 5)
- Rounds 1-5: Follow the exact same instructions as the Medium Petal (Rounds 1-5). You will have 30 stitches.
- Round 6: *Sc in the next 4 stitches, 2 sc in the next stitch*; repeat from * to * around. (36 stitches)
- Finish: Fasten off, leaving a long tail for sewing.
Rose Assembly
Now we will transform those flat circles into a beautiful, dimensional rose. This process is intuitive—you are essentially layering the petals from smallest to largest.
- Create the Center Bud: Take one small petal and roll it tightly into a cylinder shape, with the right side (the side facing you as you crocheted) facing out. This forms the tight center of the rose. Using the long tail, sew a few stitches through the bottom layers to secure the roll in place. Do not cut the yarn yet.
- Add Remaining Small Petals: Take another small petal and wrap it around the center bud, overlapping the edges slightly. Sew it securely to the base of the bud using the long tail. Repeat this with the remaining three small petals, arranging them evenly around the center to create the first layer of the bloom.
- Add Medium Petals: Continue the same process with the medium petals. Place them around the outside of the small petals, slightly offset so the seams don't line up. As you add each petal, gently cup it outward to begin creating the open bloom shape. Sew each one securely at the base.
- Add Large Petals: Finally, attach the large petals in the same manner. These will form the outermost layer of the rose. Arrange them so they open outward dramatically, creating a full, lush appearance. Sew each petal firmly to the base.
- Weave in Ends: Once all petals are attached and you are happy with the shape, weave in all remaining yarn ends securely on the underside of the rose. Your rose is complete!
Leaves (Make 6)
These leaves have a subtle vein pattern created by using different stitches. They are worked in rows.
- Foundation: Using forest green yarn, chain (ch) 10.
- Row 1: Single crochet (sc) in the 2nd chain from the hook. Half double crochet (hdc) in the next chain. Double crochet (dc) in the next 4 chains. Hdc in the next chain. Sc in the next chain. Work 3 sc in the last chain (this creates the point of the leaf).
- Other Side: Now working on the opposite side of the foundation chain: Sc in the next chain, hdc in the next, dc in the next 4, hdc in the next, sc in the last chain. Join with a slip stitch (sl st) to the first sc of the round. (20 stitches total)
- Finish: Fasten off, leaving a long tail for sewing to the stem.
Stems (Make 3)
These simple crocheted tubes will form the sturdy base of your bouquet.
- Foundation: Using forest green yarn, chain (ch) 30.
- Row 1: Sc in the 2nd chain from the hook and in each chain across. (29 stitches)
- Finish: Fasten off, leaving a long tail for assembly. The stem will naturally curl slightly, which is fine.
Bouquet Assembly
Now we bring all the pieces together to create the final, stunning bouquet.
- Attach Leaves to Stems: Take one stem and two leaves. Sew one leaf near the top of the stem and the second leaf slightly lower, on the opposite side. Repeat this for the other two stems. Weave in any loose ends.
- Attach Roses to Stems: Take one completed rose and sew it securely to the top of a stem. Position it so the base of the rose sits flat on the top of the stem. Repeat for the other two roses and stems.
- Combine the Stems: Gather the three stems together in your hand, arranging them so they fan out slightly at the top. Using a long piece of green yarn, wrap tightly around the stems from the bottom up to about halfway, securing them together into a unified bouquet. Tie off securely and weave in the end.
- Final Touches: Optionally, you can create a simple crochet bow or wrap the stems with a ribbon for an extra decorative touch. Fluff and arrange the petals and leaves as desired.
Your Radiant Crochet Rose Bouquet is now complete! Display it in a vase, give it as a gift, or use it as a beautiful, permanent centerpiece. Enjoy your handmade yarn art!