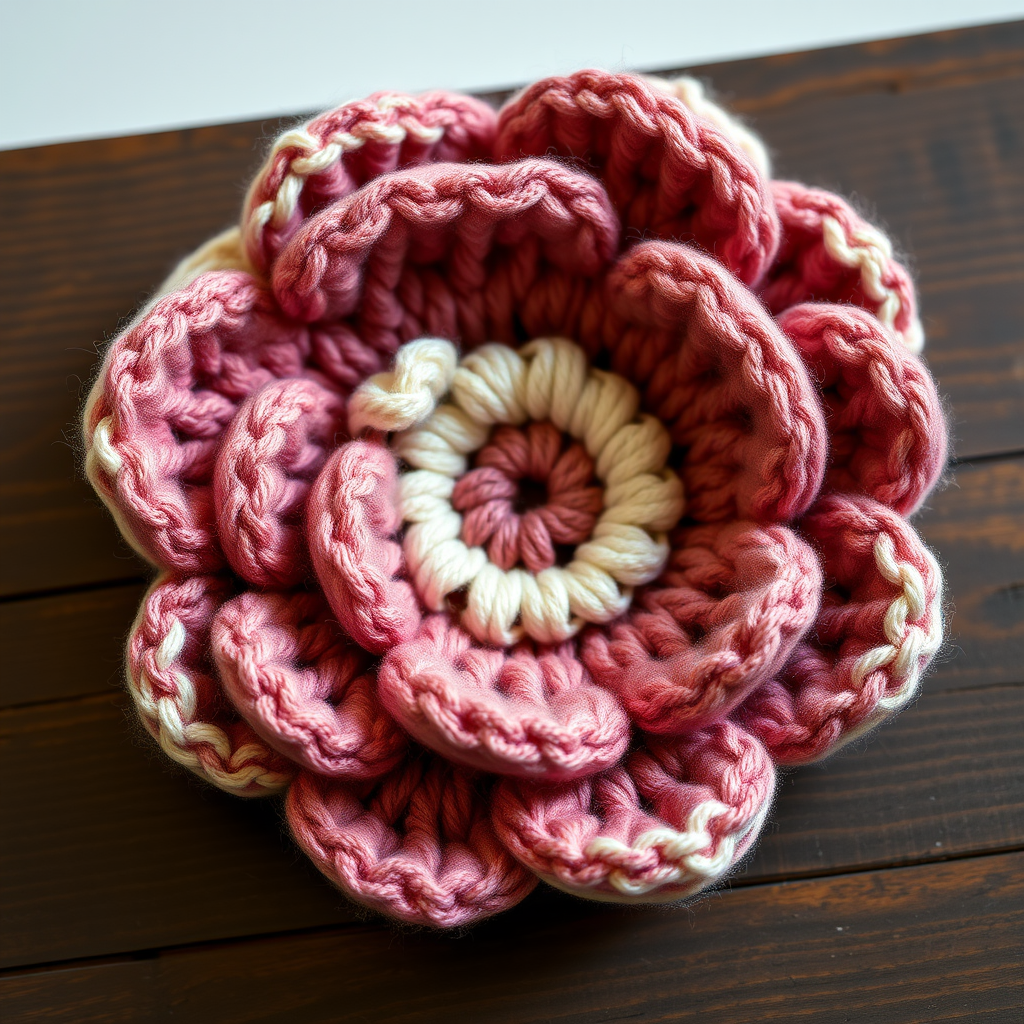
Everlasting Snowdrop Wreath Free Pattern – Crochet a Winter Bloom Circle

Everlasting Snowdrop Wreath Free Pattern – Crochet a Winter Bloom Circle
Bring the quiet beauty of a snow-covered garden indoors with this crocheted wreath of eternal winter blooms. Each delicate flower and textured leaf is worked in soft, chunky yarn to create a cozy, heirloom-worthy decoration that will grace your home for years to come. This pattern is perfect for beginners and experienced crocheters alike, offering a meditative project that results in a stunning piece of winter decor.
Whether you're looking to add a handmade touch to your front door, create a thoughtful gift, or simply enjoy a relaxing crochet session, this snowdrop wreath delivers on all fronts. The combination of ivory, dusty blue, and soft sage creates a palette that evokes a frosty morning garden—elegant, serene, and timeless.
Materials Needed
Before you begin, gather the following supplies to ensure a smooth and enjoyable crochet experience:
- Yarn: Worsted weight yarn in the following colors:
- Ivory (Color A) – for the main flowers and buds
- Soft Sage (Color B) – for the leaves
- Dusty Blue (Color C) – for accent flowers
- Gold (Color D) – for flower centers
- Hook: 4.0 mm (G) crochet hook
- Yarn needle for weaving in ends and sewing pieces together
- Wreath form: 12-inch foam or wire wreath form
- Hot glue gun with glue sticks for assembly
- Scissors
Gauge: First 3 rounds of flower motif = 2 inches across. Gauge is not critical for this project, but maintaining consistent tension will help your wreath look uniform and polished.
Step-by-Step Instructions
Flower Motif (Make 12 in Ivory, 6 in Dusty Blue)
These delicate six-petal flowers are the heart of your wreath. Each one is worked in continuous rounds, creating a beautiful layered effect.
Round 1: With Color A (ivory) or Color C (dusty blue), make a magic ring. Chain 3 (counts as first double crochet), then work 11 double crochet into the ring. Slip stitch to the top of the beginning chain-3 to close the round. You should have 12 double crochet stitches total.
Round 2: Chain 1, single crochet in the same stitch. *Chain 3, skip 1 stitch, single crochet in the next stitch; repeat from * around, ending with a chain 3 and slip stitch to the first single crochet. You will have 6 chain-3 loops.
Round 3: Slip stitch into the first chain-3 loop. Chain 1, then work (single crochet, half double crochet, 3 double crochet, half double crochet, single crochet) in each chain-3 loop around. Slip stitch to the first single crochet to close. This creates 6 beautiful petals.
Round 4: Chain 1, working behind the petals just created, single crochet in the skipped stitch from Round 2. *Chain 4, single crochet in the next skipped stitch; repeat from * around, slip stitch to the first single crochet. You will have 6 chain-4 loops behind the first layer of petals.
Round 5: Slip stitch into the first chain-4 loop. Chain 1, then work (single crochet, half double crochet, 5 double crochet, half double crochet, single crochet) in each chain-4 loop around. Slip stitch to the first single crochet. Fasten off and weave in all ends securely.
Pro tip: The two layers of petals give the snowdrop its signature full, dimensional look. Take your time with the magic ring to ensure a tight, neat center.
Leaf Motif (Make 18 in Soft Sage)
These simple yet elegant leaves add texture and depth to your wreath, mimicking the foliage of a winter garden.
Row 1: With Color B (soft sage), chain 10. Single crochet in the 2nd chain from hook, half double crochet in the next 2 chains, double crochet in the next 3 chains, half double crochet in the next 2 chains, and single crochet in the last chain. You will have 9 stitches.
Row 2: Chain 1, turn your work. Single crochet in each stitch across. Fasten off, leaving a long tail (approximately 8-10 inches) for sewing or wrapping around the wreath form.
Pro tip: The leaf naturally curves slightly, which adds a lovely organic feel when arranged on the wreath. Don't try to flatten them—embrace the natural shape!
Small Bud (Make 6 in Ivory)
These tiny buds add charming detail and fill in gaps between the larger flowers and leaves.
Round 1: With Color A (ivory), make a magic ring. Chain 2 (counts as first half double crochet), work 5 half double crochet into the ring. Pull the ring tight, slip stitch to the top of the beginning chain-2. Fasten off, leaving a tail for attaching.
Pro tip: These buds are quick to make—you can whip up all six in under fifteen minutes while watching your favorite show.
Gold Centers (Make 18)
These bright golden puffs bring warmth to the flowers and tie the whole wreath together.
Round 1: With Color D (gold), make a magic ring. Chain 2, work 6 single crochet into the ring. Slip stitch to the first single crochet, fasten off. These will be glued into the center of each flower during assembly.
Assembly Instructions
Now comes the fun part—bringing all your beautiful pieces together to create your wreath!
Step 1: Arrange Your Pieces
Lay your wreath form flat on a table. Begin arranging the flowers, leaves, and buds on the form in a balanced, organic pattern. Place the larger flowers (ivory and dusty blue) at the bottom and slightly to the sides, with smaller elements toward the top. Overlap leaves slightly for a natural, full look. Step back and adjust until you're happy with the arrangement—this is your chance to get creative!
Step 2: Attach the Pieces
Using the long tails left on your leaves and buds, sew them securely to the wreath form. For the flowers, you can either use their tails (if you left them long) or use hot glue. Hot glue is quickest and most secure for this project. Apply a generous amount of glue to the back of each piece and press firmly onto the wreath form, holding for 10-15 seconds to ensure a strong bond.
Step 3: Add the Gold Centers
Once all flowers are attached, glue a gold center puff into the middle of each flower. Apply a small dot of hot glue to the back of the gold piece and press it into the flower's center. The gold centers will brighten the wreath and give it that special finishing touch.
Step 4: Create a Hanging Loop
Cut a 10-inch piece of yarn (any color works, but ivory or sage looks nice). Fold it in half and thread the ends through the top of the wreath form, then pull the loop through and tie a secure knot. This creates a sturdy hanging loop.
Step 5: Final Touches
Give your wreath a gentle once-over, making sure all pieces are securely attached. Fluff any petals or leaves that may have gotten flattened during assembly. Your Everlasting Snowdrop Wreath is now ready to hang!
Tips for Success
- Consistent tension: Keep your tension even throughout to ensure all flowers are the same size. If your flowers vary slightly, place the larger ones at the bottom of the wreath where they'll look intentional.
- Weave ends as you go: Weaving in ends after each motif will save you time during assembly and keep your work neat.
- Customize your palette: While the ivory, sage, and dusty blue evoke a winter garden, feel free to experiment with other color combinations—blush pink and cream for spring, or deep red and green for Christmas.
- Make it your own: Add extra buds or leaves if you have gaps, or create a fuller wreath by making additional flowers. The pattern is easily scalable.
This Everlasting Snowdrop Wreath is more than just a decoration—it's a labor of love that brings warmth and handmade charm to your home. The soft, textured yarn and delicate flower design will brighten any door or wall, and the satisfaction of creating something beautiful with your own hands is truly priceless.
Happy crocheting, and enjoy your beautiful winter bloom circle!