The Whispering Pine Needle Coin Purse: A Free Knitting Pattern for a Textured, Forest-Inspired Accessory
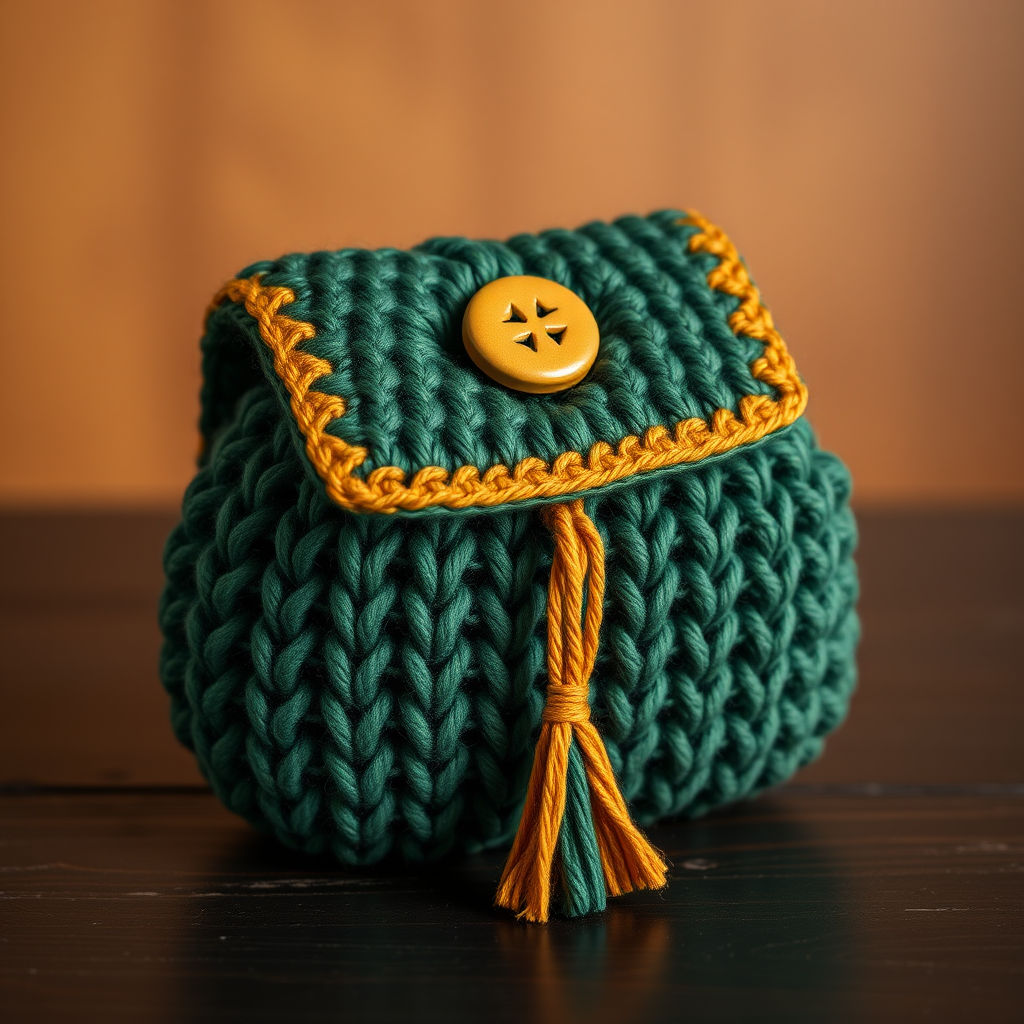
Introduction: Craft a Forest Treasure
Imagine the quiet rustle of pine needles underfoot, the earthy scent of the forest, and the warm glow of sunlight filtering through the trees. Now, capture that feeling in a small, handmade accessory. The Whispering Pine Needle Coin Purse is a free knitting pattern that transforms simple stitches into a textured, forest-inspired treasure. This charming little purse features a unique knitted surface that mimics overlapping pine needles, creating a tactile and visually stunning design. Perfect for holding coins, earbuds, or small trinkets, it’s both functional and a delightful conversation starter. Whether you’re a seasoned knitter or a confident beginner, this pattern will guide you through creating a piece that feels like a secret from the woods.
Materials Needed
Before you begin, gather these supplies. The pattern uses two colors of worsted weight yarn to create the pine needle effect and a contrasting button.
- Yarn: Worsted weight yarn in two colors:
- Forest Green (MC - Main Color): Approximately 50 yards
- Golden Brown (CC - Contrast Color): Approximately 20 yards
- Knitting Needles: US Size 6 (4.0 mm) knitting needles. You can use a pair of straight needles or a circular needle for the magic loop method.
- Crochet Hook: US Size C/2 (2.75 mm) crochet hook for the edging and button.
- Other: Yarn needle for weaving in ends, scissors, and a stitch marker (optional).
Gauge: 20 stitches and 28 rows = 4 inches in stockinette stitch (knit on right side, purl on wrong side) with the larger needles. Gauge is important for the final size, so take a moment to check it.
Step-by-Step Instructions
Follow these detailed steps to create your coin purse. The pattern is worked flat in rows, then seamed and finished with a crochet edge. Take your time, and enjoy the process!
Purse Body (Knit Flat, Then Seamed)
With MC (Forest Green) and the larger needles (US 6), cast on 20 stitches.
Stockinette Base (10 rows): This creates a smooth foundation for the texture.
- Row 1 (RS - Right Side): Knit all stitches.
- Row 2 (WS - Wrong Side): Purl all stitches.
- Row 3: Knit all stitches.
- Row 4: Purl all stitches.
- Row 5: Knit all stitches.
- Row 6: Purl all stitches.
- Row 7: Knit all stitches.
- Row 8: Purl all stitches.
- Row 9: Knit all stitches.
- Row 10: Purl all stitches.
Pine Needle Texture Section (Worked Over 10 Rows)
This is where the magic happens! The yarn over (yo) and knit two together (k2tog) create the overlapping pine needle effect. Repeat this 10-row section twice for a total of 20 rows of texture.
First Repeat (Rows 11-20):
- Row 11 (RS): Knit 2, *yo, k2tog, k1; repeat from * to last 2 stitches, knit 2. (20 stitches)
- Row 12 (WS): Purl all stitches.
- Row 13: Knit 2, *k1, yo, k2tog; repeat from * to last 2 stitches, knit 2.
- Row 14: Purl all stitches.
- Row 15: Knit 2, *yo, k2tog, k1; repeat from * to last 2 stitches, knit 2.
- Row 16: Purl all stitches.
- Row 17: Knit 2, *k1, yo, k2tog; repeat from * to last 2 stitches, knit 2.
- Row 18: Purl all stitches.
- Row 19: Knit 2, *yo, k2tog, k1; repeat from * to last 2 stitches, knit 2.
- Row 20: Purl all stitches.
Second Repeat (Rows 21-30): Repeat Rows 11-20 exactly as written above. After this, you will have completed 20 rows of the pine needle texture.
Top Flap (Knit Flat)
Now, switch back to smooth stockinette stitch for the flap that folds over the front.
- Row 31 (RS): Knit all stitches.
- Row 32 (WS): Purl all stitches.
- Row 33: Knit all stitches.
- Row 34: Purl all stitches.
- Row 35: Knit all stitches.
- Row 36: Purl all stitches.
- Row 37: Knit all stitches.
- Row 38: Purl all stitches.
Buttonhole Row (RS): Knit 8, bind off 4 stitches, knit 8. (16 stitches remain on needle)
Next Row (WS): Purl 8, cast on 4 stitches over the gap using the backward loop method, purl 8. (20 stitches)
Final Rows:
- Row 41: Knit all stitches.
- Row 42: Purl all stitches.
Bind off all stitches loosely. Cut yarn, leaving a 12-inch tail for seaming.
Assembly
- Fold and Pin: Fold the knitted piece in half, with the right sides together. Align the cast-on edge (bottom) with the row just before the flap begins (Row 30). The flap will fold over the top of the purse body.
- Seam the Sides: Using the crochet hook (US C/2) and MC, slip stitch the side seams together from the bottom up to the flap. Start at the cast-on edge and work up to the point where the flap begins. Weave in ends securely.
- Turn Right Side Out: Carefully turn the purse right side out through the open top. Use a blunt tool like a knitting needle to gently push out the corners.
Edging
With CC (Golden Brown) and the crochet hook, work a decorative edge around the flap and the top edge of the purse body.
- Round 1: Starting at one side of the flap, work a round of single crochet (sc) evenly around the entire flap edge and the top edge of the purse body. Join with a slip stitch to the first sc.
- Picot Edge (Optional but recommended): For a forest-inspired finish, work a picot edge: *sc in next stitch, chain 3, slip stitch in the same stitch; repeat from * around the entire edge. This creates tiny loops that resemble pine cone scales. Fasten off and weave in ends.
Pine Cone Button
With CC, crochet a small, textured button that looks like a tiny pine cone.
- Round 1: Make a magic ring, work 6 single crochet (sc) into the ring, pull the tail to tighten. (6 stitches)
- Round 2: 2 sc in each stitch around. (12 stitches)
- Round 3: Sc in each stitch around. (12 stitches)
- Round 4: Sc2tog (single crochet two together) around. (6 stitches)
- Fasten off, leaving a long tail (about 10 inches). Use the tail to sew the button onto the flap, aligning it with the buttonhole. Weave in ends securely.
Optional: Knitted Pine Needle Tassel
Add a tiny tassel to one bottom corner for an extra forest touch.
- Cut several 6-inch strands of MC and CC (about 6-8 strands total).
- Fold the strands in half. Insert the crochet hook through the bottom corner of the purse, catch the folded loop of the strands, and pull it through the fabric.
- Pull the loose ends of the strands through the loop and tighten to secure.
- Trim the ends evenly to about 1.5 inches long.
Your Whispering Pine Needle Coin Purse is complete! Enjoy your handmade forest treasure.


