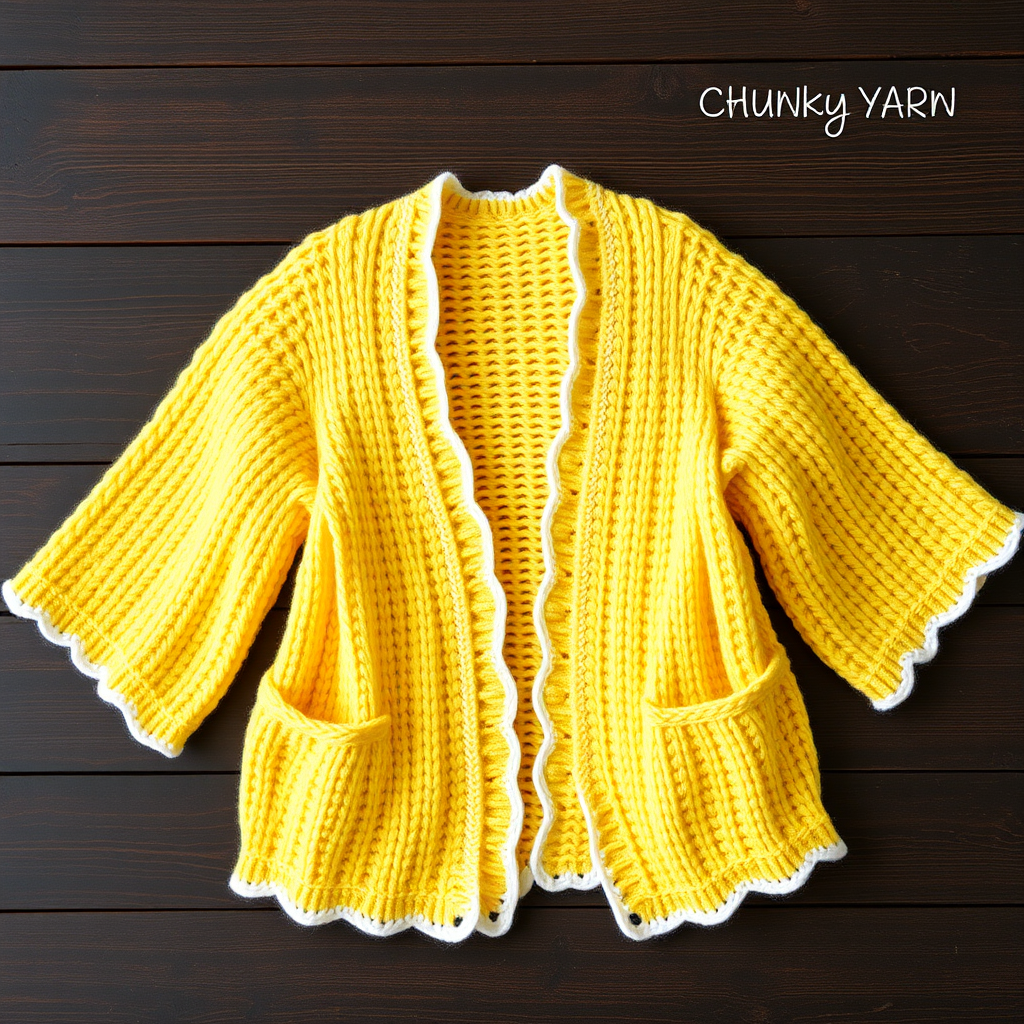
The Regelo Crochet Cardigan: A Free Pattern for a Textured, Oversized, and Boho-Chic Layering Piece

Introduction: The Regelo Crochet Cardigan – Your New Favorite Boho Layer
Embrace the art of slow fashion with this deeply textured, oversized cardigan. The Regelo Crochet Cardigan features a unique combination of shell stitches and post stitches that create a rich, woven, almost basket-like effect. Perfect for layering over dresses, jeans, or your favorite fall outfits, this free pattern guides you through creating a cozy, one-of-a-kind garment that feels like a warm hug. The relaxed, open-front design with dropped shoulders and wide, three-quarter length sleeves makes it a versatile, boho-chic staple for your handmade wardrobe.
Materials Needed
Before you begin, gather the following supplies. Using the recommended yarn will ensure your cardigan matches the gauge and look of the original sample.
Yarn
- Brand: Lion Brand Hue + Me (Bulky weight, #5) or any bulky weight yarn.
- Color Shown: 'Canyon Clay' (a warm terracotta).
- Amount Needed: Approximately 6 (7, 8, 9) skeins for sizes S/M (L/XL, 2XL/3XL, 4XL/5XL).
Tools
- Crochet Hook: Size J-10 (6.0 mm) or size needed to obtain gauge.
- Other: Yarn needle for weaving in ends, scissors, stitch markers (optional, for increasing sleeves).
Gauge
- Gauge: 12 stitches x 8 rows = 4 inches in pattern stitch (shell and post stitch combo).
- Important: Always check your gauge. If your swatch is too large, use a smaller hook. If too small, use a larger hook.
Step-by-Step Instructions
This pattern is written for sizes S/M (L/XL, 2XL/3XL, 4XL/5XL). Finished bust measurements: 44 (50, 56, 62) inches. The cardigan is designed to be oversized, so choose the size that matches your desired amount of ease.
Abbreviations
- ch = chain
- sc = single crochet
- dc = double crochet
- sk = skip
- st(s) = stitch(es)
- sl st = slip stitch
- fpdc = front post double crochet
- bpdc = back post double crochet
Pattern Stitch (Multiple of 4 + 2)
This is the main stitch pattern used for the entire cardigan. Practice on a small swatch first to get comfortable with the shell and post stitch combination.
- Row 1 (RS): Sc in 2nd ch from hook, *sk 3 ch, (dc, ch 1, dc) in next ch (shell made), sk 3 ch, sc in next ch; repeat from * across. Turn.
- Row 2 (WS): Ch 3 (counts as dc), fpdc around first sc, *bpdc around next 2 dc, fpdc around next sc; repeat from * across, ending with bpdc around last sc, dc in last sc. Turn.
- Row 3: Ch 1, sc in first dc, *sk next 2 sts, (dc, ch 1, dc) in next fpdc (center of shell), sk next 2 sts, sc in next fpdc; repeat from * across, ending with sc in top of turning ch. Turn.
- Row 4: Ch 3, fpdc around first sc, *bpdc around next 2 dc, fpdc around next sc; repeat from * across, ending with bpdc around last sc, dc in last sc. Turn.
- Repeat: Repeat Rows 3-4 for pattern.
Back Panel
- Foundation Chain: Ch 74 (86, 98, 110).
- Work Pattern: Work in pattern stitch (Rows 1-4, then repeat Rows 3-4) until piece measures 24 (25, 26, 27) inches from the start.
- Finish: Fasten off. Weave in the starting tail.
Left Front Panel
- Foundation Chain: Ch 38 (44, 50, 56).
- Work Pattern: Work in pattern stitch (Rows 1-4, then repeat Rows 3-4) until piece measures 24 (25, 26, 27) inches from the start.
- Finish: Fasten off. Weave in the starting tail.
Right Front Panel
- Foundation Chain: Ch 38 (44, 50, 56).
- Work Pattern: Work in pattern stitch (Rows 1-4, then repeat Rows 3-4) until piece measures 24 (25, 26, 27) inches from the start.
- Finish: Fasten off. Weave in the starting tail.
Sleeves (Make 2)
- Foundation Chain: Ch 38 (38, 44, 44).
- Work Pattern with Increases: Work in pattern stitch (Rows 1-4, then repeat Rows 3-4). At the same time, increase 1 stitch at each end of every 4th row. To increase, work 2 sc in the first and last stitch of the row (or use your preferred increase method).
- Continue Increasing: Continue increasing until you have 50 (56, 62, 68) stitches total.
- Work Even: Once you have the correct number of stitches, continue working in pattern without further increases until the sleeve measures 18 (19, 20, 21) inches from the start.
- Finish: Fasten off. Weave in the starting tail.
Assembly
- Shoulder Seams: Sew the shoulder seams. Align the top edge of the back panel with the top edge of each front panel. Sew approximately 6 inches from the outer edge inward on each side, leaving the center open for the neckline.
- Sleeves: Pin the sleeves into the armholes. The top center of the sleeve should align with the shoulder seam. Sew the sleeves in place.
- Side and Sleeve Seams: Fold the cardigan with right sides together. Sew the side seams from the bottom hem up to the sleeve opening, then continue sewing the sleeve seam down to the cuff.
Edging
- Attach Yarn: With the right side facing, join yarn at the bottom right front corner of the cardigan.
- Work Single Crochet Border: Work 1 row of single crochet (sc) evenly around the entire front opening and neckline. Work 1 sc in each stitch and row end, making sure to keep the edge flat (not too tight or too loose).
- Finish: Fasten off. Weave in all remaining ends.
Your Regelo Crochet Cardigan is now complete! Enjoy your cozy, textured, boho-chic layering piece. Remember to block your cardigan gently to even out the stitches and enhance the drape.