Sun-Kissed Citrus Kimono Cardigan Free Pattern – Knit a Zesty Lemon Wrap
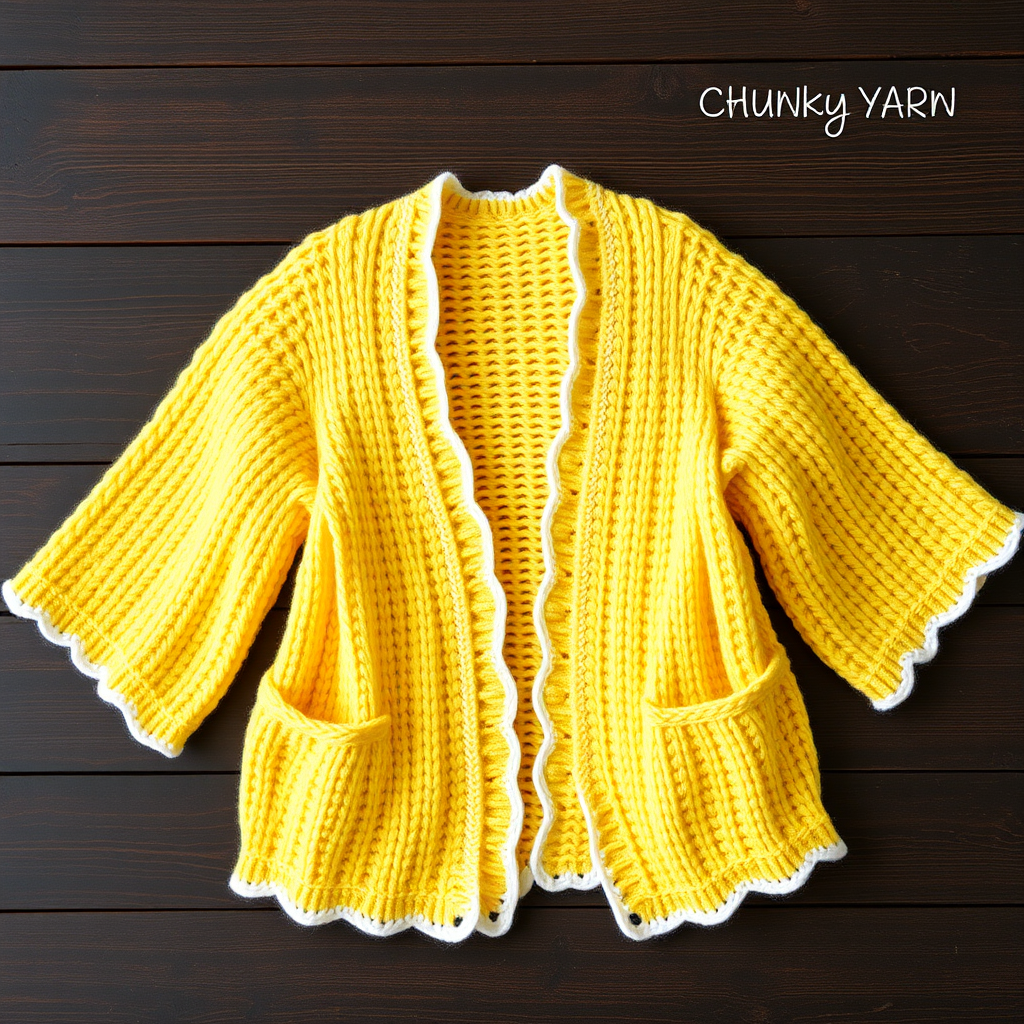
Sun-Kissed Citrus Kimono Cardigan: A Free Knitting Pattern for a Zesty Lemon Wrap
Wrap yourself in the bright, cheerful warmth of a lemon-inspired kimono cardigan! This breezy, open-front layer is the perfect project for spring and summer, adding a pop of sunny color to any outfit. Featuring a beautifully textured seed stitch body and a delicate picot edging, this cardigan is as enjoyable to knit as it is to wear. Whether you're a seasoned knitter looking for a relaxing project or a confident beginner ready for a new challenge, this free pattern will guide you through creating a stunning, handmade wardrobe staple.
This design is all about effortless style. The boxy, relaxed silhouette with wide, flowing sleeves creates a flattering, kimono-inspired shape that drapes beautifully. The bright lemon yellow (MC) is complemented by a crisp white (CC) picot border, evoking a sense of sunshine and warmth. The soft, breathable cotton yarn makes it perfect for layering over a summer dress or a simple tank top.
Materials Needed
Before you begin, gather your materials. This project uses simple, worsted-weight yarn and basic tools, making it accessible for most knitters.
- Yarn: Worsted weight cotton or cotton-blend yarn in Lemon Yellow (MC) and White (CC). You will need approximately 800 (900, 1000) yards of MC and 150 yards of CC for sizes S (M, L).
- Knitting Needles: US 7 (4.5 mm) knitting needles.
- Crochet Hook: US 7 (4.5 mm) crochet hook for the edging.
- Notions: Stitch markers, tapestry needle for weaving in ends.
Gauge
Getting the correct gauge is crucial for achieving the right size. Always knit a swatch first!
Gauge: 20 stitches and 28 rows = 4 inches in seed stitch (blocked).
Step-by-Step Instructions
This pattern is worked in flat panels and seamed together. The construction is straightforward, creating a beautiful, seamless-looking garment. Follow the instructions carefully for a flawless finish.
Sizes & Measurements
SIZES: S (M, L)
Finished Chest Circumference: 38 (42, 46) inches.
Length: 22 (23, 24) inches.
Abbreviations
Familiarize yourself with these standard knitting abbreviations before you start.
- K = Knit
- P = Purl
- K2tog = Knit two together (decrease)
- SSK = Slip, slip, knit (decrease)
- YO = Yarn over (increase)
- PM = Place marker
- SM = Slip marker
- RS = Right side
- WS = Wrong side
- MC = Main color (Lemon Yellow)
- CC = Contrast color (White)
Seed Stitch Pattern
This cardigan uses a simple, two-row repeat to create a beautiful, nubby texture. It's easier than it looks!
SEED STITCH PATTERN (over an even number of stitches):
Row 1 (RS): *K1, P1; repeat from * to end.
Row 2 (WS): *P1, K1; repeat from * to end.
Repeat Rows 1 and 2 for the seed stitch pattern.
Back Panel
Let's start with the largest piece – the back panel.
- With MC, cast on 96 (106, 116) stitches.
- Work in the seed stitch pattern until the piece measures 20 (21, 22) inches from the cast-on edge, ending with a WS row.
- Bind off all stitches loosely. Set aside.
Left Front Panel
The front panels are worked identically, creating a symmetrical open front.
- With MC, cast on 48 (53, 58) stitches.
- Work in the seed stitch pattern until the piece measures 20 (21, 22) inches from the cast-on edge, ending with a WS row.
- Bind off all stitches loosely. Set aside.
Right Front Panel
Work the right front panel exactly the same as the left front panel.
- With MC, cast on 48 (53, 58) stitches.
- Work in the seed stitch pattern until the piece measures 20 (21, 22) inches from the cast-on edge, ending with a WS row.
- Bind off all stitches loosely. Set aside.
Sleeves (Make 2)
The sleeves are knit flat and shaped with simple increases to create a gentle taper.
- With MC, cast on 60 (66, 72) stitches.
- Work in the seed stitch pattern, increasing 1 stitch at each end of every 6th row until you have 72 (78, 84) stitches on your needle. To increase, simply K1, then K1 into the front and back of the next stitch (Kfb) at the beginning of the row, and Kfb into the second-to-last stitch, then K1 at the end of the row.
- Continue even (without increasing) until the sleeve measures 12 (13, 14) inches from the cast-on edge.
- Bind off all stitches loosely. Repeat for the second sleeve.
Assembly
Now it's time to bring all the pieces together. Take your time with the seaming for a professional finish.
- Lay out the pieces: Lay the back panel flat. Place the left and right front panels on top, aligning the shoulders.
- Sew shoulder seams: Sew the shoulder seams for approximately 4 (5, 6) inches from the outer edge on each side. Leave the center back open for the neckline.
- Mark armholes: Measure 7 (8, 9) inches down from the shoulder seam on each side and place a stitch marker. This will be your armhole opening.
- Sew in sleeves: Sew the sleeves into the armholes, matching the center of the sleeve top to the shoulder seam.
- Sew side seams: Sew the side seams from the underarm down to the bottom edge. Important: Leave a 6-inch slit at the bottom on each side for the kimono style.
Picot Edging
This delicate, scalloped edge is the perfect finishing touch. It's worked in the round around the entire outer edge of the cardigan.
- With the CC yarn and your crochet hook, start at the bottom corner of one front panel.
- Round 1: Work a single crochet (sc) evenly around the entire outer edge (fronts, bottom, and neckline). Work 3 sc in each corner to help the edging lay flat.
- Round 2: *Sc in the next 3 stitches, chain 3 (ch 3), slip stitch (sl st) in the same stitch; repeat from * around the entire edge.
- Fasten off and weave in the yarn end.
Finishing
The final steps will transform your knitting into a beautifully finished garment.
- Weave in ends: Carefully weave in all loose yarn ends with your tapestry needle.
- Block: Block the cardigan to the specified measurements. Gently stretch it to open up the seed stitch texture and even out the stitches. Pin it to shape and allow it to dry completely. This step is essential for a professional look.
Your Sun-Kissed Citrus Kimono Cardigan is now complete! This beautiful, handmade piece is sure to become a favorite. The bright, cheerful color and breezy silhouette make it perfect for adding a touch of sunshine to any day. Enjoy wearing your new creation!


