The Lilypad Crown Frog Hat Free Pattern – A Knitted Pondside Adventure
The Lilypad Crown Frog Hat Free Pattern – A Knitted Pondside Adventure
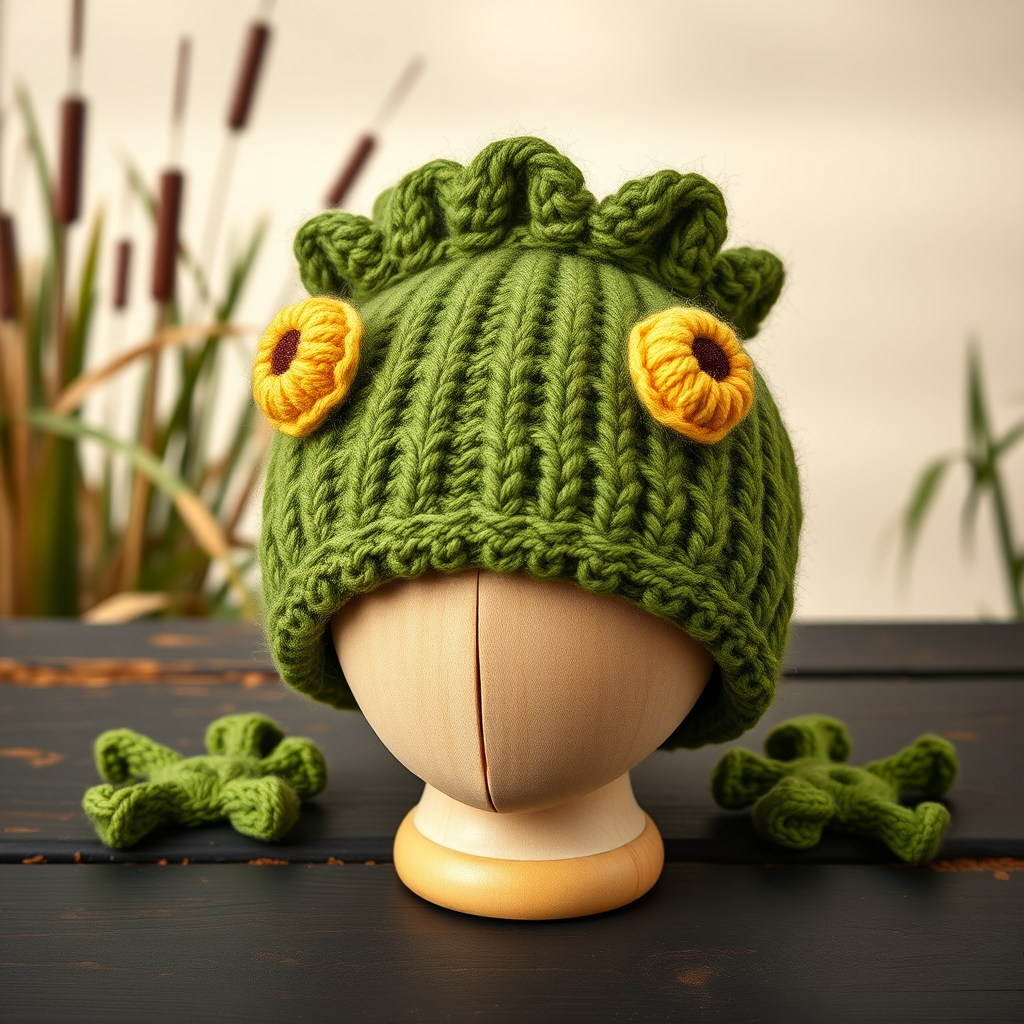
Welcome to a whimsical knitting project that will transform you—or your little one—into a regal pond monarch! The Lilypad Crown Frog Hat is a cozy, textured knit that brings a splash of marshland magic to chilly days. With its leafy crown and bulging butter-yellow eyes, this hat is equal parts playful and practical. Whether you're a seasoned knitter looking for a fun weekend project or a brave beginner ready for a delightful challenge, this pattern is designed to guide you through every step with clarity and confidence. Let's dive into this pondside adventure together!
Materials Needed
Before we begin, gather your supplies. This project uses simple, accessible materials that you can find at any local yarn shop or online. Here's what you'll need:
- Yarn: Worsted weight yarn in three shades:
- Marsh Green (main hat body) – approximately 150g
- Lilypad Green (crown) – approximately 30g
- Butter Yellow (eyes) – approximately 20g
- Needles: US 7 (4.5mm) 16-inch circular needle for the hat body, and double-pointed needles (DPNs) in the same size for small circumferences (eyes and crown shaping).
- Notions: Stitch markers, tapestry needle for finishing, scissors, and fiberfill stuffing for the eyes.
- Gauge: 20 stitches and 26 rows = 4 inches in stockinette stitch (knit flat, then blocked). Gauge is crucial for the correct fit, so take a moment to knit a swatch and adjust needle size if needed.
Step-by-Step Instructions
Follow these detailed instructions carefully, and you'll have a magnificent frog hat in no time. The pattern is broken down into sections for clarity. Take your time, and enjoy the process!
Hat Body (Worked in the Round from the Brim Up)
- Cast On: With Marsh Green yarn, cast on 80 stitches using your circular needle. Join in the round, being very careful not to twist your stitches. Place a stitch marker at the beginning of the round to track your progress.
- Ribbing: Work K1, P1 ribbing for 1.5 inches (approximately 10 rounds). This creates a snug, stretchy brim that will keep the hat securely on the head.
- Stockinette Body: Switch to stockinette stitch (knit every round) and work even until the hat measures 5 inches from the cast-on edge. This gives you a nice, deep hat body.
- Begin Decreases (Crown Shaping): Now we'll shape the top of the hat. Follow this decrease pattern:
- Round 1: *K8, K2tog* repeat to end of round (72 stitches remain).
- Round 2 and all even rounds: Knit all stitches (no decreases).
- Round 3: *K7, K2tog* repeat to end (64 stitches).
- Round 5: *K6, K2tog* repeat to end (56 stitches).
- Continue in this pattern: Decrease 8 stitches every other round (on odd-numbered rounds), working one fewer knit stitch before the K2tog each time (K5, K2tog; then K4, K2tog; etc.) until 16 stitches remain.
- Finish: Cut the yarn, leaving a 12-inch tail. Thread the tail through a tapestry needle, then pass it through the remaining 16 stitches. Pull tight to close the hole, and secure the yarn inside the hat by weaving it through the stitches.
Frog Eyes (Make 2)
- Cast On: With Butter Yellow yarn, cast on 12 stitches. Distribute them evenly onto three DPNs (4 stitches on each needle). Join in the round, being careful not to twist.
- Knit Even: Knit 4 rounds even (no increases or decreases). This creates the base of the eye.
- Decrease: Next round: K2tog around (6 stitches remain).
- Close: Cut the yarn, leaving a long tail (about 12 inches). Thread the tail through the remaining 6 stitches, pull tight, and secure. Important: Before pulling completely closed, stuff the eye lightly with fiberfill. Then pull the yarn tight to close the opening completely.
Eye Spots (Make 2)
- Cast On: With Marsh Green yarn, cast on 6 stitches.
- Knit: Knit 2 rows (this creates a small, flat oval patch).
- Bind Off: Bind off all stitches. Leave a tail for sewing.
- Attach: Sew each oval patch onto the front of each eye, slightly off-center, to mimic frog pupils. Position them so they look like the frog is looking slightly to the side for a playful expression.
Lilypad Crown (Worked Flat, Then Seamed)
- Cast On: With Lilypad Green yarn, cast on 20 stitches.
- Stockinette: Work in stockinette stitch (knit on the right side, purl on the wrong side) until the piece measures 4 inches from the cast-on edge. This forms the base of the crown.
- Shape the Crown Points: Now we'll create the leafy points of the crown:
- Next Row (RS): K2tog, K16, K2tog (18 stitches remain).
- Next Row: Purl all stitches.
- Repeat these two rows until 6 stitches remain. This creates a triangular point.
- Bind Off: Bind off the remaining 6 stitches.
- Seam: Fold the crown piece in half lengthwise (so the short edges meet) and sew the short edges together to form a ring. This ring will sit atop the hat like a leafy coronet.
Assembly
- Position the Eyes: Place the two eyes on the front of the hat, about 2 inches above the ribbing and 1 inch apart. Make sure they're centered and look balanced. Sew them on securely using the long tails you left earlier. Weave the tails through the inside of the hat for a clean finish.
- Attach the Crown: Place the lilypad crown ring on the top of the hat, centered. Sew it in place around its base, leaving the top edge free to flop slightly for a playful, organic look.
- Final Touches: Weave in all remaining ends with your tapestry needle. Optional: Add a small embroidered smile with black yarn below the eyes. Use a simple backstitch to create a cute, friendly expression.
Tips for Success
- Gauge Matters: Always check your gauge before starting. If your hat comes out too small or too large, adjust your needle size accordingly.
- Stitch Markers: Use a different colored marker for the beginning of the round to avoid confusion, especially during the decrease rounds.
- Stuffing the Eyes: Don't overstuff the eyes—they should be firm but still squishy. A little fiberfill goes a long way.
- Customization: Feel free to adjust the hat size by casting on more or fewer stitches (in multiples of 8) for a larger or smaller fit.
And there you have it—your very own Lilypad Crown Frog Hat! This whimsical creation is perfect for chilly days, costume parties, or just adding a touch of pondside magic to your wardrobe. The combination of the cozy ribbed brim, the playful bulging eyes, and the regal leafy crown makes this hat a true conversation starter. We hope you enjoyed this knitting adventure and feel proud of your handmade masterpiece. Happy knitting, and may your days be filled with marshland magic!


