The Ember Glow Bonfire Wrap: A Free Crochet Pattern for a Cozy, Textured Triangle Shawl
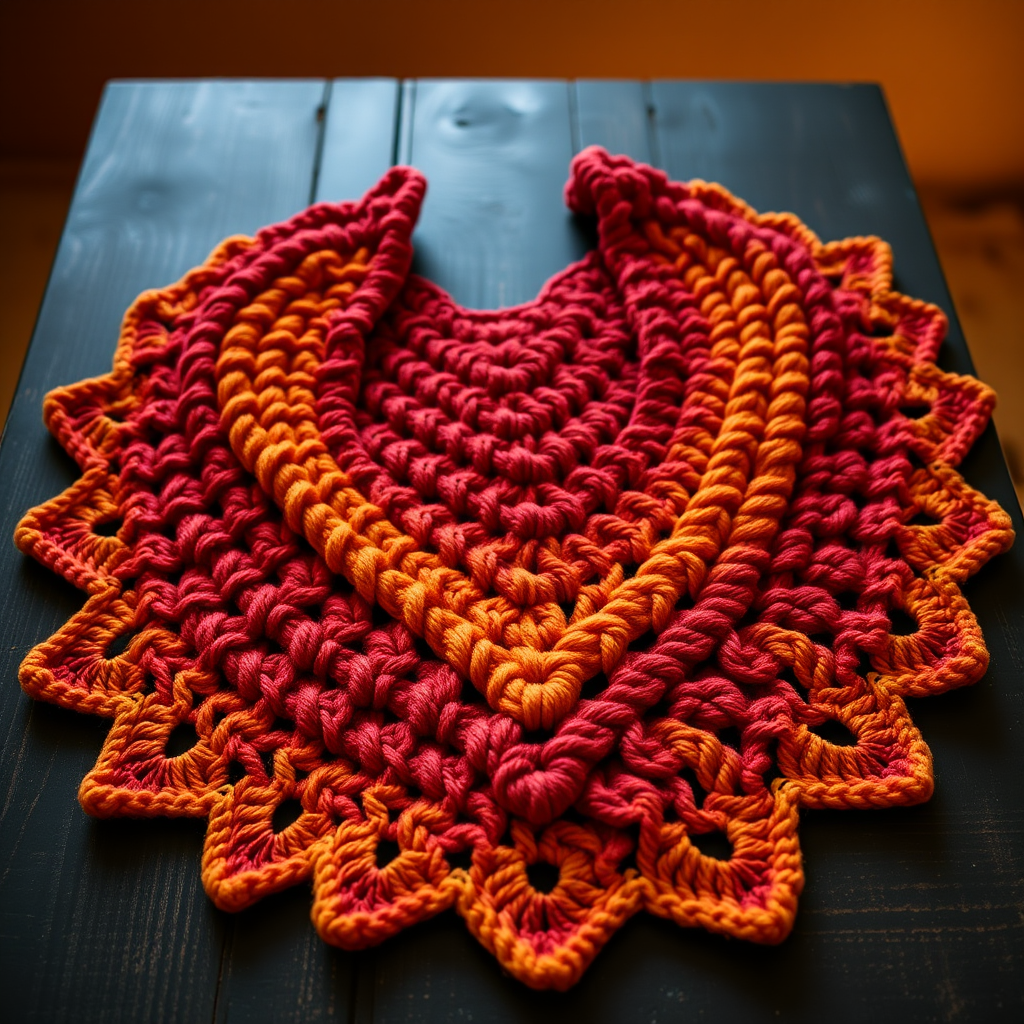
Wrap Yourself in Warmth: The Ember Glow Bonfire Wrap
Imagine the cozy crackle of a bonfire on a crisp autumn evening, wrapped in a blanket of rich, warm colors. That's the feeling you'll capture with the Ember Glow Bonfire Wrap. This free crochet pattern creates a deeply textured, oversized triangle shawl that's perfect for chilly nights. Featuring a stunning gradient from deep rust to golden yellow and a unique woven-like stitch pattern, this wrap is as luxurious to make as it is to wear. Whether you're a seasoned crocheter or a confident beginner looking for a rewarding project, this pattern will guide you to create a stunning, one-of-a-kind accessory.
Materials Needed
Before you begin, gather the following supplies. The gauge is not critical for this project, but using the recommended yarn and hook will ensure your shawl matches the intended size and drape.
- Yarn: Worsted weight (#4) yarn in 3 colors:
- Color A: Deep Rust – 300g (approximately 600 yards)
- Color B: Burnt Orange – 250g (approximately 500 yards)
- Color C: Golden Yellow – 200g (approximately 400 yards)
- Total: Approximately 750g (1500 yards) of worsted weight yarn.
- Crochet Hook: 6.0 mm (J-10) crochet hook
- Other: Yarn needle for weaving in ends, scissors, stitch markers (optional).
- Gauge: 14 stitches and 8 rows in pattern = 4 inches (10 cm). Gauge is not critical but affects final size.
Step-by-Step Instructions
This shawl is worked from the top center point down, increasing at the center and both edges. The pattern uses a combination of front post double crochet (fpdc) and back post double crochet (bpdc) to create a woven texture. Read through all instructions before beginning.
Abbreviations
- ch = chain
- dc = double crochet
- fpdc = front post double crochet
- bpdc = back post double crochet
- st(s) = stitch(es)
- sk = skip
- sl st = slip stitch
Special Stitch: Woven Stitch (worked over 2 sts)
fpdc around next st, bpdc around next st; repeat from * to * across the designated stitches. This creates the woven, basket-like texture.
Pattern Notes
- The shawl is worked from the top center point down, increasing at the center and edges.
- Ch 3 at the beginning of each row counts as a double crochet (dc).
- Edge increases: Work 2 dc in the first and last stitch of each row.
- Center increase: In the ch-2 space at the center of each row, work (dc, ch 2, dc).
Getting Started
Row 1 (Color A): Ch 4. In the 4th ch from hook (the first ch you made), work (dc, ch 2, dc). Turn. You now have 3 dc and 1 ch-2 space.
Row 2 (Color A): Ch 3 (counts as dc here and throughout). In the same st (the base of the ch-3), work dc (edge increase). Work 1 dc in the next dc. In the ch-2 space, work (dc, ch 2, dc) (center increase). Work 1 dc in the next dc. In the last st (the top of the ch-3 from the previous row), work 2 dc (edge increase). Turn. You now have 9 dc and 1 ch-2 space.
Row 3 (Color A): Ch 3. 2 dc in the same st (edge increase). Work 1 dc in each dc across to the ch-2 space. In the ch-2 space, work (dc, ch 2, dc) (center increase). Work 1 dc in each dc across to the last st. In the last st, work 2 dc (edge increase). Turn. You now have 15 dc and 1 ch-2 space.
Introducing the Woven Stitch
Row 4 (Color A): Ch 3. 2 dc in the same st (edge increase). *Work Woven Stitch over the next 2 sts*; repeat from * to * across until you have 1 st before the ch-2 space. Work 1 dc in that next st. In the ch-2 space, work (dc, ch 2, dc) (center increase). Work 1 dc in the next st. *Work Woven Stitch over the next 2 sts*; repeat from * to * across until you have 1 st before the last st. In the last st, work 2 dc (edge increase). Turn. You now have 21 sts: 10 dc, 10 post sts (5 fpdc + 5 bpdc), and 1 ch-2 space.
Row 5 (Color A): Ch 3. 2 dc in the same st (edge increase). *Work Woven Stitch over the next 2 sts*; repeat from * to * across until you have 1 st before the ch-2 space. Work 1 dc in that next st. In the ch-2 space, work (dc, ch 2, dc) (center increase). Work 1 dc in the next st. *Work Woven Stitch over the next 2 sts*; repeat from * to * across until you have 1 st before the last st. In the last st, work 2 dc (edge increase). Turn. You now have 27 sts: 12 dc, 14 post sts (7 fpdc + 7 bpdc), and 1 ch-2 space.
Row 6 (Color A): Repeat Row 5. You now have 33 sts: 14 dc, 18 post sts (9 fpdc + 9 bpdc), and 1 ch-2 space.
Changing Colors and Continuing the Pattern
Row 7 (Color B): Repeat Row 5. You now have 39 sts: 16 dc, 22 post sts (11 fpdc + 11 bpdc), and 1 ch-2 space.
Row 8 (Color B): Repeat Row 5. You now have 45 sts: 18 dc, 26 post sts (13 fpdc + 13 bpdc), and 1 ch-2 space.
Continue in this manner, repeating Row 5, changing colors every 6-8 rows as desired. A suggested color sequence is: 8 rows Color A, 8 rows Color B, 8 rows Color C, then repeat Color B and Color A. Always maintain the edge increases (2 dc in first and last st) and center increase (dc, ch 2, dc in ch-2 space). The Woven Stitch pattern will naturally expand as the shawl grows. The number of stitches will increase by 6 each row (2 at each edge and 2 at the center).
Finishing
When the shawl reaches your desired size (approximately 60 inches wide and 30 inches deep), fasten off by cutting the yarn and pulling the tail through the last loop. Weave in all ends using a yarn needle. Block gently by wetting or steaming the shawl and pinning it to shape, allowing it to dry completely. This will open up the stitch pattern and give the shawl a beautiful, professional finish.