The Dewdrop Pear Charm: A Free Crochet Pattern for a Tiny, Textured Necklace Pendant
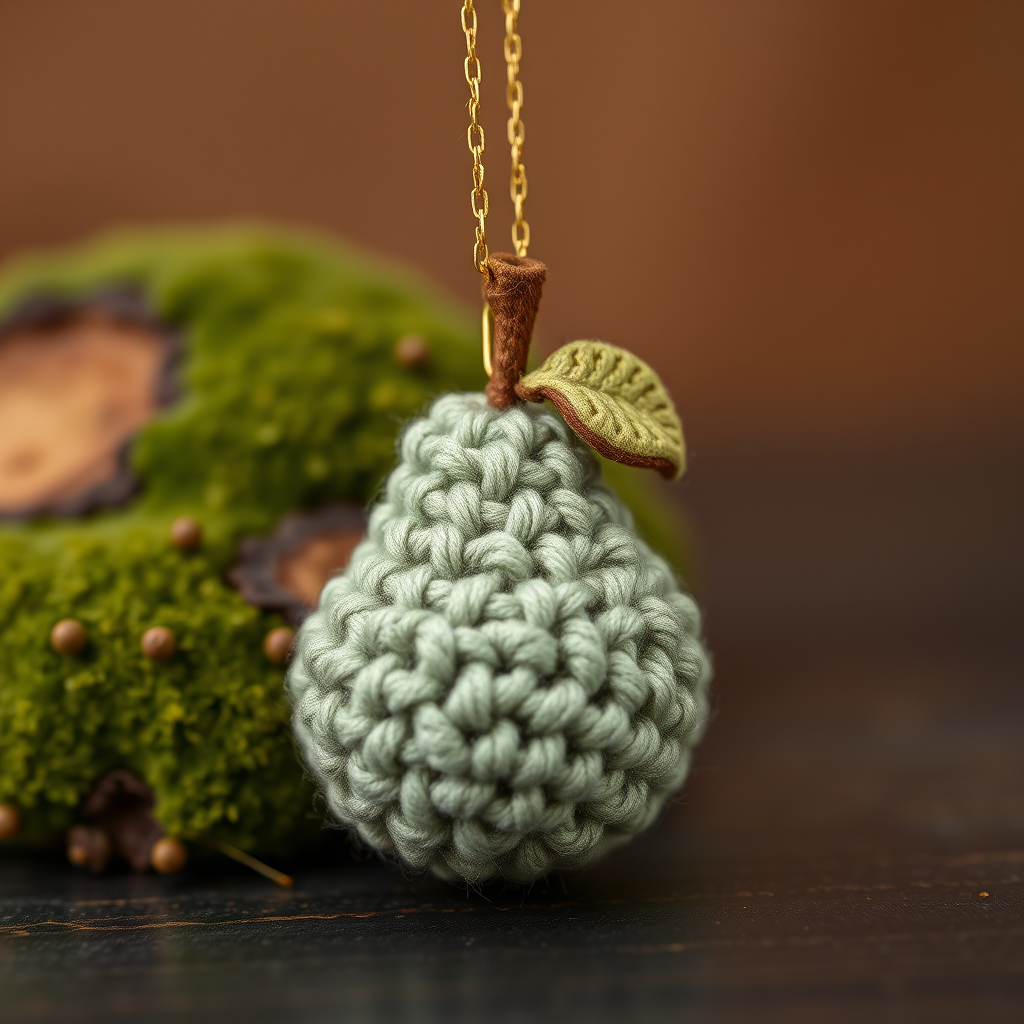
Introduction: A Tiny Treasure to Crochet
Welcome to a delightful miniature crochet project that transforms simple stitches into a wearable work of art. The Dewdrop Pear Charm is a free pattern designed to create a tiny, textured necklace pendant that looks like an heirloom piece. With its delicate seed stitch texture and soft, earthy color palette, this amigurumi project is perfect for using up scrap yarn while crafting something truly unique and nature-inspired. Whether you're a seasoned crocheter or a beginner looking for a quick, satisfying project, this pattern will guide you through every step to create a charming pear pendant that adds a touch of whimsy to any outfit.
Materials Needed
Before you begin, gather the following materials. The quantities are minimal, making this an excellent stash-busting project.
Yarn
- Main Color (MC): Fingering weight cotton yarn (e.g., Knit Picks Curio) in Sage Green – approximately 10 yards.
- Contrast Color (CC): Fingering weight cotton yarn in Warm Brown – approximately 5 yards.
- Leaf Color: A small amount of light green fingering weight cotton yarn for the leaf.
Tools & Notions
- Crochet Hook: 2.25 mm (B-1) crochet hook.
- Fiberfill: Small amount of polyester stuffing.
- Tapestry Needle: For weaving ends and embroidering the seed stitch texture.
- Scissors
- Jump Ring: One small jump ring (approximately 5-6 mm) for attaching to a chain.
- Chain or Cord: For wearing as a necklace (not included in yarn estimate).
Gauge
Gauge is not critical for this project, but aim for a tight tension to prevent stuffing from showing. Approximately 7 single crochet stitches and 8 rows = 1 inch. Work firmly to create a dense fabric.
Step-by-Step Instructions
Follow these detailed instructions to create your Dewdrop Pear Charm. Work each round carefully, and don't hesitate to adjust tension as needed.
Pear Body (Make 1, using MC – Sage Green)
Round 1: Make a magic ring. Work 6 single crochet (sc) stitches into the ring. Pull the tail to close the ring tightly. (6 stitches)
Round 2: Increase (inc) in each stitch around. To inc, work 2 sc into the same stitch. (12 stitches)
Round 3: *Sc in the next stitch, inc in the next stitch* – repeat from * to * around. (18 stitches)
Round 4: *Sc in the next 2 stitches, inc in the next stitch* – repeat from * to * around. (24 stitches)
Rounds 5-8: Sc in each stitch around. Do not increase or decrease. (24 stitches per round)
Round 9: *Sc in the next 2 stitches, decrease (dec) in the next stitch* – repeat from * to * around. To dec, insert hook into the next stitch, yarn over and pull up a loop, insert hook into the following stitch, yarn over and pull up a loop, yarn over and pull through all 3 loops on hook. (18 stitches)
Round 10: *Sc in the next stitch, dec in the next stitch* – repeat from * to * around. (12 stitches)
Round 11: Dec around. Work a dec in each pair of stitches. (6 stitches)
Finishing the Body: Fasten off, leaving a long tail (about 12 inches). Stuff the pear firmly with fiberfill using the blunt end of your hook or a small tool. Use the tail to sew the opening closed by weaving the needle through the front loops of the remaining 6 stitches, then pull tight to close. Weave in the end securely.
Stem (Make 1, using CC – Warm Brown)
Chain 5. Starting in the 2nd chain from the hook, slip stitch (sl st) in each chain across. Fasten off, leaving a tail for sewing. You will have a small, solid stem.
Attaching the Stem: Using the tail, sew the stem to the top center of the pear. Position it so it stands upright. Weave in the end.
Leaf (Make 1, using Light Green)
Chain 6. Starting in the 2nd chain from the hook, work the following stitches in the same chain: single crochet (sc), half double crochet (hdc), double crochet (dc), half double crochet (hdc), single crochet (sc). This creates a leaf shape. Fasten off, leaving a tail for sewing.
Attaching the Leaf: Sew the leaf to the base of the stem, just above the pear body. Position it so it curves naturally. Weave in the end.
Seed Stitch Texture (Optional but Recommended)
This step adds the signature heirloom texture to your pear. Using a tapestry needle and a length of MC yarn (Sage Green), embroider small 'v' shapes randomly over the surface of the pear. Each 'v' is a single straight stitch about 1/8 inch long. To make a 'v':
- Insert the needle from the inside of the pear to the outside at the bottom left of the 'v'.
- Insert the needle back into the pear at the top point of the 'v', creating a diagonal line.
- Bring the needle out again at the bottom right of the 'v' (same level as the first point).
- Insert the needle back into the pear at the top point, creating the second diagonal line that meets the first.
- Pull gently to form a small 'v' shape. Repeat randomly over the surface, spacing them about 1/4 inch apart.
Weave in all ends securely.
Finishing
Attach a small jump ring to the top of the stem. If the stem is too small, you can sew a small loop of thread (using matching brown yarn) through the top of the stem and attach the jump ring to that. Thread a chain or cord through the ring to wear as a necklace.
Your Dewdrop Pear Charm is now complete! Enjoy your unique, nature-inspired accessory.


