The Desert Bloom Bauble: A Free Knitting Pattern for a Textured, Southwestern-Inspired Christmas Ornament
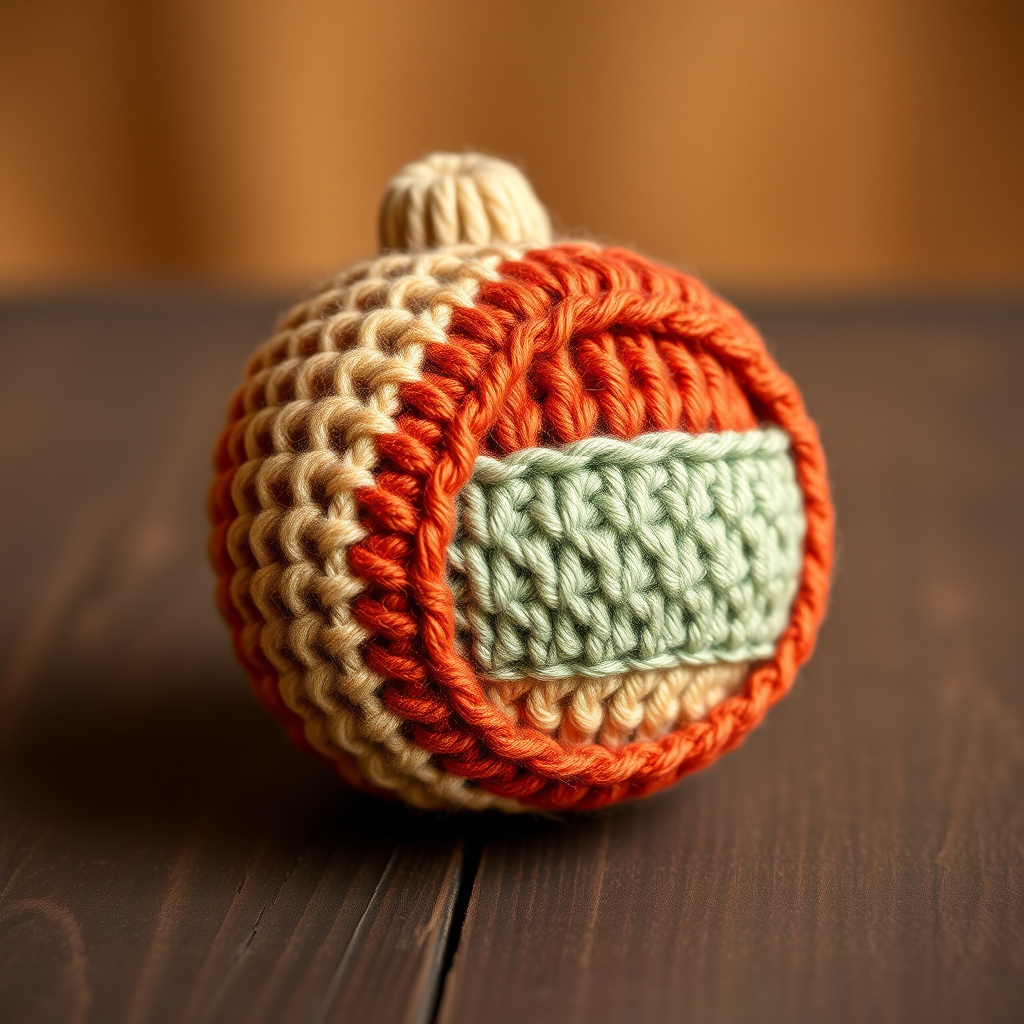
Bring the Desert to Your Tree: The Desert Bloom Bauble
Move over, traditional red and green! This free knitting pattern creates a stunning, boho-chic Christmas bauble adorned with intricate, textured stitches and earthy, warm tones. It's a unique, handmade ornament that brings a touch of desert beauty to your holiday tree. Whether you're a seasoned knitter or a beginner looking for a fun, quick project, this Southwestern-inspired ornament is the perfect way to add a personal, handcrafted touch to your holiday decor. The combination of terracotta, sand, and sage green creates a visual warmth that feels both rustic and elegant.
Materials Needed
Before you begin, gather the following supplies. This project is small and portable, making it perfect for on-the-go knitting.
- Yarn: Worsted weight cotton or cotton blend yarn in three colors:
- Color A (Terracotta): Approximately 20 yards
- Color B (Sand): Approximately 20 yards
- Color C (Sage Green): Approximately 20 yards
- Needles: US Size 5 (3.75 mm) double-pointed needles (DPNs) or a circular needle for magic loop. Use the size needed to obtain the correct gauge.
- Gauge: 24 stitches and 32 rows = 4 inches (10 cm) in stockinette stitch, worked in the round. Gauge is important for achieving the correct size, but this is a forgiving project.
- Notions: Tapestry needle for weaving in ends, stitch marker (optional), small amount of fiberfill for stuffing (optional).
Step-by-Step Instructions
This bauble is knitted in the round from the bottom up, using a combination of stockinette, garter, and a simple textured stitch to create a Southwestern-inspired pattern. Follow these instructions carefully, and you'll have a beautiful ornament in no time.
Abbreviations
- CO: Cast on
- K: Knit
- P: Purl
- Kfb: Knit into the front and back of the same stitch (increase)
- K2tog: Knit two together (decrease)
- St(s): Stitch(es)
- Rnd(s): Round(s)
Pattern
Bottom (Color A - Terracotta)
This section creates the base of the bauble. Work increases to form a flat circle.
- Rnd 1: CO 6 sts. Distribute evenly on 3 DPNs (2 sts per needle). Join in the round, being careful not to twist. K 1 rnd.
- Rnd 2: (Kfb) around. (12 sts)
- Rnd 3: K all sts.
- Rnd 4: (K1, kfb) around. (18 sts)
- Rnd 5: K all sts.
- Rnd 6: (K2, kfb) around. (24 sts)
- Rnd 7: K all sts.
- Rnd 8: (K3, kfb) around. (30 sts)
- Rnd 9: K all sts.
- Rnd 10: (K4, kfb) around. (36 sts)
- Rnd 11: K all sts.
Body (Color B - Sand)
This section creates the main body with a subtle ribbed texture from alternating knit and purl rows.
- Rnd 12: With Color B, K all sts.
- Rnd 13: P all sts.
- Rnd 14: K all sts.
- Rnd 15: P all sts.
- Rnd 16: K all sts.
- Rnd 17: P all sts.
Textured Band (Color C - Sage Green)
This band features a simple knit-purl checkerboard pattern for visual interest.
- Rnd 18: With Color C, K all sts.
- Rnd 19: (K1, P1) around.
- Rnd 20: K all sts.
- Rnd 21: (P1, K1) around.
- Rnd 22: K all sts.
Body (Color B - Sand)
Repeat the same ribbed texture as before, but note the order is reversed (starting with a purl row) to mirror the bottom section.
- Rnd 23: With Color B, P all sts.
- Rnd 24: K all sts.
- Rnd 25: P all sts.
- Rnd 26: K all sts.
- Rnd 27: P all sts.
- Rnd 28: K all sts.
Top (Color A - Terracotta)
This section decreases the stitches to close the top of the bauble.
- Rnd 29: With Color A, K all sts.
- Rnd 30: (K4, k2tog) around. (30 sts)
- Rnd 31: K all sts.
- Rnd 32: (K3, k2tog) around. (24 sts)
- Rnd 33: K all sts.
- Rnd 34: (K2, k2tog) around. (18 sts)
- Rnd 35: K all sts.
- Rnd 36: (K1, k2tog) around. (12 sts)
- Rnd 37: K all sts.
- Rnd 38: (K2tog) around. (6 sts)
Cut yarn, leaving a 10-inch tail. Thread tail through remaining 6 sts, pull tight to close the top. Weave in end securely.
Finishing
- Weave in all loose ends using a tapestry needle. Be sure to secure them well so they don't come undone.
- Using a tapestry needle and a length of Color B yarn, create a hanging loop by threading through the top of the bauble and tying a knot. Trim excess yarn.
- Optionally, stuff the bauble lightly with a small amount of fiberfill before closing the top to give it a plump, rounded shape. This step is recommended for a more professional look.
Your Desert Bloom Bauble is now complete! Hang it on your tree, give it as a thoughtful handmade gift, or use it to add a touch of Southwestern charm to your holiday decor. Enjoy your beautiful, textured creation!