Sunny Snuggle Monster Free Pattern – Crochet a Cheerful Cuddly Companion
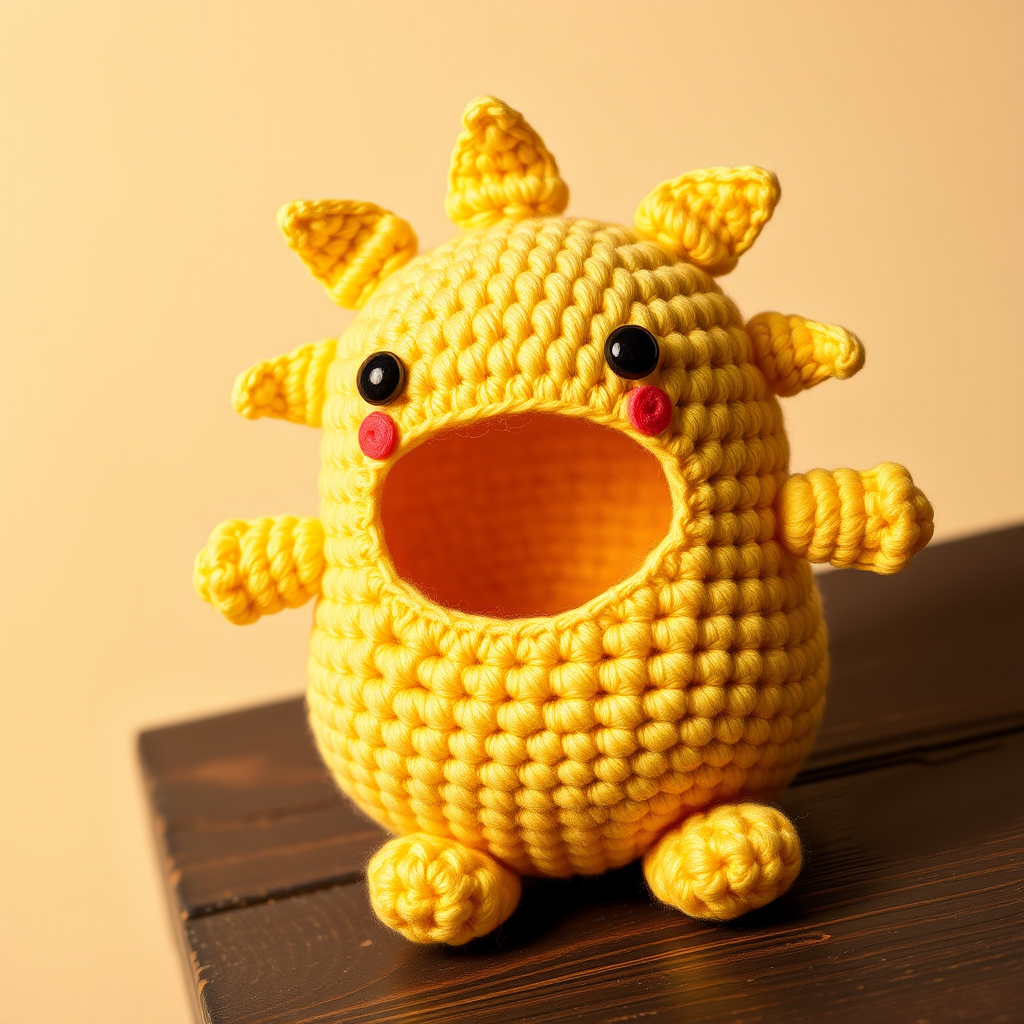
Meet the Sunny Snuggle Monster: A Joyful Crochet Companion
Get ready to bring a burst of sunshine into your home with the Sunny Snuggle Monster! This whimsical amigurumi friend features a cheerful golden-yellow body, adorable triangular sunshine spikes, and a soft, huggable shape that's impossible to resist. Whether you're looking for a unique handmade gift, a playful nursery decoration, or simply a fun weekend project, this pattern delivers a joyful, modern twist on classic monster plushies. Best of all, it's designed with beginners in mind, using basic crochet stitches and simple construction techniques. Let's dive in and create your very own cuddly companion!
Materials Needed
Before you begin, gather the following supplies to ensure a smooth and enjoyable crochet experience:
- Yarn: Worsted weight yarn in three colors:
- Sunshine yellow (main body, spikes, arms, legs)
- Soft coral (mouth, cheeks)
- Cream (optional, for contrast if desired)
- Small amounts of black and white for the face details
- Crochet Hook: 3.5mm hook (or size needed to achieve gauge)
- Gauge: 4 inches = 16 single crochet (sc) and 18 rows in continuous rounds (for reference; exact gauge isn't critical for a plush toy)
- Stitch markers (to track rounds)
- Yarn needle (for sewing and embroidering)
- Polyester fiberfill or stuffing of your choice
- Scissors
Step-by-Step Instructions
This pattern is worked in continuous spiral rounds unless otherwise noted. Always use a stitch marker to keep track of your rounds—it's a lifesaver for amigurumi!
Head and Body (Worked as One Piece)
We'll start from the top of the head and work down to the bottom of the body in one seamless piece.
- Round 1: With sunshine yellow, make a magic ring, work 6 single crochet (sc) into the ring. (6 stitches)
- Round 2: Work 2 sc in each stitch around. (12 stitches)
- Round 3: *Sc in the next stitch, 2 sc in the next stitch*; repeat from * to * around. (18 stitches)
- Round 4: *Sc in the next 2 stitches, 2 sc in the next stitch*; repeat around. (24 stitches)
- Round 5: *Sc in the next 3 stitches, 2 sc in the next stitch*; repeat around. (30 stitches)
- Round 6: *Sc in the next 4 stitches, 2 sc in the next stitch*; repeat around. (36 stitches)
- Rounds 7-12: Sc in each stitch around for 6 rounds. (36 stitches each round) — This creates the height of the head.
- Round 13 (Decrease): *Sc in the next 4 stitches, sc2tog (single crochet 2 together)*; repeat around. (30 stitches)
- Round 14: *Sc in the next 3 stitches, sc2tog*; repeat around. (24 stitches)
- Round 15: *Sc in the next 2 stitches, sc2tog*; repeat around. (18 stitches)
- Stuff firmly: Now is the time to stuff the head/body with fiberfill. Make sure it's nice and plump but not overstuffed to the point of stretching stitches.
- Round 16: *Sc in the next stitch, sc2tog*; repeat around. (12 stitches)
- Round 17: Sc2tog around. (6 stitches)
- Finish: Fasten off, leaving a long tail. Use the tail to weave through the front loops of the remaining 6 stitches and pull tight to close the hole. Weave in the end securely.
Sunshine Spikes (Make 8)
These adorable triangular spikes give the monster its sunny personality!
- With sunshine yellow, chain 4.
- Sc in the 2nd chain from the hook, half double crochet (hdc) in the next chain, double crochet (dc) in the last chain.
- Fasten off, leaving a long tail (about 8-10 inches) for sewing.
- Assembly: Sew the spikes evenly around the top of the head, pointing outward. Position them in a circle, with the pointed end facing away from the head. Stitch securely along the base of each spike.
Arms (Make 2)
- Round 1: With sunshine yellow, make a magic ring, 6 sc in ring. (6 stitches)
- Rounds 2-6: Sc in each stitch around for 5 rounds. (6 stitches each round) — This creates a small, rounded tube.
- Finish: Fasten off, leaving a long tail. Do not stuff (or stuff very lightly if desired). Sew the arms to the sides of the body, positioning them about 2-3 rounds down from the top of the head.
Legs (Make 2)
- Round 1: With sunshine yellow, make a magic ring, 6 sc in ring. (6 stitches)
- Rounds 2-4: Sc in each stitch around for 3 rounds. (6 stitches each round)
- Finish: Fasten off, leaving a long tail. Sew the legs to the bottom front of the body, spacing them evenly apart so the monster can sit up.
Face Details
This is where your monster comes to life! Take your time and use the yarn needle for all embroidery.
- Mouth: With soft coral yarn, embroider a smiling mouth using surface slip stitches or a chain stitch. Start at one corner of the smile, work across to the other corner, and curve it upward for a cheerful expression.
- Eyes: With black yarn, embroider two oval eyes. Position them above the mouth, spaced about 4-5 stitches apart. Use a satin stitch or a series of straight stitches to fill in the ovals.
- Eye Highlights: With white yarn, add a small stitch or two at the top of each black eye to create a cute, shiny highlight.
- Rosy Cheeks (Optional): With soft coral yarn, use a simple running stitch to create small, subtle blush circles on the cheeks. Work a few short stitches in a circular pattern.
Finishing Touches
- Weave in all ends: Use your yarn needle to carefully weave any remaining tails into the body of the monster so they're completely hidden.
- Shape and fluff: Gently squeeze and shape the monster to ensure it's round and plump. Fluff the spikes with your fingers so they stand up nicely.
And there you have it—your very own Sunny Snuggle Monster! This cheerful companion is perfect for cuddling, gifting, or simply brightening up a shelf. The pattern is easily customizable too: try different color combinations, add a little belly patch, or make a mini version with thinner yarn. Happy crocheting!


