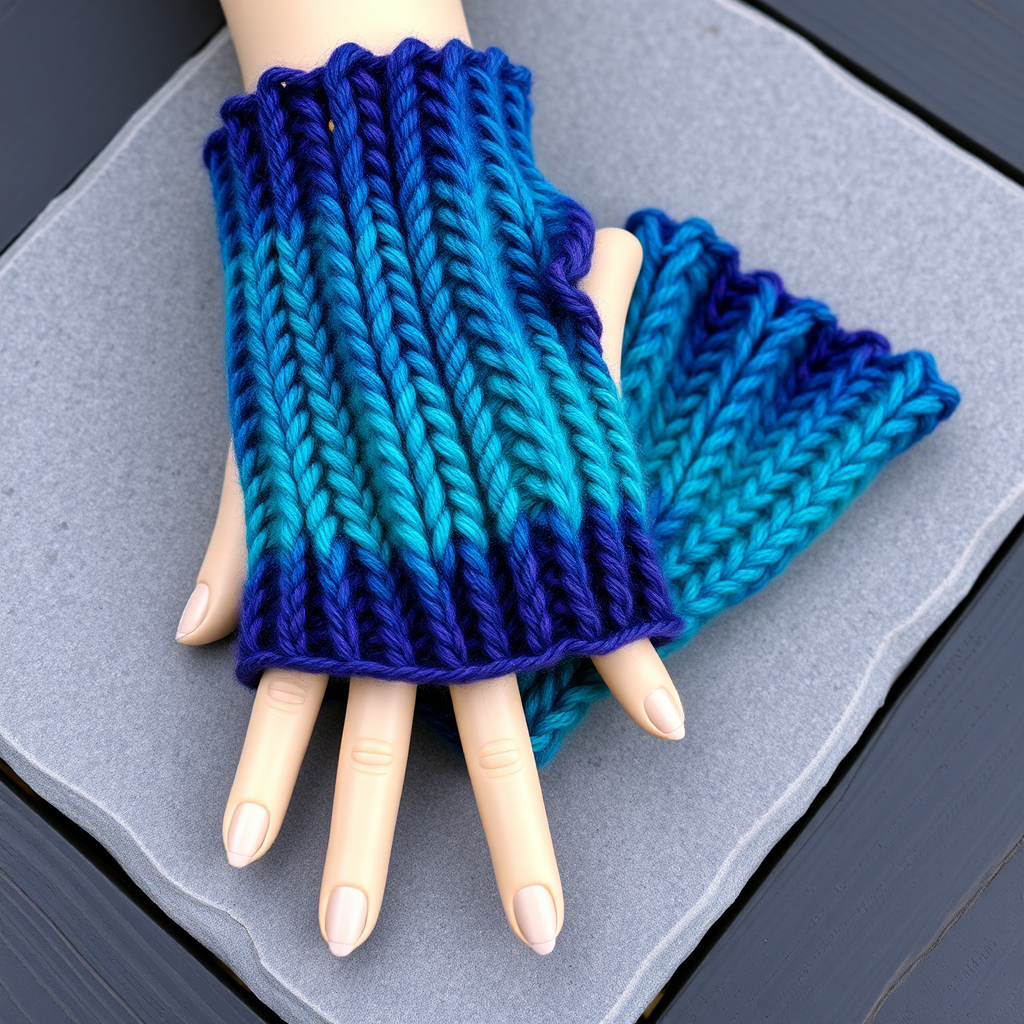
Mossy Glen Cable Fingerless Gloves Free Pattern – Knit a Forest Floor Wrap

Mossy Glen Cable Fingerless Gloves Free Pattern – Knit a Forest Floor Wrap
Wrap your hands in the quiet comfort of a woodland path with these richly textured cable gloves. The deep moss and heather tones evoke a misty forest floor, while the intricate braided cables add a touch of timeless craftsmanship. This free knitting pattern is perfect for intermediate knitters looking to expand their cable skills while creating a cozy, practical accessory for chilly days.
These fingerless gloves feature a stunning cable panel running along the back of the hand, framed by smooth stockinette sections and a classic ribbed cuff. The moss green main color paired with a heather grey contrast cuff creates a beautiful, earthy aesthetic that pairs well with autumn and winter wardrobes. Whether you're knitting for yourself or as a handmade gift, these gloves are sure to become a favorite.
Materials Needed
Before you begin, gather the following supplies:
- Yarn: Worsted weight yarn in two colors:
- Main Color (MC) – Moss Green (approx. 150g/300m)
- Contrast Color (CC) – Heather Grey (approx. 50g/100m)
- Needles: US Size 6 (4.0 mm) knitting needles (or size needed to obtain gauge)
- Cable needle
- Tapestry needle for weaving ends
- Stitch holder or scrap yarn for thumb stitches
Gauge
20 stitches and 28 rows = 4 inches in stockinette stitch. Cable pattern measures 2 inches wide over 8 stitches. Always knit a gauge swatch first to ensure proper fit!
Size
Women's Medium (7.5 inch hand circumference). Adjust by adding/removing stitches in multiples of 4 in the stockinette sections.
Abbreviations
- CO: cast on
- K: knit
- P: purl
- C4F: slip 2 stitches to cable needle, hold in front, knit 2, knit 2 from cable needle
- C4B: slip 2 stitches to cable needle, hold in back, knit 2, knit 2 from cable needle
- M1: make one (increase)
- K2tog: knit two together (decrease)
- SSK: slip slip knit (decrease)
- St(s): stitch(es)
Pattern Notes
These gloves are worked flat from cuff to fingers, then seamed. The cable panel runs along the back of the hand. Make two identical gloves. The pattern includes a thumb gusset for a comfortable, ergonomic fit.
Step-by-Step Instructions
Cuff (Make 2 Alike)
With MC, CO 40 sts.
Row 1 (RS): *K2, P2; repeat from * to end.
Row 2 (WS): *P2, K2; repeat from * to end.
Repeat Rows 1-2 for 2 inches (about 14 rows). End with a WS row.
Optional Contrast Cuff: Instead of knitting the entire cuff in MC, use CC for the first 1 inch of the cuff, then switch to MC for the rest. This adds a subtle heather accent that beautifully complements the moss green.
Hand – Increase Section
Now we'll increase stitches to accommodate the wider palm area and create space for the cable panel.
Row 1 (RS): K18, M1, K4, M1, K18 (42 sts).
Row 2 (WS): Purl all sts.
Row 3 (RS): K17, M1, K8, M1, K17 (44 sts).
Row 4 (WS): Purl all sts.
Row 5 (RS): K16, M1, K12, M1, K16 (46 sts).
Row 6 (WS): Purl all sts.
Row 7 (RS): K15, M1, K16, M1, K15 (48 sts).
Row 8 (WS): Purl all sts.
Now you have 48 sts. The center 16 sts will form the cable panel. Notice how the increases are placed to gradually widen the center section where the cables will be worked.
Cable Pattern (Work Over Center 16 Sts)
This is where the magic happens! The cable panel creates that beautiful braided texture reminiscent of tree roots on the forest floor.
Row 1 (RS): K15, P2, C4F, C4B, P2, K15.
Row 2 (WS): P15, K2, P8, K2, P15.
Row 3 (RS): K15, P2, K8, P2, K15.
Row 4 (WS): P15, K2, P8, K2, P15.
Row 5 (RS): K15, P2, C4B, C4F, P2, K15.
Row 6 (WS): P15, K2, P8, K2, P15.
Row 7 (RS): K15, P2, K8, P2, K15.
Row 8 (WS): P15, K2, P8, K2, P15.
Repeat Rows 1-8 until the piece measures 4 inches from the cuff (about 28 rows). End with a WS row.
Pro Tip: The P2 stitches on either side of the cable panel create a beautiful framed effect and help the cables pop against the stockinette background. Don't skip these!
Thumb Gusset (Increase for Thumb)
Now we'll create the thumb opening by gradually increasing stitches on one side of the work.
Next Row (RS): K15, P2, K8, P2, M1, K15 (49 sts).
Next Row (WS): Purl all sts.
Next Row (RS): K15, P2, K8, P2, K1, M1, K15 (50 sts).
Next Row (WS): Purl all sts.
Next Row (RS): K15, P2, K8, P2, K2, M1, K15 (51 sts).
Next Row (WS): Purl all sts.
Next Row (RS): K15, P2, K8, P2, K3, M1, K15 (52 sts).
Next Row (WS): Purl all sts.
Next Row (RS): K15, P2, K8, P2, K4, M1, K15 (53 sts).
Next Row (WS): Purl all sts.
Next Row (RS): K15, P2, K8, P2, K5, M1, K15 (54 sts).
Next Row (WS): Purl all sts.
Now you have 54 sts. The thumb gusset is 6 sts. Notice how the increases are worked on the right side of the cable panel, creating a wedge shape that will accommodate your thumb.
Separate Thumb
Now we'll separate the thumb stitches from the main body of the glove.
Next Row (RS): K15, P2, K8, P2, K6, place these 6 sts on a holder, CO 2 sts, K15 (now 50 sts on needle).
Continue in pattern (cable panel over center 16 sts, stockinette on sides) for 2 more inches (about 14 rows), ending with a WS row.
Note: The 2 cast-on stitches bridge the gap between the thumb and hand, creating a comfortable opening for your thumb to move freely.
Finger Section (Decrease for Shaping)
Now we'll decrease stitches to shape the top of the glove, creating a comfortable fit around your fingers.
Row 1 (RS): K13, SSK, P2, K8, P2, K2tog, K13 (48 sts).
Row 2 (WS): Purl all sts.
Row 3 (RS): K12, SSK, P2, C4F, C4B, P2, K2tog, K12 (46 sts).
Row 4 (WS): Purl all sts.
Row 5 (RS): K11, SSK, P2, K8, P2, K2tog, K11 (44 sts).
Row 6 (WS): Purl all sts.
Row 7 (RS): K10, SSK, P2, C4B, C4F, P2, K2tog, K10 (42 sts).
Row 8 (WS): Purl all sts.
Row 9 (RS): K9, SSK, P2, K8, P2, K2tog, K9 (40 sts).
Row 10 (WS): Purl all sts.
Bind off loosely in pattern (knit the knits, purl the purls). This creates a stretchy edge that will comfortably fit over your fingers.
Thumb
Now let's finish the thumb opening:
Pick up the 6 sts from holder, plus 2 sts from the CO edge, plus 2 sts from the side of the hand (10 sts total).
Work in stockinette stitch (knit RS, purl WS) for 1.5 inches (about 10 rows).
Next Row (RS): K2tog across (5 sts).
Cut yarn, thread through remaining sts, pull tight, and weave in end.
Finishing
With MC, sew the side seam from the cuff up to the thumb, then continue sewing the small gap between thumb and fingers. Weave in all ends. Repeat for second glove.
Tips for Success
- Keep your tension consistent – especially when working the cable rows. Cables naturally pull the fabric tighter, so don't be alarmed if the cable section looks slightly narrower than the stockinette sections.
- Use a cable needle that matches your needle size – this prevents stretched stitches at the cable crossings.
- Mark your right side – since the pattern is worked flat, it's easy to lose track of which row you're on. Use a stitch marker or a piece of contrasting yarn to mark the RS.
- Block your finished gloves – this will even out the stitches and make the cables look more defined. Wet block by soaking in lukewarm water, gently squeezing out excess, and laying flat to dry.
Customization Ideas
Once you've mastered this pattern, try these variations:
- Color Swap: Reverse the colors – use heather grey as the main color and moss green for the cuff.
- Longer Cuffs: Add 1-2 inches to the ribbed cuff for extra warmth.
- Full Fingers: Continue the stockinette sections to create full-finger gloves.
- Different Cable: Substitute the C4F/C4B combination with a different cable pattern for a unique look.
These Mossy Glen Cable Fingerless Gloves are the perfect project for cozy autumn evenings or as a thoughtful handmade gift. The combination of rich forest colors and intricate cables creates a timeless accessory that will be treasured for years to come. Happy knitting!