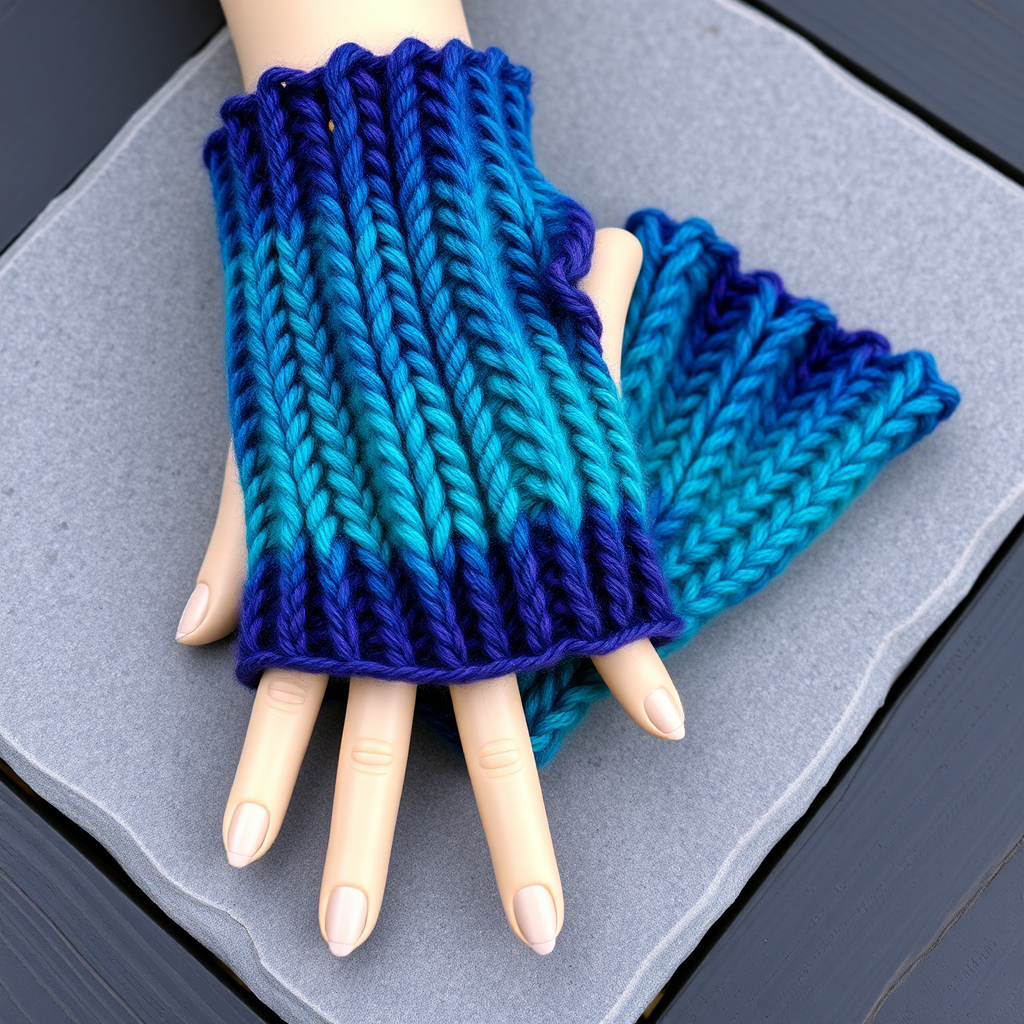
Celestial Drift Fingerless Gloves Free Pattern – Knit with Star Stitches and Gradient Yarn

Celestial Drift Fingerless Gloves: A Free Knitting Pattern for Starry-Eyed Beginners
There’s something deeply comforting about wrapping your hands in a piece of the night sky. The Celestial Drift Fingerless Gloves capture that quiet magic with a soft gradient that flows from deep midnight indigo to shimmering silver. The star stitch pattern creates a subtle, twinkling texture across the fabric—like distant constellations caught in warm yarn.
Whether you're a seasoned knitter looking for a quick, satisfying project or a beginner ready to try something new, this pattern is designed to be accessible, forgiving, and absolutely beautiful. The worsted weight yarn works up quickly, and the fingerless design means you can keep your hands free for typing, texting, or sipping hot cocoa while staying cozy.
Let’s dive into this celestial journey together. By the end of this post, you’ll have a pair of gloves that feel like a gentle hug from the universe itself.
Materials Needed
Before we begin, gather your supplies. Here’s everything you’ll need to bring these starry gloves to life:
- Yarn: Worsted weight yarn in a gradient (e.g., Malabrigo Rios in "Indigo" to "Silver") – 200 yards. If you can’t find a gradient, you can use two complementary solid colors and switch halfway through.
- Needles: US 6 (4.0 mm) knitting needles – either double-pointed needles (DPNs) or a circular needle for magic loop, depending on your preference.
- Stitch markers – at least 2
- Stitch holder or scrap yarn – for the thumb stitches
- Tapestry needle – for weaving in ends
- Scissors
Gauge: 20 stitches and 26 rows = 4 inches in stockinette stitch. Getting the right gauge is important for a comfortable fit, so take a moment to knit a small swatch before you start.
Step-by-Step Instructions
This pattern is worked in the round, which means you’ll be knitting a seamless tube. Don’t worry if you’ve never worked in the round before—it’s easier than it sounds, and the results are worth it. Here’s everything you need to know, step by step.
Size and Abbreviations
Size: Adult medium (7.5 inches around palm, 8 inches long)
Abbreviations:
- CO: cast on
- K: knit
- P: purl
- K2tog: knit two together (right-leaning decrease)
- SSK: slip, slip, knit (left-leaning decrease)
- YO: yarn over
- St st: stockinette stitch (knit on RS, purl on WS – but since we’re working in the round, you’ll knit every round)
- M1L: make one left (increase)
- M1R: make one right (increase)
Special Stitch – Star Stitch (worked over 2 stitches):
Insert your right needle into the second stitch on the left needle as if to knit, knit it but do not drop it. Then knit the first stitch on the left needle, and drop both stitches off the left needle. This creates a twisted, star-like bump that catches the light beautifully.
Instructions (Make 2 – they’re identical!)
Step 1: The Cuff
CO 40 stitches. Join in the round, being very careful not to twist your stitches. Place a stitch marker at the beginning of the round to keep track.
Work in K2, P2 ribbing for 2 inches. This creates a snug, stretchy cuff that will keep the gloves in place. The ribbing should feel comfortable but not tight around your wrist.
Step 2: The Main Body – Star Stitch Pattern
Switch to stockinette stitch (knit every round) and begin the star stitch pattern:
- Round 1: *K2, work Star Stitch over the next 2 stitches* – repeat from * to end of round.
- Round 2: Knit all stitches.
Repeat Rounds 1-2 for 4 inches, or until the glove reaches the base of your thumb. The star stitch will create a beautiful, textured pattern that looks like tiny twinkling stars scattered across the fabric.
Pro tip: If you’re new to the star stitch, practice on a small swatch first. It’s a simple two-step maneuver, but it takes a few tries to get the rhythm.
Step 3: Thumb Gusset
Now we’ll shape the thumb. Place a marker after the first 4 stitches of the round. This will be your guide for increases.
Increase round: K1, M1L, knit to the marker, M1R, K1 (this adds 2 stitches to the round).
Work one round even (knit all stitches).
Repeat the increase round every 3 rounds until you have 12 stitches between the markers. You should now have 52 stitches total on your needles.
Step 4: Thumb Opening
On the next round, knit to the first marker. Remove the marker and place the next 12 stitches onto a stitch holder or a piece of scrap yarn. These will become the thumb later.
CO 2 stitches over the gap (using the backward loop method or your preferred cast-on), then knit to the end of the round. You’re back to 42 stitches total.
Step 5: The Hand
Continue in the star stitch pattern (as established in Step 2) for 2 more inches, or until the glove reaches the base of your fingers. Try it on if you can—you want the glove to feel comfortable and not too long.
Step 6: Finger Edging
Work in K2, P2 ribbing for 1 inch. This will create a neat, finished edge that keeps the glove in place.
Bind off loosely in pattern. Important: If you bind off too tightly, the edge will pucker. Use a larger needle for binding off if needed, or bind off with a relaxed tension.
Step 7: The Thumb
Pick up the 12 stitches from your holder, plus 2 stitches from the CO edge (14 stitches total). Distribute them onto your needles, being careful not to twist.
Knit in stockinette stitch (knit every round) for 1 inch. This gives you a comfortable thumb that covers the base of your thumb without being too long.
Bind off loosely.
Step 8: Finishing
Weave in all ends with your tapestry needle. Take your time here—neat ends make a huge difference in the final look.
Block gently to even out your stitches. Wet blocking works beautifully with worsted weight yarn: soak the gloves in lukewarm water with a drop of wool wash, gently squeeze out excess water, and lay flat to dry. This will relax the yarn and make your star stitches pop.
Tips for Success
- Gauge matters: If your gloves are too tight or too loose, adjust your needle size. Going up a size makes the gloves looser; going down makes them snugger.
- Gradient yarn: If you’re using a gradient yarn, the color transition will happen naturally as you knit. If you’re using two solid colors, switch to the second color when you start the main body or at the thumb opening—your choice!
- Make it yours: Feel free to adjust the length of the cuff or the hand to fit your preferences. This pattern is a starting point, not a rulebook.
Wrap Up
And there you have it—your very own pair of Celestial Drift Fingerless Gloves. These are perfect for chilly mornings, cozy evenings, or as a thoughtful handmade gift for someone who loves the night sky.
The star stitch is a joy to knit once you get the hang of it, and the gradient yarn makes every pair unique. I’d love to see your finished gloves—tag me in your photos and share your celestial creations with the knitting community.
Happy knitting, and may your hands always be wrapped in starlight.