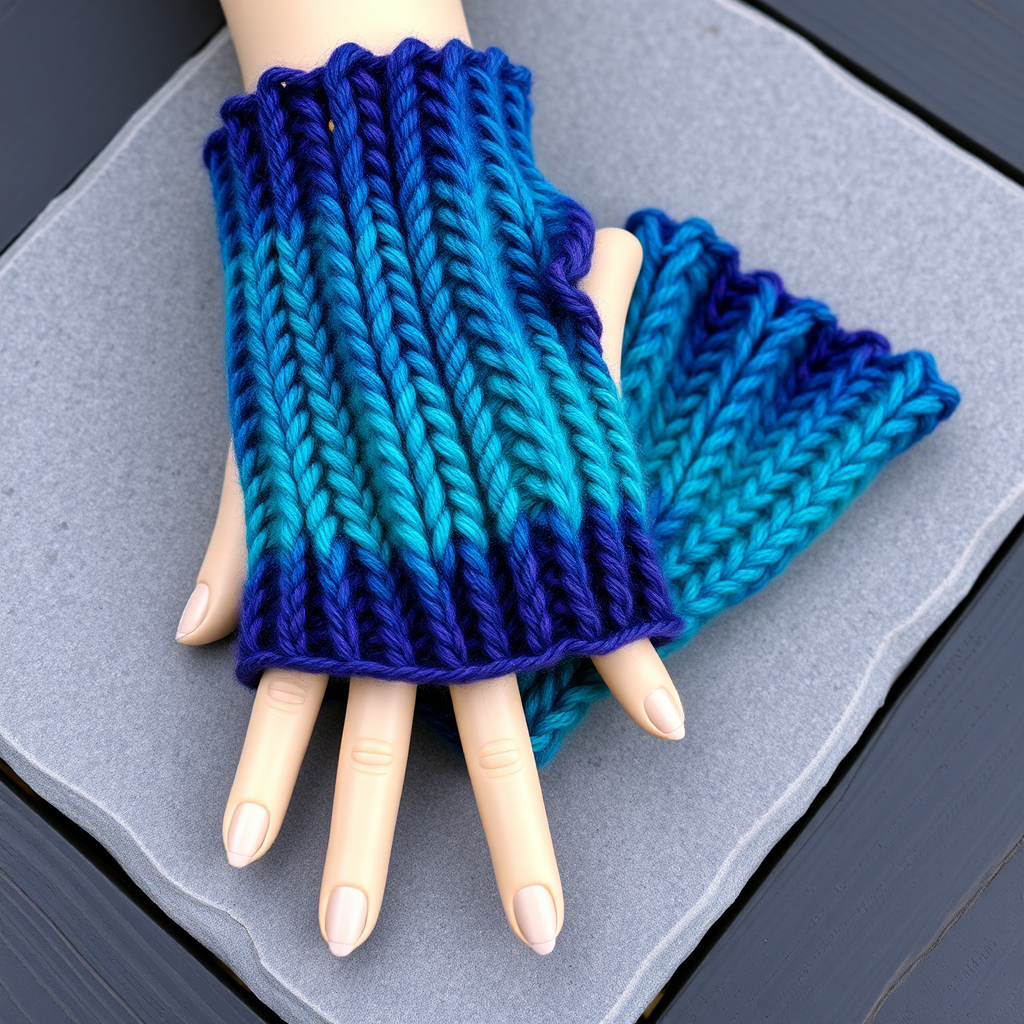
Ember Dune Fingerless Gloves Free Pattern – Textured Sand Stitch Knit

Wrap Your Hands in Desert Warmth: The Ember Dune Fingerless Gloves
There's something magical about a knitting project that transports you—even if it's just to a cozy corner with a warm cup of tea. The Ember Dune Fingerless Gloves do exactly that. Inspired by the rolling, sun-kissed sands of the desert, this free knitting pattern features a mesmerizing textured ripple stitch that catches the light beautifully. The combination of rich burnt orange and soft cream sand creates a sophisticated, artisanal look that's perfect for cool mornings, typing at your desk, or adding a handmade touch to any outfit.
Whether you're a seasoned knitter looking for a quick, satisfying project or a confident beginner ready to try something new, these wrist warmers are an absolute joy to make. The pattern is worked flat in two pieces and seamed, leaving a comfortable opening for your thumb. Let's dive into this cozy adventure!
Materials Needed
Before you begin, gather your supplies. This project is wonderfully portable and requires minimal equipment.
- Yarn: Worsted weight yarn in two colors:
- Main Color (MC): Burnt Orange (approx. 150g / 300 yards)
- Contrast Color (CC): Cream Sand (approx. 50g / 100 yards)
- Needles: US 7 (4.5 mm) knitting needles, or the size needed to obtain gauge.
- Notions: Tapestry needle for weaving in ends and seaming, stitch holders or scrap yarn, stitch markers.
- Gauge: 20 stitches and 28 rows = 4 inches in stockinette stitch (after blocking). Always check your gauge to ensure a perfect fit!
Step-by-Step Instructions
This pattern is worked flat in two pieces (left and right glove) and seamed, leaving an opening for the thumb. The textured ripple stitch is created with a combination of knit, purl, and slipped stitches. Don't be intimidated by the slipped stitches—they're simple to do and create that gorgeous, undulating texture.
Abbreviations
- K = knit
- P = purl
- K2tog = knit two together
- P2tog = purl two together
- Sl1 = slip one stitch purlwise (unless otherwise stated)
- YO = yarn over
- MC = main color (Burnt Orange)
- CC = contrast color (Cream Sand)
- wyif = with yarn in front
The Ripple Stitch Pattern (Multiple of 6 + 2)
This is the heart of the design. The slipped stitches create long, floating strands of the contrast color that give the fabric its unique, textured look.
- Row 1 (RS): With MC, K2, *P2, K2; repeat from * to end.
- Row 2 (WS): With MC, P2, *K2, P2; repeat from * to end.
- Row 3 (RS): With CC, K2, *Sl1 wyif, K1, P2, K1; repeat from * to last 2 sts, Sl1 wyif, K1.
- Row 4 (WS): With CC, P2, *Sl1 wyif, P1, K2, P1; repeat from * to last 2 sts, Sl1 wyif, P1.
- Row 5 (RS): With MC, K2, *P2, K2; repeat from * to end.
- Row 6 (WS): With MC, P2, *K2, P2; repeat from * to end.
- Row 7 (RS): With CC, K2, *K1, Sl1 wyif, P2, Sl1 wyif; repeat from * to last 2 sts, K2.
- Row 8 (WS): With CC, P2, *P1, Sl1 wyif, K2, Sl1 wyif; repeat from * to last 2 sts, P2.
Repeat rows 1-8 for the pattern.
Left Glove
Step 1: Cuff
Cast on 38 stitches with MC. Work in 2x2 ribbing (K2, P2) for 2 inches (about 12 rows). This creates a snug, comfortable cuff.
Step 2: Main Body
Switch to the ripple stitch pattern, starting with Row 1. Work even in the pattern until the piece measures 4 inches from the cast-on edge, ending with a wrong-side (WS) row. This is where the thumb gusset will begin.
Step 3: Thumb Gusset
The gusset is a series of increases that shape the thumb. Here's how to work it:
- Next Row (RS): Work in pattern across the first 18 stitches, place a marker, M1 (increase by picking up the bar between stitches and knitting it), K2, M1, place a marker, work in pattern to end. (40 stitches)
- Continue in the pattern, increasing 2 stitches every 4th row inside the marked section (between the markers) until you have 10 stitches between the markers (about 5 increase rows).
- Work even until the piece measures 6 inches from the cast-on edge, ending with a WS row.
Step 4: Separate the Thumb
Now you'll divide the work to create the thumb opening.
- Next Row (RS): Work in pattern across the first 18 stitches, place these 18 stitches on a holder for the hand.
- Work across the 10 thumb stitches, then cast on 2 stitches at the end of the thumb section (for the underarm), place these 12 stitches on a holder for the thumb.
- Work in pattern across the remaining 18 stitches to the end. (36 stitches for the hand)
Work even in the pattern on these 36 stitches until the piece measures 8 inches from the cast-on edge (or your desired length to the knuckles), ending with a WS row.
Step 5: Top Edging
Switch back to MC and work in 2x2 ribbing for 1 inch (about 6 rows). Bind off loosely in rib. This creates a neat, stretchy top edge.
Step 6: Thumb
Place the 12 thumb stitches onto your needles. With MC, pick up and knit 2 stitches from the cast-on underarm edge. Work in 2x2 ribbing for 0.5 inch. Bind off loosely. This creates a comfortable, flexible thumb opening.
Right Glove
Work the same as the left glove, but mirror the thumb gusset placement. Instead of placing the increases after the first 18 stitches, you will place them before the last 18 stitches. In practice, this means: work 18 stitches, M1, K2, M1, then work to the end. This ensures the thumb sits on the correct side for your right hand.
Finishing
Step 1: Seaming
Sew the side seams using the mattress stitch. Important: Leave a 2-inch opening for the thumb, aligning it with the thumb gusset. This opening is what allows your thumb to poke through comfortably.
Step 2: Weave in Ends
Use your tapestry needle to weave in all loose ends securely, both at the cast-on/bind-off edges and where you changed colors.
Step 3: Blocking
Block the gloves gently to shape. This helps even out the stitches and really makes the textured ripple pattern pop. Lay them flat to dry.
And there you have it—a beautiful pair of Ember Dune Fingerless Gloves! The combination of the warm burnt orange and the subtle cream sand creates a stunning, desert-inspired accessory. These make wonderful gifts for friends, family, or a well-deserved treat for yourself. Happy knitting!