Aurora Borealis Fingerless Gloves Free Knitting Pattern – Iridescent Cable Knit
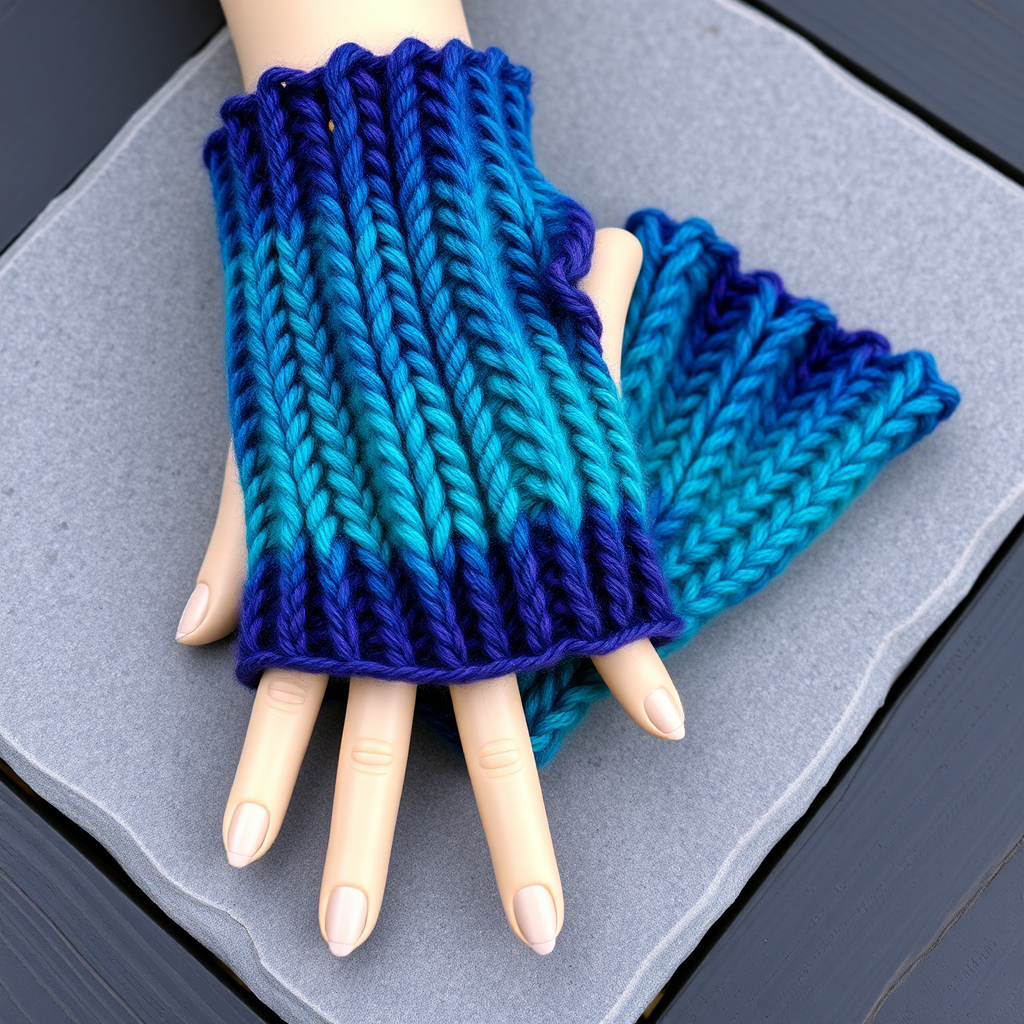
Wrap Your Hands in the Northern Lights: The Aurora Borealis Fingerless Gloves
There are some knitting projects that are simply more than just fabric and yarn—they are experiences. The Aurora Borealis Fingerless Gloves are exactly that. This free knitting pattern captures the ethereal, shimmering dance of the northern lights and translates it into a cozy, textured accessory for your hands. Using a clever combination of gradient yarn and twisted cables, these gloves create a unique, iridescent effect that is both eye-catching and deeply satisfying to knit. Whether you are looking for a statement piece for a chilly evening or a heartfelt handmade gift, this pattern offers a rewarding journey into cable knitting that results in a stunning, wearable work of art.
In this comprehensive guide, we will walk you through every step, from gathering your materials to binding off the final stitch. Designed with clarity in mind, these instructions are detailed enough for a confident beginner to follow, yet engaging for seasoned knitters looking for a quick, beautiful project. Let’s cast on and bring the magic of the aurora to your fingertips.
Materials Needed: Gathering Your Aurora Palette
Before you begin, ensure you have all the necessary tools and yarn. The magic of this pattern relies heavily on the yarn choice, so choose a colorway that inspires you.
- Yarn: Worsted weight yarn in a gradient or self-striping colorway (e.g., blue-purple-green), approximately 200 yards (183 m). The gradient is crucial for the "aurora" effect, as it mimics the shifting colors of the sky.
- Needles: US 6 (4.0 mm) knitting needles. You will need a set of 4 double-pointed needles (DPNs) or a circular needle long enough for the magic loop method.
- Notions: Stitch markers (at least 4), a cable needle, a tapestry needle for weaving in ends, and a stitch holder or scrap yarn for the thumb stitches.
- Gauge: 22 stitches and 28 rows = 4 inches (10 cm) in stockinette stitch. Always check your gauge to ensure a proper fit.
Step-by-Step Instructions: Knitting the Aurora Borealis Gloves
This pattern is worked in the round from the cuff up. We will create the right glove first, then the left, with a simple mirror-image adjustment for the thumb. The cable pattern is the star of the show, creating a beautiful vertical texture on the back of your hand.
Abbreviations & Special Stitches
Familiarize yourself with these abbreviations before you start:
- CO: Cast on
- K: Knit
- P: Purl
- C4F: Cable 4 front (slip 2 stitches to cable needle, hold in front, knit 2, knit 2 from cable needle)
- C4B: Cable 4 back (slip 2 stitches to cable needle, hold in back, knit 2, knit 2 from cable needle)
- M1L: Make 1 left (increase)
- M1R: Make 1 right (increase)
- K2tog: Knit 2 together (decrease)
- SSK: Slip slip knit (decrease)
- BO: Bind off
Getting Started: The Cuff
Size: Women's medium (7.5 in / 19 cm hand circumference). You can adjust the size by adding or removing stitches in multiples of 4.
Right Glove
Step 1: CO 40 stitches. Distribute them evenly across your 4 double-pointed needles (10 stitches per needle). Join in the round, being extremely careful not to twist your cast-on edge. Place a stitch marker to indicate the beginning of the round.
Step 2: Work the cuff in K2, P2 ribbing for 2 inches (5 cm). This creates a snug, stretchy opening that will keep the glove securely on your wrist.
The Hand: Creating the Cable Pattern
Once the cuff is complete, you will begin the main cable pattern. This pattern is a 4-round repeat that creates a beautiful, twisted rope effect.
Round 1: *K4, P1, C4F, P1*; repeat from * to * around (this will be 5 repeats total).
Round 2: *K4, P1, K4, P1*; repeat from * to * around.
Round 3: *K4, P1, C4B, P1*; repeat from * to * around.
Round 4: Same as Round 2.
Repeat Rounds 1-4 until the piece measures 3 inches (7.5 cm) from the cast-on edge, ending with a Round 4. This establishes the beautiful cable panel that will run up the back of your hand.
Shaping the Thumb Gusset
Now we will add stitches to create a comfortable, anatomical thumb opening. The gusset is increased on the palm side of the glove.
Round 1 (Increase Round): Work in pattern across the first 20 stitches (this is the back of the hand). Place a marker. M1R, K1, M1L. Place a second marker. Work in pattern across the remaining 20 stitches (the palm).
Round 2: Work in pattern, knitting the increased stitches (they will be knit stitches).
Round 3 (Increase Round): Work in pattern to the first marker. M1R, K to the second marker, M1L. Work in pattern to the end of the round.
Repeat Rounds 2 and 3 until you have 13 stitches between the markers. You will have increased every other round, 6 times total. The gusset is now complete.
Separating the Thumb
Next Round: Work in pattern to the first marker. Remove the marker. Place the 13 thumb stitches onto a stitch holder or a piece of waste yarn. Remove the second marker. CO 1 stitch (this is a "bridge" stitch to close the gap). Work in pattern to the end of the round. You should now have 40 stitches on your needles again.
Continue working in the cable pattern (Rounds 1-4) until the glove measures 7 inches (18 cm) from the cast-on edge, or until it reaches the desired length to cover the base of your fingers.
Finishing the Hand and Thumb
Finger Edging: Work K2, P2 ribbing for 1 inch (2.5 cm). BO loosely in rib. This provides a neat, stretchy finish at the top of the glove.
Thumb: Place the 13 thumb stitches back onto your needles. Pick up and knit 3 stitches from the bridge you created (total 16 stitches). Join in the round. Work K2, P2 ribbing for 0.5 inch (1.3 cm). BO loosely in rib.
Knitting the Left Glove (Mirror Image)
Work the left glove the same as the right, but you will place the thumb gusset on the opposite side to create a mirror image. To do this, work the first 20 stitches in pattern, place a marker, M1R, K1, M1L, place a second marker, and work the remaining 20 stitches in pattern. Continue the increases exactly as you did for the right glove.
Final Touches: Weaving and Blocking
Weave in all loose ends carefully with your tapestry needle, making sure to secure them on the inside of the glove. To finish, block the gloves gently. Wet blocking or steam blocking will help even out the cables and give the gloves a professional, polished look. Lay them flat to dry.
And there you have it—a stunning pair of Aurora Borealis Fingerless Gloves. The combination of the gradient yarn and the twisted cables creates a truly unique accessory that is sure to draw compliments. Enjoy the process, and wear your handcrafted northern lights with pride!


