Heirloom Rosebud Baby Booties Free Pattern – Crochet with Cable Stitches and Satin Ribbon
Heirloom Rosebud Baby Booties: A Timeless Crochet Pattern
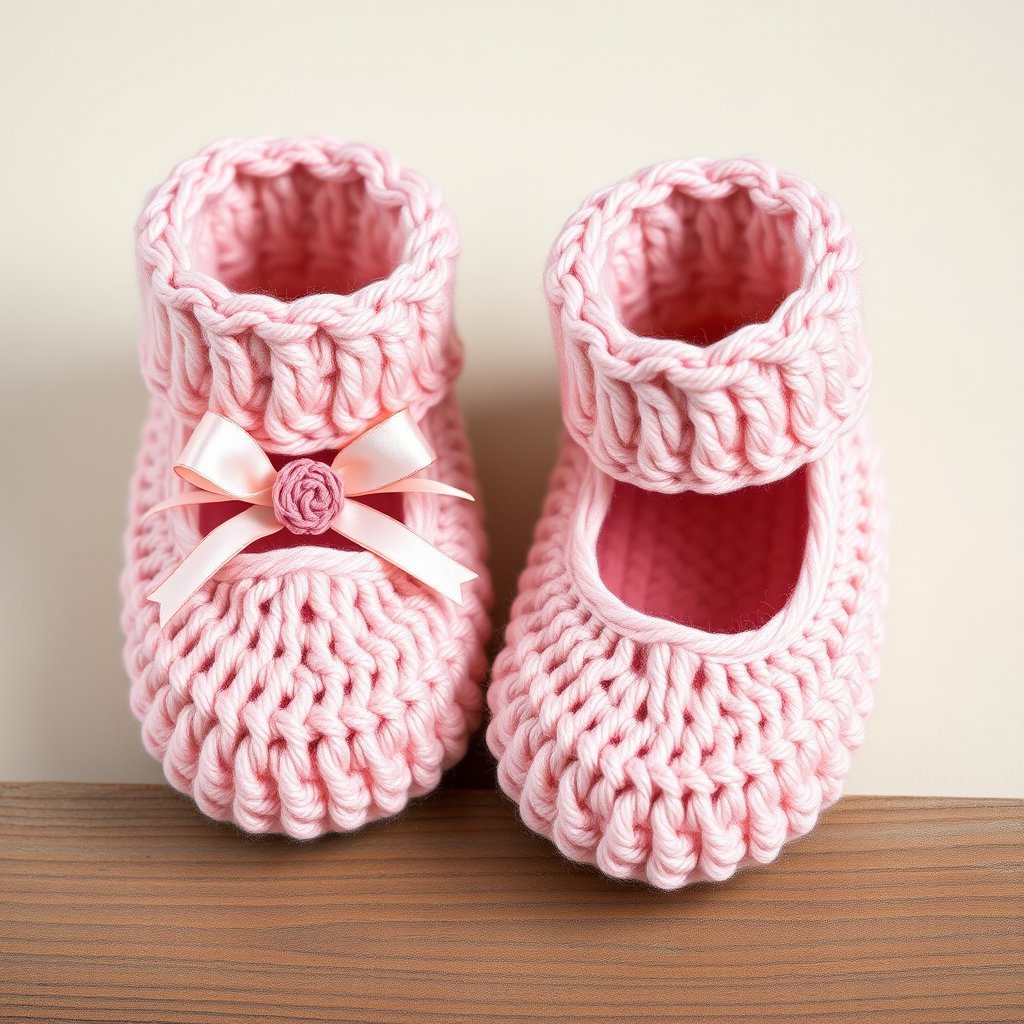
There are few gifts more precious than something handmade for a new arrival. These Heirloom Rosebud Baby Booties are designed to become a cherished keepsake—delicate cable twists, a soft satin ribbon, and a tiny crocheted rosebud combine to create a pair of booties that look like they belong in a vintage photograph. Whether you're crafting for a baby shower, a newborn photoshoot, or simply because you love the art of heirloom crochet, this pattern is as rewarding to make as it is beautiful to give.
The pattern uses simple stitches—single crochet, double crochet, and a crossed double crochet technique—to create a textured, romantic finish. The blush pink yarn and satin ribbon give it a soft, matte elegance that feels both cozy and refined. Let's get started.
Materials Needed
Before you begin, gather the following supplies. This project is perfect for a single afternoon of crafting.
- Yarn: DK weight cotton or baby soft yarn in blush pink (approximately 50g). A cotton blend is ideal for breathability and stitch definition.
- Crochet Hook: 3.5mm (E) crochet hook.
- Satin Ribbon: Approximately 30cm (12 inches) of narrow satin ribbon (about 6mm wide) in a matching or contrasting shade.
- Yarn Needle: For weaving in ends and sewing the rosebud.
- Scissors: For cutting yarn and ribbon.
Gauge: 20 stitches x 24 rows = 4 inches in single crochet. Achieving the correct gauge ensures the booties fit a newborn (approximately 0-3 months). If your gauge is off, adjust your hook size accordingly.
Step-by-Step Instructions
This pattern is worked in three main parts: the sole, the upper, and the cable band. Follow each section carefully, and you'll have a perfect pair of booties in no time.
Part 1: The Sole (Make 2)
The sole is worked in continuous rounds (no joining) to create a smooth, oval shape.
- Foundation: Chain 10.
- Round 1: Work 2 single crochet (sc) into the 2nd chain from the hook. Sc in the next 7 chains. Work 3 sc into the last chain (this turns the corner). Now, working on the opposite side of the foundation chain, sc in the next 7 chains. Work 2 sc into the last remaining chain. You should have 20 stitches total.
- Round 2: Work 2 sc into each of the next 2 stitches. Sc in the next 7 stitches. Work 2 sc into each of the next 3 stitches. Sc in the next 7 stitches. Work 2 sc into each of the next 2 stitches. You should now have 28 stitches.
- Round 3: (Work 2 sc into the next stitch, sc in the next stitch) twice. Sc in the next 7 stitches. (Work 2 sc into the next stitch, sc in the next stitch) 3 times. Sc in the next 7 stitches. (Work 2 sc into the next stitch, sc in the next stitch) twice. You should now have 36 stitches.
- Finish: Fasten off and weave in the end. Repeat to make the second sole.
Part 2: The Upper
Now we'll build the body of the bootie. This section is worked in continuous rounds to create a seamless cup for the foot.
- Attach Yarn: Attach your yarn at the center back of the sole (the middle of the heel area).
- Round 1: Sc around the entire sole, working in the back loops only. This creates a neat, defined edge. (36 stitches)
- Rounds 2-3: Sc in each stitch around. (36 stitches)
- Round 4 (Toe shaping): Sc in the first 14 stitches. Work (sc2tog) 4 times. Sc in the last 14 stitches. (32 stitches)
- Round 5: Sc in the first 12 stitches. Work (sc2tog) 4 times. Sc in the last 12 stitches. (28 stitches)
- Round 6: Sc in the first 10 stitches. Work (sc2tog) 4 times. Sc in the last 10 stitches. (24 stitches)
- Round 7: Sc in each stitch around. (24 stitches)
Part 3: The Cable Band
This is where the magic happens. The crossed double crochet creates a beautiful, twisted cable effect that gives the booties their heirloom character.
- Round 8 (Cable pattern): Chain 3 (this counts as your first double crochet). Double crochet (dc) in the next stitch. *Skip the next 2 stitches. Dc in the next stitch. Then, dc in the 2 skipped stitches (working in front of the stitch you just made).* Repeat from * to * around. Join with a slip stitch to the top of the beginning chain-3. You will have 12 crossed double crochet groups.
- Round 9: Chain 3 (counts as dc). Dc in each stitch around. Join with a slip stitch. (24 double crochet)
- Round 10: Chain 1. Sc in each stitch around. Join with a slip stitch. Fasten off and weave in all ends.
Finishing Touches
Now for the part that makes these booties truly special.
- Weave in Ends: Use your yarn needle to carefully weave in any remaining loose ends inside the bootie.
- Thread the Ribbon: Cut a 30cm (12 inch) piece of satin ribbon. Starting at the front center of the bootie, weave the ribbon in and out through the holes created by the cable band (Round 8). Work your way around until you return to the front.
- Tie the Bow: Tie the ribbon into a neat, secure bow at the front of the bootie. Trim the ribbon ends at an angle to prevent fraying.
- Optional Rosebud: To add the signature rosebud, create a small flower: Chain 4 and join with a slip stitch to form a ring. Chain 3, work 4 double crochet into the ring, chain 3, and slip stitch into the ring. Fasten off, leaving a long tail. Sew this tiny rosebud to the center of the ribbon bow.
Repeat the entire process for the second bootie. Place them side-by-side, and you'll have a stunning, heirloom-quality pair of booties ready to be gifted. The soft blush pink, the intricate cable stitch, and the delicate ribbon make these a true labor of love—a tiny treasure that will be remembered for years to come.