Amigurumi Patterns
Enchanted Forest Fairy Amigurumi Free Pattern
Anonymous
•
July 03, 2026
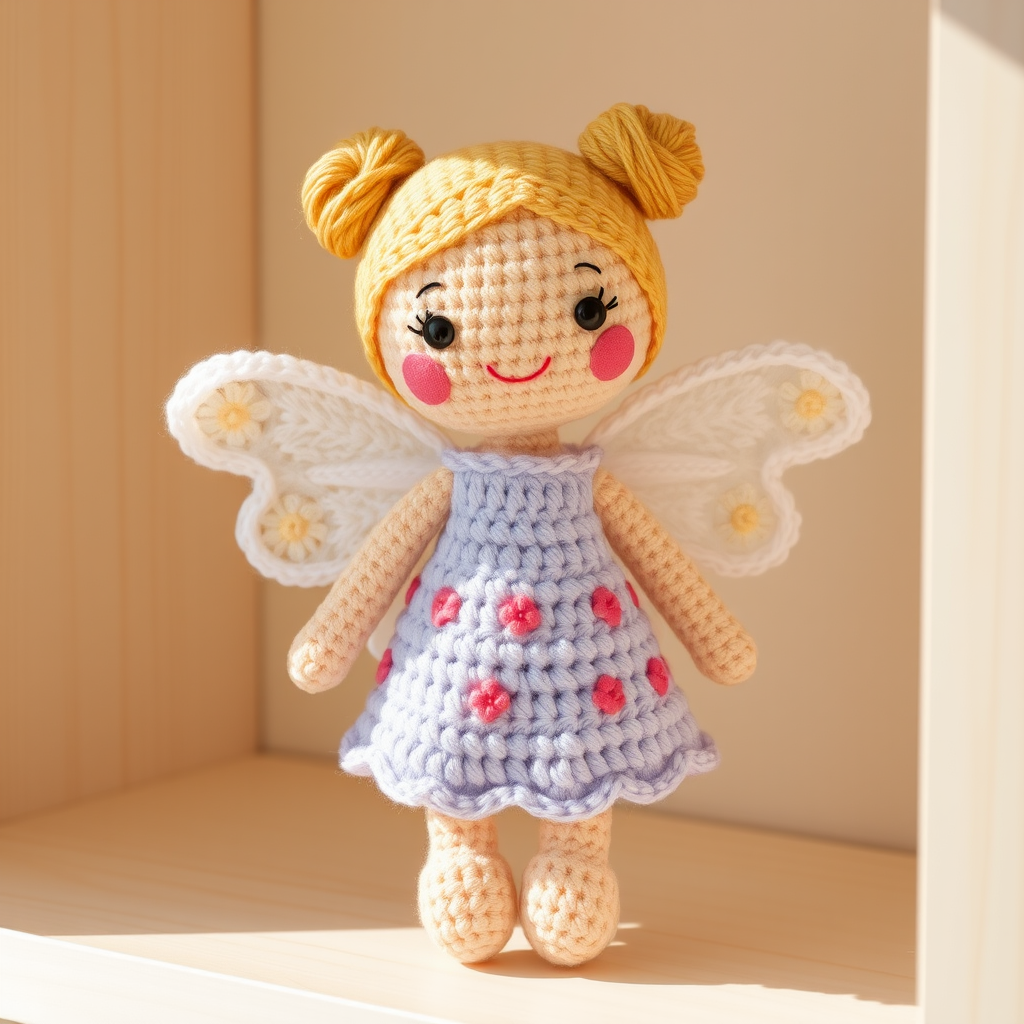
Enchanted Forest Fairy Amigurumi Free Pattern
Introduction
Bring a touch of magic to your crafting with this delightful Enchanted Forest Fairy Amigurumi. Perfect for adding whimsy to any space, this pattern guides you through creating a charming fairy with delicate wings and a playful expression. Whether you're looking to make a special gift or simply want to enhance your crafting skills, this project is perfect for beginners and seasoned crafters alike!
Materials Needed
- Yarn: Lightweight cotton yarn in pastel shades (peach for skin, lavender for dress, white for wings, golden yellow for hair)
- Hook: 3.0 mm crochet hook
- Embroidery thread: Black for eyes, pink for smile, and additional colors for embellishments
- Stuffing: Polyester fiberfill or similar stuffing material
- Scissors
- Tapestry needle for sewing pieces together
Step-by-Step Instructions
1. Create the Head
- Begin with a magic ring. To make a magic ring, wrap the yarn around your fingers to form a loop, insert your hook into the loop, yarn over, and pull through.
- Make 6 single crochets (sc) into the magic ring (6 sts).
- Round 2: Increase (inc) in each stitch around (12 sts).
- Round 3: (Sc in next st, inc) around (18 sts).
- Round 4: (Sc in next 2 sts, inc) around (24 sts).
- Rounds 5-10: Sc in each stitch around (24 sts).
- Round 11: (Sc in next 2 sts, decrease (dec)) around (18 sts).
- Round 12: (Sc in next st, dec) around (12 sts).
- Round 13: Dec around (6 sts). Fasten off, leaving a long tail for sewing.
2. Create the Body
- Begin with a magic ring. Make 6 sc into the ring (6 sts).
- Round 2: Inc in each stitch around (12 sts).
- Round 3: (Sc in next st, inc) around (18 sts).
- Rounds 4-8: Sc in each stitch around (18 sts).
- Round 9: (Sc in next st, dec) around (12 sts).
- Round 10: Dec around (6 sts). Fasten off, leaving a long tail for sewing.
3. Create the Wings
- Row 1: Chain (ch) 6, sc in 2nd ch from hook and across (5 sts).
- Row 2: Ch 1, turn, inc in first stitch, sc in next 3 sts, inc in last stitch (7 sts).
- Row 3: Ch 1, turn, sc across (7 sts).
- Row 4: Ch 1, turn, dec in first stitch, sc in next 3 sts, dec in last stitch (5 sts).
- Fasten off. Repeat for the second wing.
4. Assembly
- Using the long tail from the head, sew the head securely to the top of the body.
- Attach the wings to the back of the body using the long tail from the body.
- Embroider the facial features using black embroidery thread for the eyes and pink for the smile.
- Add any additional embellishments like tiny flowers or beads to the fairy's dress for extra charm.
Your Enchanted Forest Fairy Amigurumi is now complete! This whimsical creation stands about 6 inches tall, with a round head and a slightly elongated body. Enjoy showcasing your new magical friend in your home or gifting it to someone special!


