Coral Cove Sea Turtle Appliqué Free Pattern – Knit a Textured Ocean Charm
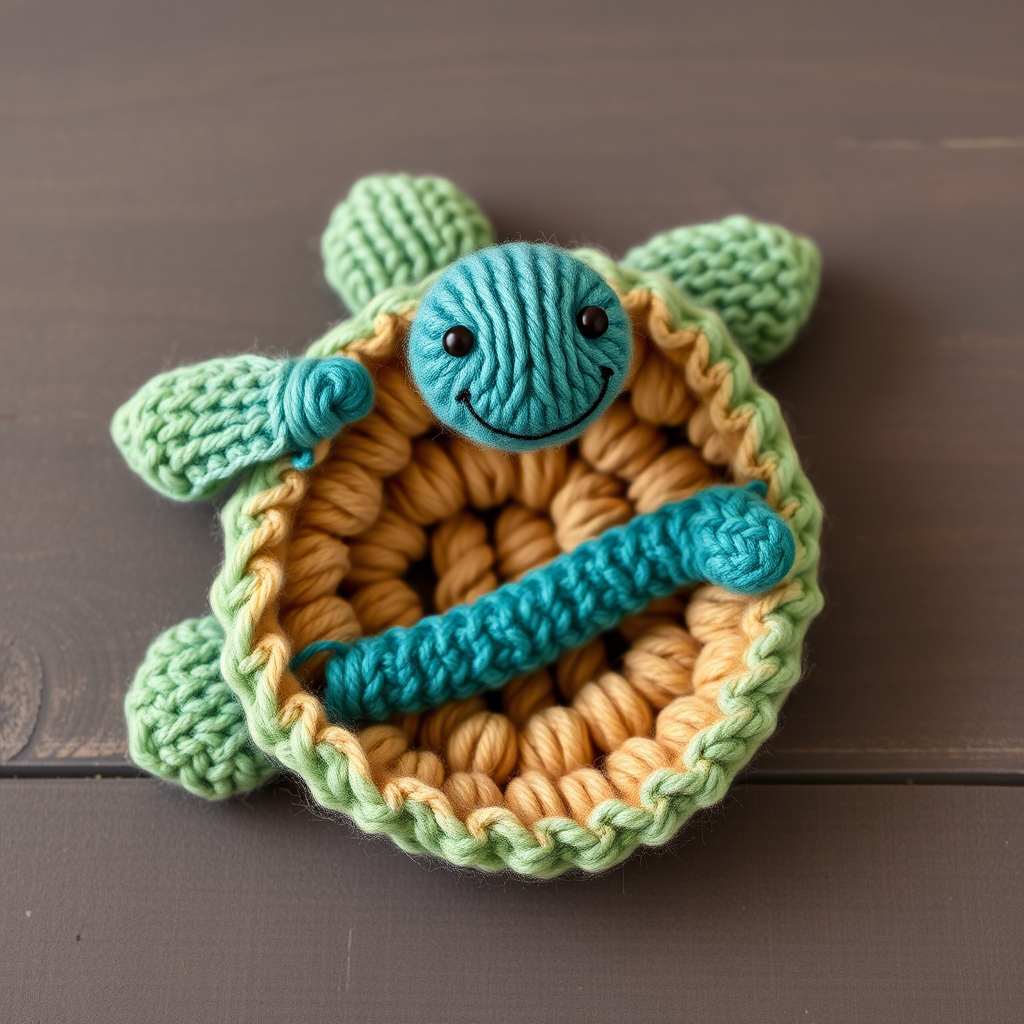
Coral Cove Sea Turtle Appliqué: A Beginner-Friendly Knitting Pattern
Dive into a handmade ocean treasure with this adorable knitted sea turtle appliqué! Featuring a richly textured, lightly stuffed shell and gentle teal flippers, this charming project is perfect for embellishing baby blankets, tote bags, or adding a touch of coastal whimsy to your nursery decor. Whether you're a seasoned knitter or just starting your amigurumi journey, this pattern is designed to be simple, satisfying, and utterly delightful. Let's cast on and bring this little ocean friend to life!
Materials Needed
Before we begin, gather your supplies. This project uses small amounts of yarn, making it a great stash-buster!
- Yarn: Worsted weight cotton or acrylic yarn in the following colors:
- Sage Green (for the shell top)
- Warm Sand (for the belly)
- Teal (for the head, flippers, and tail)
- Dark Brown (for embroidering the eyes and smile)
- Needles: US 5 (3.75 mm) knitting needles (or a crochet hook if you prefer, though this pattern is written for knitting).
- Notions: Tapestry needle for sewing pieces together, scissors, and a small amount of polyester stuffing for a plump shell.
- Gauge: 20 stitches and 28 rows = 4 inches in stockinette stitch. Note: Gauge is not critical for this project, but maintaining consistent tension will ensure your pieces look neat and even.
Step-by-Step Instructions
This pattern is worked flat in pieces and sewn together. Follow each step carefully, and you'll have a beautiful turtle in no time!
Abbreviations
- CO: Cast on
- K: Knit
- P: Purl
- K2tog: Knit two together (decrease)
- Kfb: Knit front and back (increase)
- St(s): Stitch(es)
- BO: Bind off
- RS: Right side
- WS: Wrong side
Shell (Make 2 Pieces)
You will knit two identical shell shapes: one in sage green for the top and one in warm sand for the belly. This creates a 3D, domed effect.
- Cast On: CO 6 sts.
- Row 1 (RS): Kfb across all sts. (12 sts)
- Row 2 (WS): Purl all sts.
- Row 3: *Kfb, K1*; repeat from * to * across. (18 sts)
- Row 4: Purl all sts.
- Row 5: *Kfb, K2*; repeat from * to * across. (24 sts)
- Row 6: Purl all sts.
- Row 7: *Kfb, K3*; repeat from * to * across. (30 sts)
- Row 8: Purl all sts.
- Row 9: *Kfb, K4*; repeat from * to * across. (36 sts)
- Rows 10-14: Work even in stockinette stitch (Knit on RS, Purl on WS).
- Row 15: *K2tog, K4*; repeat from * to * across. (30 sts)
- Row 16: Purl all sts.
- Row 17: *K2tog, K3*; repeat from * to * across. (24 sts)
- Row 18: Purl all sts.
- Row 19: *K2tog, K2*; repeat from * to * across. (18 sts)
- Row 20: Purl all sts.
- Row 21: *K2tog, K1*; repeat from * to * across. (12 sts)
- Row 22: Purl all sts.
- Row 23: K2tog across all sts. (6 sts)
- Finish: Cut yarn, leaving a long tail. Thread the tail through the remaining 6 sts on your needle, pull tight to close the hole, and secure with a knot. Weave in the end.
Head (Make 1 in Teal)
- Cast On: CO 8 sts.
- Row 1 (RS): Kfb across all sts. (16 sts)
- Rows 2-4: Work even in stockinette stitch.
- Row 5: K2tog across all sts. (8 sts)
- Finish: Cut yarn, thread through remaining sts, pull tight, and secure. Shape into a rounded head by gently molding it with your fingers.
Flippers (Make 4: 2 Front, 2 Back in Teal)
All four flippers are knitted the same way; you'll just position them differently during assembly.
- Cast On: CO 4 sts.
- Row 1 (RS): Kfb, K2, Kfb. (6 sts)
- Rows 2-6: Work even in stockinette stitch.
- Row 7: K2tog, K2, K2tog. (4 sts)
- Finish: BO all sts. Leave a long tail (approx. 8 inches) for sewing.
Tail (Make 1 in Teal)
- Cast On: CO 3 sts.
- Rows 1-4: Work even in stockinette stitch.
- Row 5: K2tog, K1. (2 sts)
- Finish: BO all sts. Leave a long tail for sewing.
Assembly: Bringing Your Turtle to Life
Now for the fun part—watching your turtle come together! Take your time with the sewing to ensure a polished finish.
- Create the Shell: Place the sage green shell and the warm sand belly together with their wrong sides facing (the right sides should be on the outside). Using a tapestry needle and a length of yarn, whip stitch around the edge, leaving a 1-inch opening. Gently stuff the shell with a small amount of polyester filling to give it a plump, domed shape. Do not overstuff; you want it soft and squishy. Continue sewing the opening closed and weave in the end.
- Attach the Head: Position the head at the top edge of the shell, slightly overlapping the seam. The head should sit centered. Sew it securely in place with a few firm stitches, weaving the yarn through the base of the head and the shell.
- Attach the Front Flippers: Place the two front flippers on either side of the head, angled slightly outward and downward. Sew them securely to the shell using their long tails.
- Attach the Back Flippers: Position the two back flippers near the bottom edge of the shell, angled slightly downward and outward. Sew them securely.
- Attach the Tail: Sew the tail at the bottom center of the shell, between the back flippers.
- Embroider the Face: Using the dark brown yarn and a tapestry needle, embroider two small eyes on the head. Make a few straight stitches for each eye. If desired, add a tiny smile with a single curved stitch.
- Final Weave-In: Weave in all remaining yarn ends on the underside of the turtle to keep the front looking clean.
Congratulations! Your Coral Cove Sea Turtle Appliqué is complete. This textured, cozy charm is ready to adorn a blanket, a bag, or any project that needs a splash of ocean love. Happy knitting!


