Whimsical Woodland Gnome Home Free Crochet Pattern – Cozy Mushroom Cottage
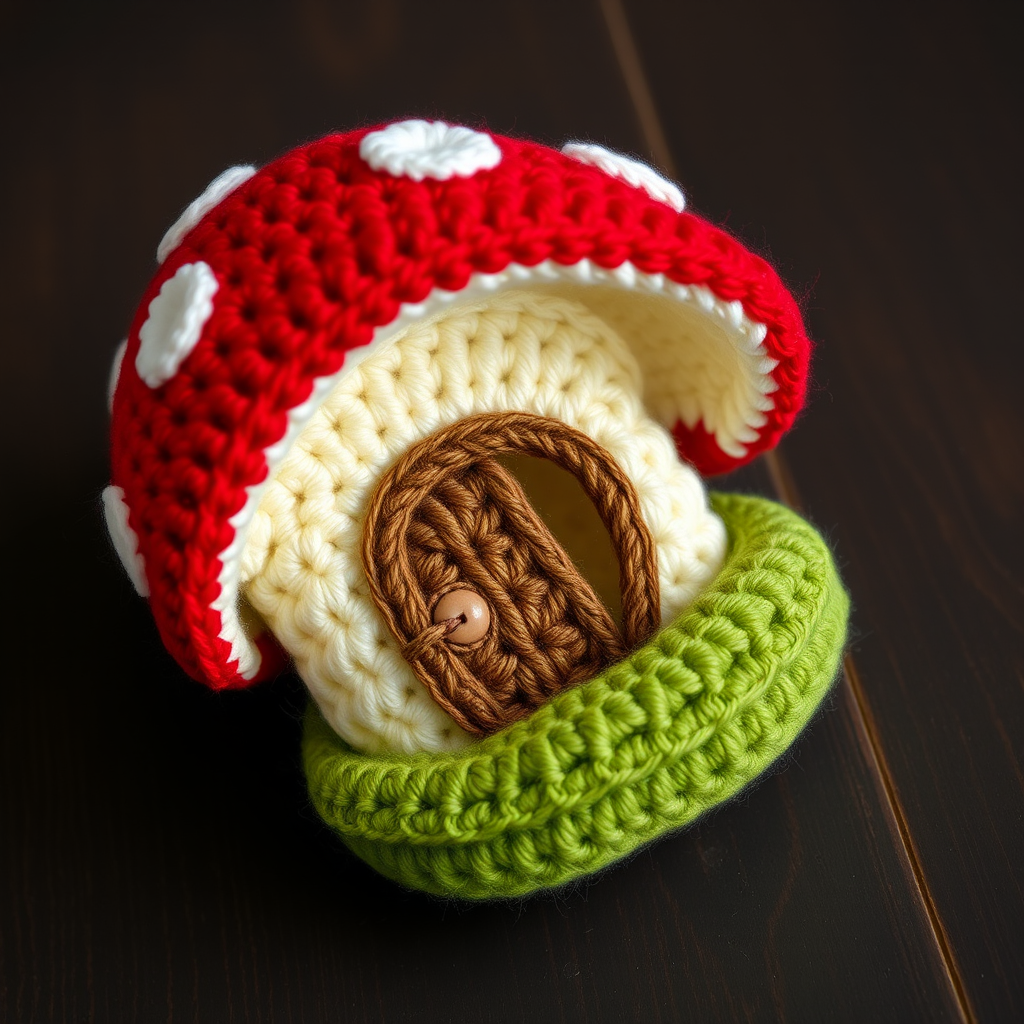
Whimsical Woodland Gnome Home Free Crochet Pattern – Cozy Mushroom Cottage
Bring a touch of enchanted forest charm to your shelf with this adorable crochet mushroom cottage, complete with a tiny door and whimsical windows. Perfect for fairy garden lovers and cozy decor enthusiasts, this amigurumi project is a delightful way to add handmade magic to any room. Whether you're a seasoned crocheter or just starting your yarn journey, this pattern is designed to be accessible, rewarding, and utterly charming. Let's dive into creating your very own woodland gnome home!
Materials Needed
Before you begin, gather the following supplies to ensure a smooth and enjoyable crafting session:
- Yarn: Worsted weight yarn in four colors:
- Red (for the mushroom cap)
- Cream (for the stem and windows)
- Brown (for the door)
- Green (for the base and leaf details)
- Hook: 3.5mm crochet hook (or size needed to meet gauge)
- Stuffing: Polyester fiberfill stuffing
- Notions: Yarn needle for sewing and weaving in ends
- Extras: Stitch markers to keep track of rounds
Gauge: 4 sc x 4 rows = 1 inch. Gauge is important for achieving the correct size, but for this project, it's flexible—just keep your stitches tight and even for a professional finish.
Abbreviations
Familiarize yourself with these standard crochet abbreviations used throughout the pattern:
- MR: Magic ring
- sc: Single crochet
- inc: Increase (2 sc in same stitch)
- dec: Decrease (sc 2 together)
- sl st: Slip stitch
- ch: Chain
Step-by-Step Instructions
Follow these detailed instructions to create each piece of your mushroom cottage. Work in continuous rounds unless otherwise noted, and use a stitch marker to mark the beginning of each round.
Mushroom Cap (Make 1)
Start with the iconic red cap, which will form the roof of your cottage.
- Round 1: With red yarn, make a MR, work 6 sc into the ring. Pull tight to close. (6 sts)
- Round 2: Work inc in each stitch around. (12 sts)
- Round 3: *Sc in next st, inc*; repeat from * to * around. (18 sts)
- Round 4: *Sc in next 2 sts, inc*; repeat around. (24 sts)
- Round 5: *Sc in next 3 sts, inc*; repeat around. (30 sts)
- Round 6: *Sc in next 4 sts, inc*; repeat around. (36 sts)
- Rounds 7-10: Sc in each stitch around for 4 rounds. (36 sts) This creates the dome shape.
- Round 11: *Sc in next 4 sts, dec*; repeat around. (30 sts)
- Round 12: *Sc in next 3 sts, dec*; repeat around. (24 sts)
- Fasten off, leaving a long tail (about 12 inches) for sewing. Lightly stuff the cap with fiberfill—it should be soft and slightly domed, not overly firm.
Mushroom Stem (Make 1)
This forms the body of the cottage where the door and windows will live.
- Round 1: With cream yarn, make a MR, work 6 sc into the ring. (6 sts)
- Round 2: Inc in each stitch around. (12 sts)
- Round 3: *Sc in next st, inc*; repeat around. (18 sts)
- Rounds 4-8: Sc in each stitch around for 5 rounds. (18 sts) This creates the straight stem.
- Round 9: *Sc in next 2 sts, inc*; repeat around. (24 sts) This slight increase will help the stem flare at the bottom.
- Rounds 10-12: Sc in each stitch around for 3 rounds. (24 sts)
- Fasten off, leaving a long tail for sewing. Stuff the stem firmly with fiberfill so it holds its shape well.
Door (Make 1)
A tiny arched door adds character to your cottage.
- With brown yarn, ch 6.
- Row 1: Sc in the 2nd ch from the hook and across. (5 sts)
- Rows 2-4: Ch 1, turn, sc in each stitch across. (5 sts) This creates a small rectangular door.
- Fasten off, leaving a tail for sewing. For a more arched look, you can slightly round the top corners when sewing it on.
Windows (Make 2)
Round, whimsical windows bring light to your gnome's home.
- Round 1: With cream yarn, make a MR, work 6 sc into the ring. (6 sts)
- Round 2: Inc in each stitch around. (12 sts)
- Fasten off, leaving a tail for sewing. These small circles will be perfect round windows.
Base (Make 1)
The lush green base grounds your cottage and adds a fairy-garden feel.
- Round 1: With green yarn, make a MR, work 6 sc into the ring. (6 sts)
- Round 2: Inc in each stitch around. (12 sts)
- Round 3: *Sc in next st, inc*; repeat around. (18 sts)
- Round 4: *Sc in next 2 sts, inc*; repeat around. (24 sts)
- Round 5: *Sc in next 3 sts, inc*; repeat around. (30 sts)
- Round 6: *Sc in next 4 sts, inc*; repeat around. (36 sts)
- Rounds 7-8: Sc in each stitch around for 2 rounds. (36 sts) This creates a flat, sturdy base.
- Fasten off, leaving a tail for sewing.
Assembly
Now it's time to bring all the pieces together to create your cozy mushroom cottage. Take your time with the sewing to ensure a neat, professional finish.
- Attach the Cap: Position the mushroom cap on top of the stem, aligning the edges. Using the long tail from the cap, whip stitch the cap to the stem, going through both layers of yarn. Sew securely all the way around, then weave in the end.
- Sew the Door: Place the brown door on the front of the stem, centered about 2 inches from the bottom edge. Use the tail to sew it in place with small, neat stitches along the edges. Weave in the end.
- Add the Windows: Position the two cream windows on either side of the door, about 1 inch above the base. Sew each window in place using its tail, stitching around the circumference. Weave in ends.
- Attach to the Base: Center the assembled mushroom on the green base. Using the tail from the base, sew the mushroom to the base, working your way around the bottom edge of the stem. Ensure it's securely attached. Weave in the end.
- Embroider Details: With brown yarn, embroider a small doorknob in the center of the door—just a few small stitches. Then, using green yarn, add tiny leaf details on the red cap. You can make simple leaf shapes by stitching small loops or lines. This adds a lovely finishing touch.
- Final Weave: Weave in all remaining ends carefully, trimming any excess yarn. Your whimsical woodland gnome home is complete!
Place your new mushroom cottage on a shelf, in a fairy garden, or give it as a heartfelt handmade gift. The tight single crochet stitches and soft worsted weight yarn create a durable, huggable piece that captures the magic of the forest. Enjoy your cozy creation!


