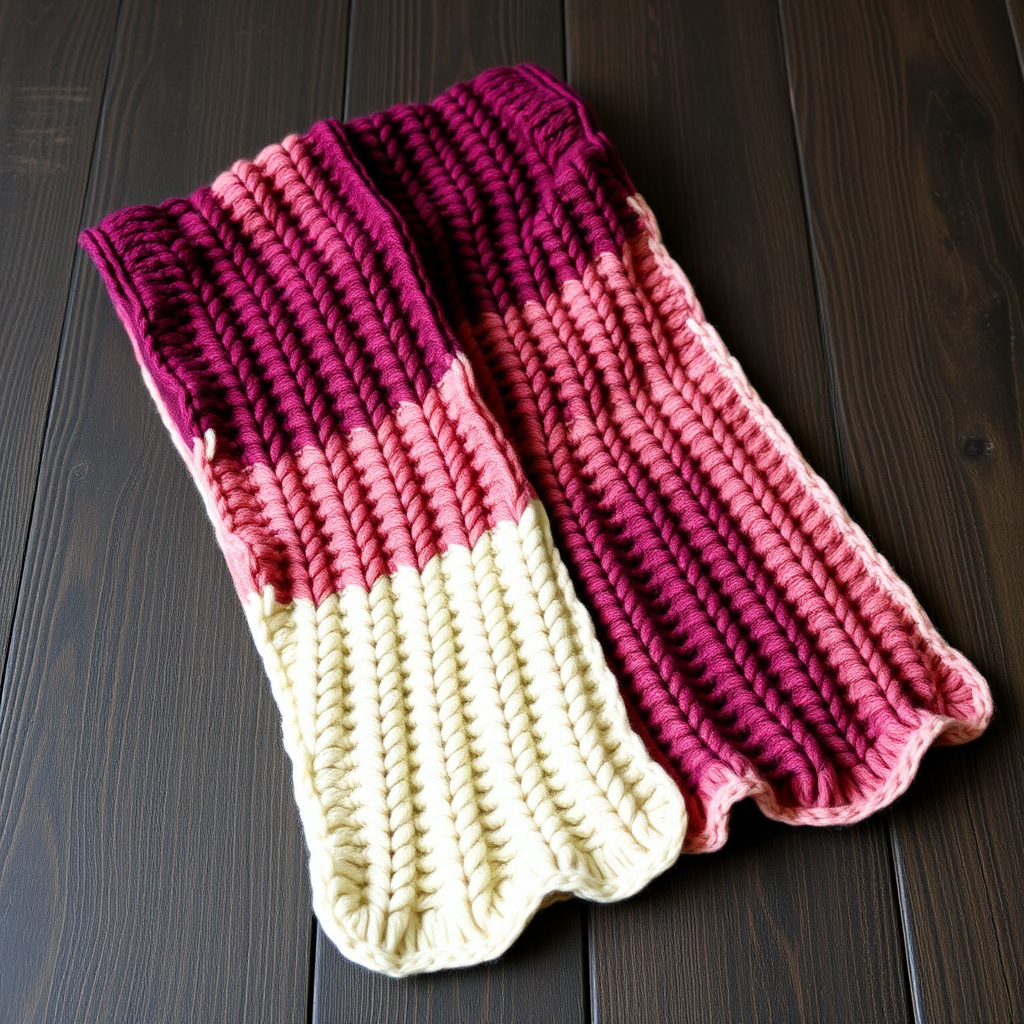
Tidal Drift Scarf Free Pattern – A Crocheted Ocean Wave Wrap

Introducing the Tidal Drift Scarf: A Crocheted Ocean Wave Wrap
Wrap yourself in the soothing rhythm of the sea with this uniquely textured crochet scarf, featuring undulating waves of soft, hand-dyed yarn. The Tidal Drift Scarf is a cozy, artistic statement piece that captures the essence of a serene coastal escape. This beginner-friendly pattern uses simple post stitches to create a mesmerizing, ribbed texture that mimics the rolling ocean. With three harmonious colors—Sea Foam, Deep Teal, and Sandy Shore—this scarf evokes the meeting of sea and sand, draping elegantly as a long, rectangular wrap. Whether you're a seasoned crocheter or just starting your journey, this pattern is designed to be both relaxing and rewarding, resulting in a stunning accessory you'll be proud to wear or gift.
Materials Needed
Before you begin, gather the following materials to ensure a smooth and enjoyable crocheting experience:
- Yarn: Worsted weight yarn in 3 shades:
- Sea Foam (light aqua) – approx. 120g
- Deep Teal (dark teal) – approx. 120g
- Sandy Shore (warm beige) – approx. 110g
- Hook: 5.5mm (I-9) crochet hook
- Gauge: 14 stitches x 10 rows = 4 inches in half double crochet (hdc)
- Extras: Yarn needle for weaving in ends, scissors, and optional measuring tape
Step-by-Step Instructions
Follow these detailed instructions carefully to create your Tidal Drift Scarf. The pattern is broken down into manageable steps, with clear explanations of each technique. Take your time, and enjoy the process!
Getting Started: Foundation Chain
Step 1: Begin by making a slip knot and placing it on your 5.5mm hook.
Step 2: Chain 32 stitches loosely. This foundation chain will determine the width of your scarf (approximately 8 inches). Ensure your chains are not too tight, as this will make working into them easier in the first row.
Row 1: Foundation Row
Step 3: Work 1 half double crochet (hdc) in the 3rd chain from your hook. (The first two chains count as your first hdc.)
Step 4: Work 1 hdc in each chain across the row. You should have a total of 30 hdc stitches. Turn your work.
Row 2: Establishing the Base
Step 5: Chain 2 (this counts as your first hdc).
Step 6: Work 1 hdc in each stitch across the row. Turn your work. (30 hdc)
Rows 3-4: Beginning the Wave Pattern
Step 7 (Row 3): Chain 2 (counts as hdc). Now, you will begin the wave stitch pattern:
- *Work 1 front post double crochet (fpdc) around the next 3 stitches.
- Then, work 1 back post double crochet (bpdc) around the next 3 stitches.*
- Repeat from * to * across the row, ending with 1 hdc in the top of the turning chain from the previous row.
How to work a Front Post Double Crochet (fpdc): Yarn over, insert your hook from front to back to front around the post of the stitch (the vertical part of the stitch below), yarn over and pull up a loop, yarn over and pull through two loops, yarn over and pull through the remaining two loops. This creates a raised ridge on the front of your work.
How to work a Back Post Double Crochet (bpdc): Yarn over, insert your hook from back to front to back around the post of the stitch, yarn over and pull up a loop, yarn over and pull through two loops, yarn over and pull through the remaining two loops. This creates a recessed ridge on the back of your work.
Step 8 (Row 4): Chain 2 (counts as hdc). Now, you will reverse the pattern:
- *Work 1 bpdc around the next 3 stitches.
- Then, work 1 fpdc around the next 3 stitches.*
- Repeat from * to * across the row, ending with 1 hdc in the top of the turning chain.
Turn your work.
Rows 5-6: Deepening the Wave Texture
Step 9: Repeat Rows 3 and 4 to create a deeper, more pronounced wave texture. This will give your scarf that beautiful, undulating ribbed effect.
Row 7: Color Change to Deep Teal
Step 10: Attach the Deep Teal yarn to your work. To do this, simply make a slip knot with the new yarn and place it on your hook, then pull it through the loop on your hook.
Step 11: Chain 2 (counts as hdc). Work 1 hdc in each stitch across the row. Turn your work. (30 hdc)
Rows 8-10: Deep Teal Wave Section
Step 12: Repeat Rows 3 and 4 with the Deep Teal yarn, maintaining the wave pattern. This means you will work Row 8 as Row 3, Row 9 as Row 4, and Row 10 as Row 3 again. This creates a full wave cycle in Deep Teal.
Row 11: Color Change to Sea Foam
Step 13: Attach the Sea Foam yarn in the same manner as before.
Step 14: Chain 2 (counts as hdc). Work 1 hdc in each stitch across the row. Turn your work. (30 hdc)
Rows 12-14: Sea Foam Wave Section
Step 15: Repeat Rows 3 and 4 with the Sea Foam yarn, maintaining the wave pattern. Work Row 12 as Row 3, Row 13 as Row 4, and Row 14 as Row 3.
Row 15: Color Change to Sandy Shore
Step 16: Attach the Sandy Shore yarn.
Step 17: Chain 2 (counts as hdc). Work 1 hdc in each stitch across the row. Turn your work. (30 hdc)
Rows 16-18: Sandy Shore Wave Section
Step 18: Repeat Rows 3 and 4 with the Sandy Shore yarn, maintaining the wave pattern. Work Row 16 as Row 3, Row 17 as Row 4, and Row 18 as Row 3.
Continuing the Pattern
Step 19: Now, you will repeat the color sequence (Deep Teal, Sea Foam, Sandy Shore) and the wave pattern rows until the scarf measures approximately 60 inches from the beginning. Each color section consists of 4 rows: 1 hdc row (for the color change) followed by 3 wave pattern rows (alternating Rows 3 and 4).
Important: Always end with a Deep Teal section to match the beginning. This ensures your scarf has a balanced, symmetrical look.
Final Row: Finishing the Scarf Body
Step 20: Once your scarf reaches the desired length (approximately 60 inches) and you have completed a Deep Teal section, work the final row:
- With Deep Teal, chain 2 (counts as hdc).
- Work 1 hdc in each stitch across the row.
- Fasten off by cutting the yarn, leaving a 6-inch tail, and pulling it through the last loop.
Finishing Touches: Weaving in Ends
Step 21: Thread your yarn needle with the loose ends from each color change and the final fasten-off.
Step 22: Weave each end carefully through the back of the stitches, going in one direction for about 2 inches, then reversing direction for another inch. This secures the ends and prevents them from unraveling. Trim any excess yarn.
Optional: Adding Fringe
Step 23: To add a beautiful, cascading fringe to your scarf, cut 12-inch strands of each color yarn. You will need approximately 15-20 strands per end, depending on how full you want the fringe.
Step 24: Fold a strand in half. Insert your crochet hook from the back to the front through the edge of the scarf at the short end.
Step 25: Hook the folded loop of the strand and pull it through the edge of the scarf, creating a small loop on the front.
Step 26: Take the two loose ends of the strand and pull them through the loop. Pull tight to secure the fringe.
Step 27: Repeat this process evenly along both short edges of the scarf, alternating colors to match the stripes.
Step 28: Once all fringe is attached, trim the ends to an even length for a polished look.
Your Tidal Drift Scarf is Complete!
Congratulations! You've created a beautiful, textured scarf that captures the essence of the ocean. The combination of post stitches and harmonious colors makes this a truly unique piece. Whether you're curling up on a cool evening or adding a coastal touch to your outfit, this scarf is sure to become a favorite. Enjoy wearing your handcrafted creation, and don't forget to share your beautiful work with fellow crocheters!