Ember Dusk Crochet Scarf Pattern – Free Pattern

Wrap Yourself in Twilight: The Ember Dusk Crochet Scarf
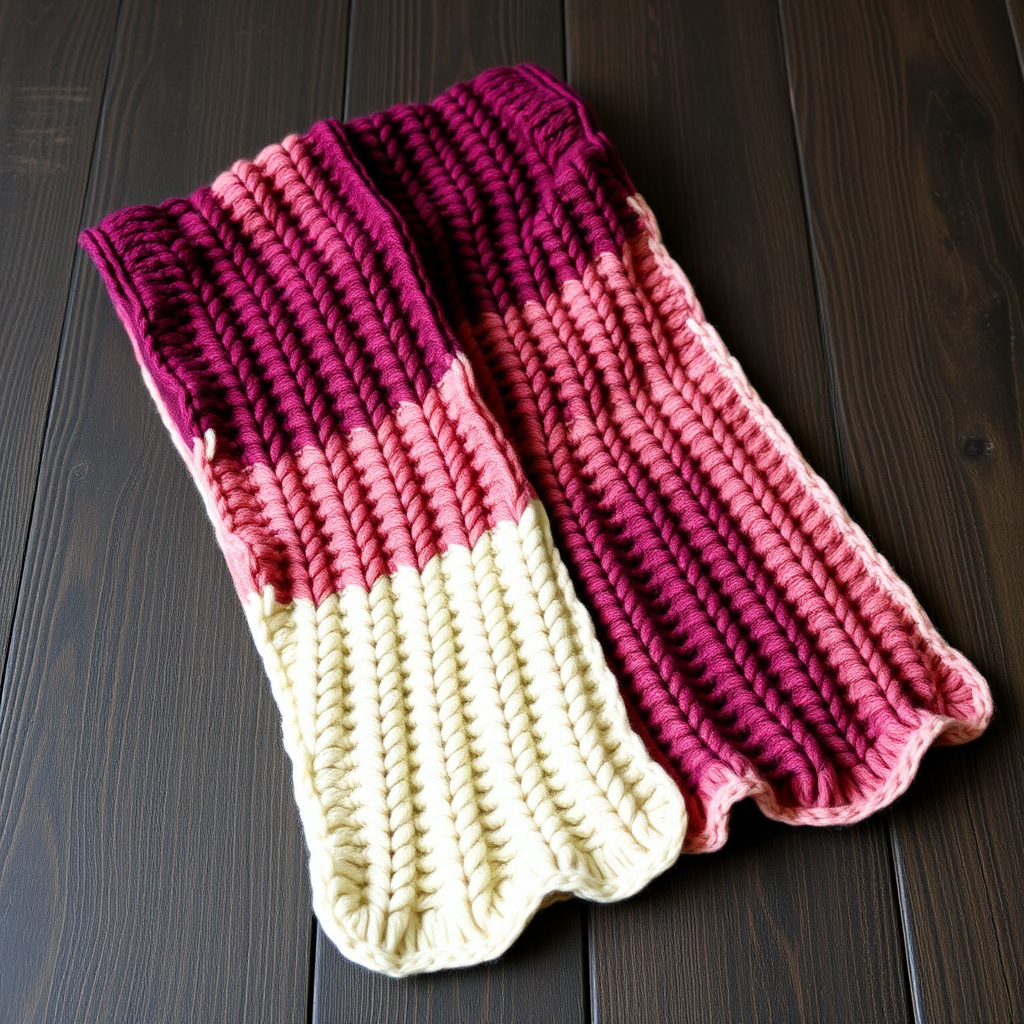
There are some crochet projects that are more than just accessories—they become wearable memories. The Ember Dusk Crochet Scarf is exactly that kind of project. Inspired by the breathtaking transition of a twilight sky, this scarf captures the deep burgundy of fading embers, the warm amber of a setting sun, and the soft cream of early evening clouds.
What makes this pattern truly special is its unique third-loop stitch technique. Instead of the standard half double crochet, you'll be working into the horizontal bar (the third loop) on the front of your stitches. This creates a stunning, ribbed fabric that feels incredibly soft and looks professionally textured. It's a modern twist on a classic winter essential—perfect for chilly commutes, cozy coffee shop afternoons, and stylish layering all season long.
Best of all, this is a free, beginner-friendly pattern that uses simple worsted weight yarn and a single crochet hook. The repetitive rows are meditative, and the color changes keep things exciting. Let's dive into creating your very own Ember Dusk Scarf!
Materials Needed
Before you begin, gather these simple supplies. This project is wonderfully portable and requires minimal tools.
Yarn & Hook
- Yarn: Worsted weight (Category 4) yarn in three shades:
- Deep Burgundy (approx. 140-160 yards)
- Warm Amber (approx. 140-160 yards)
- Soft Cream (approx. 70-80 yards)
- Crochet Hook: 5 mm (H/8) crochet hook
Additional Tools
- Yarn needle (for weaving in ends)
- Scissors
- Stitch markers (optional, but helpful for tracking your color sections)
Gauge
17 half double crochet (hdc) stitches = 4 inches. Gauge is important for achieving the correct width, but since this is a scarf, it's quite forgiving. If your scarf is slightly wider or narrower, it will still look gorgeous!
Step-by-Step Instructions
This pattern is worked in rows, using the third loop of the half double crochet stitch. Don't worry if you've never tried this technique before—it's simple once you know where to look. The "third loop" is the horizontal bar that sits at the front of your hdc stitch, just below the two top loops you normally work into. When you work into this loop, the stitch tilts slightly, creating that beautiful ribbed texture.
Important Notes:
- The front side of your work is the side facing you as you crochet.
- You will be cutting your yarn and reattaching at opposite ends to create the color blocks. This creates a clean, symmetrical gradient.
- Always ensure the front side is facing you when you attach new yarn.
Foundation & First Rows
Foundation: Chain 26 loosely. This will give you a scarf that's approximately 6 inches wide.
Row 1: Half double crochet (hdc) in the 3rd chain from your hook and in each chain across. You should have 24 hdc stitches total. Turn your work.
Row 2: Chain 2 (this counts as your first hdc). Skip the first stitch (the one directly below your chain). Now, look at the next hdc from the previous row. You'll see the two top loops forming a "V". Just below that "V", on the front of the stitch, is a horizontal bar—that's your third loop. Insert your hook into that third loop, yarn over, and pull through. Complete your hdc as normal. Continue working hdc into the third loop of each hdc across. At the end of the row, work your final hdc into the top of the turning chain from the previous row. You should still have 24 hdc stitches. Turn.
Repeat Row 2 for the entire scarf. This creates the consistent, ribbed texture.
Creating the Color Blocks
Now for the fun part—the gradient! You'll be working in sections of approximately 18 inches each. Here's the color sequence:
- First Section (Deep Burgundy): Continue repeating Row 2 with your burgundy yarn until the scarf measures 18 inches from the foundation. Cut your yarn, leaving a 6-inch tail, and pull through the loop to secure.
- Second Section (Warm Amber): With the front side facing you, attach your amber yarn to the first stitch of the row. Chain 2 (counts as first hdc), skip the first stitch, and repeat Row 2 across. Continue for 18 inches. Cut yarn and secure.
- Third Section (Soft Cream): Attach your cream yarn with the front side facing you. Repeat Row 2 for 18 inches. Cut yarn and secure.
- Fourth Section (Warm Amber): Attach amber yarn again, front side facing you. Repeat Row 2 for 18 inches. Cut yarn and secure.
- Fifth Section (Deep Burgundy): Attach burgundy yarn one final time, front side facing you. Repeat Row 2 for 18 inches.
Your scarf should now measure approximately 5 feet (90 inches) in total length. If you prefer a longer or shorter scarf, simply adjust the length of each color section equally.
Finishing Touches
After your final row, cut your yarn, leaving a 6-inch tail. Pull the tail through the loop on your hook to secure the stitch.
Using your yarn needle, weave in all ends securely. Take your time with this step—weaving in ends properly ensures your scarf will last for years without unraveling. Weave each tail through the back of several stitches in the same color, then trim any excess.
Optional Fringe: While the visual details show this scarf without fringe, adding a playful fringe is a lovely option. Cut strands of all three colors, each about 10 inches long. Fold each strand in half, insert the folded end through the edge of your scarf, and pull the tails through the loop. Repeat across both short ends for a boho-chic finish.
Your Ember Dusk Scarf Awaits
And there you have it—a stunning, textured scarf that mirrors the beauty of a twilight sky. The third-loop technique creates a fabric that's not only visually striking but also wonderfully warm and drapey. Whether you keep it for yourself or gift it to someone special, this scarf is sure to become a cherished handmade treasure.
We'd love to see your finished Ember Dusk Scarf! Share your photos on social media and tag us so we can admire your beautiful work. Happy crocheting!