The Sunset Strip Crochet Cardigan: A Free Pattern for a Textured, Color-Block Boho Layer
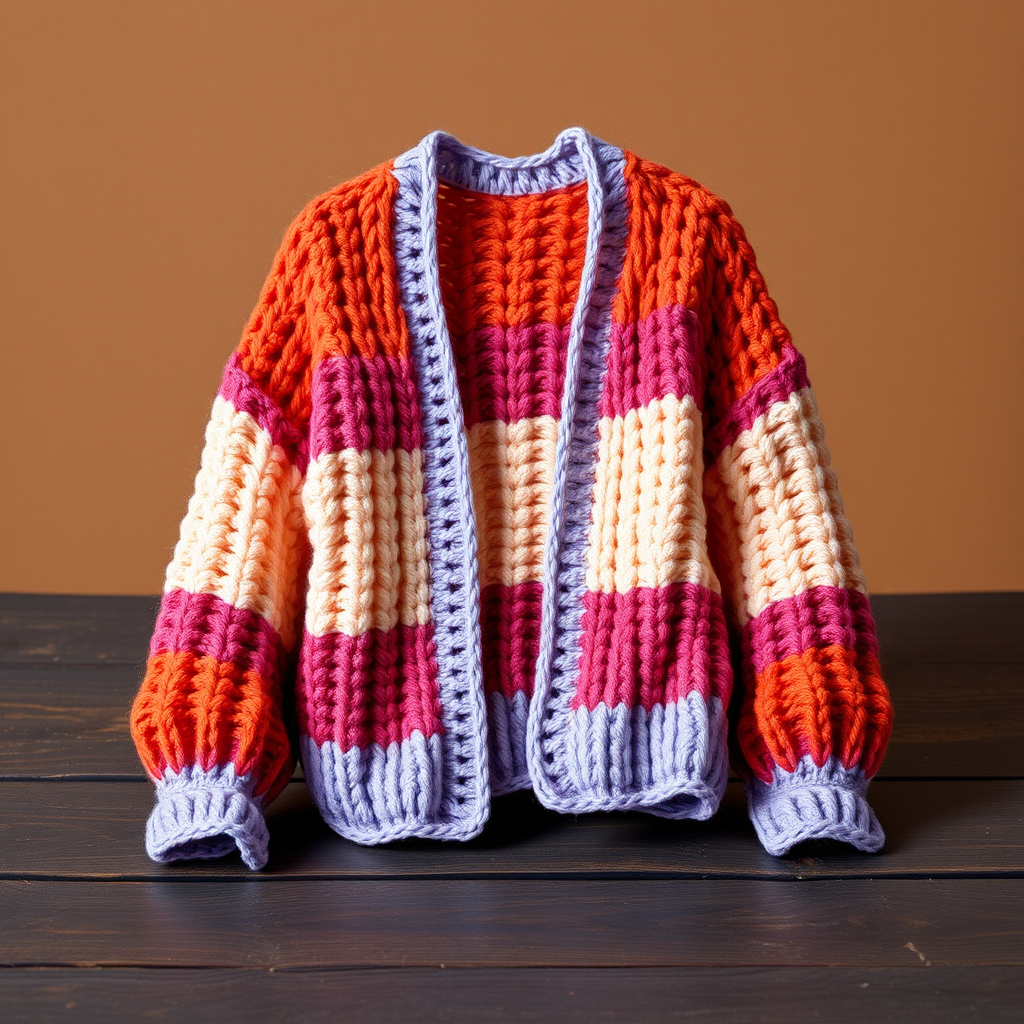
Wrap Yourself in a Sunset: The Free Sunset Strip Crochet Cardigan Pattern
Imagine the warm, glowing colors of a Los Angeles sunset, captured in a cozy, textured cardigan you can wear on cool evenings. The Sunset Strip Crochet Cardigan is a free pattern designed to bring that laid-back, bohemian luxury into your handmade wardrobe. With a unique stitch pattern that creates a woven, ribbed fabric and a stunning gradient of sunset hues, this open-front layer is as enjoyable to make as it is to wear. Perfect for intermediate beginners, this pattern guides you through creating a relaxed, oversized cardigan with long, slightly flared sleeves and a simple, elegant finish.
Materials Needed
Before you begin, gather the following materials. Using the specified yarn weight and hook size is crucial for achieving the correct gauge and the perfect drape.
- Yarn: Worsted weight (#4) cotton-acrylic blend yarn in 4 colors:
- Color A (Sunset Orange) - 300g
- Color B (Coral Pink) - 250g
- Color C (Dusty Rose) - 250g
- Color D (Lavender Haze) - 200g
- Hook: 6.0 mm (J-10) crochet hook
- Other: Yarn needle for weaving in ends, scissors, tape measure, stitch markers (optional).
Gauge & Sizing
Gauge: 14 stitches x 10 rows = 4 inches in the textured stitch pattern (after blocking). Always check your gauge to ensure your cardigan fits as intended.
Sizes: S (M, L, XL). Finished bust measurement: 38 (42, 46, 50) inches. Choose the size that gives you 2-4 inches of positive ease for an oversized fit.
Stitches & Special Pattern
This pattern uses basic crochet stitches and a simple, repeating textured stitch. Here’s what you need to know:
- ch: chain
- sc: single crochet
- dc: double crochet
- fpdc: front post double crochet (yarn over, insert hook from front to back to front around the post of the stitch, yarn over, pull up a loop, complete as a double crochet)
- bpdc: back post double crochet (yarn over, insert hook from back to front to back around the post of the stitch, yarn over, pull up a loop, complete as a double crochet)
- dc2tog: double crochet 2 together (decrease)
Special Stitch Pattern: Textured Stripe
This 2-row repeat creates the beautiful, woven texture. Work it over an even number of stitches.
- Row 1 (Right Side): *fpdc around the next stitch, bpdc around the next stitch* repeat across the row.
- Row 2 (Wrong Side): *bpdc around the next stitch, fpdc around the next stitch* repeat across the row.
Step-by-Step Instructions
Back Panel
- Foundation: With Color A, chain 68 (76, 84, 92).
- Row 1: Double crochet in the 4th chain from the hook and in each chain across. You will have 66 (74, 82, 90) double crochet stitches.
- Rows 2-5: Chain 3 (counts as first dc), turn. Double crochet in each double crochet across.
- Change to Color B.
- Rows 6-11: Work the Textured Stripe pattern (Rows 1-2) for 6 rows. Remember to chain 3 at the beginning of each row.
- Change to Color C.
- Rows 12-17: Repeat the Textured Stripe pattern for 6 rows.
- Change to Color D.
- Rows 18-23: Repeat the Textured Stripe pattern for 6 rows.
- Repeat: Continue this color sequence (A, B, C, D) and the Textured Stripe pattern until the piece measures 22 (23, 24, 25) inches from the beginning. Fasten off.
Left Front Panel
- Foundation: With Color A, chain 34 (38, 42, 46).
- Row 1: Double crochet in the 4th chain from the hook and in each chain across. You will have 32 (36, 40, 44) double crochet stitches.
- Rows 2-5: Chain 3, turn. Double crochet in each double crochet across.
- Continue: Follow the same color sequence and Textured Stripe pattern as the back panel, working the same number of rows for each color block.
- Neck Shaping: When the piece measures 18 (19, 20, 21) inches from the beginning, you will shape the neck. This is done at the beginning of Right Side rows (the neck edge).
- Row 1 (RS): Slip stitch across the first 6 (7, 8, 9) stitches. Chain 3, then double crochet across the remaining stitches.
- Next 4 rows: Continue decreasing 1 stitch at the neck edge every row. To do this, at the beginning of the RS row, chain 3, skip the first stitch (the decrease), and double crochet across. At the end of the WS row, work until 2 stitches remain, then dc2tog.
- Work Even: After the decreases, continue working even (no more decreases) in the pattern until the panel is the same length as the back panel. Fasten off.
Right Front Panel
- Work exactly as the Left Front Panel, but reverse the neck shaping. This means you will decrease at the end of the Right Side rows (the neck edge) instead of the beginning.
- To decrease at the end of a RS row: Work in pattern until 3 stitches remain, dc2tog, then double crochet in the last stitch.
Sleeves (Make 2)
- Foundation: With Color A, chain 46 (50, 54, 58).
- Row 1: Double crochet in the 4th chain from the hook and in each chain across. You will have 44 (48, 52, 56) double crochet stitches.
- Rows 2-5: Chain 3, turn. Double crochet in each double crochet across.
- Continue: Follow the same color sequence and Textured Stripe pattern. While doing so, increase 1 stitch at each end of every 4th row, 6 times total.
- To increase: Work 2 double crochet in the first stitch and 2 double crochet in the last stitch of the row.
- After all increases, you will have 56 (60, 64, 68) stitches.
- Work even until the sleeve measures 18 (19, 20, 21) inches from the beginning. Fasten off.
Assembly & Finishing
- Sew Shoulder Seams: With a yarn needle, sew the shoulder seams of the front panels to the back panel.
- Set in Sleeves: Pin the center of the top edge of each sleeve to the shoulder seam. Sew the sleeves into the armholes.
- Sew Side & Sleeve Seams: Sew the side seams from the bottom edge up to the sleeve opening, then continue sewing the sleeve seam from the underarm to the cuff.
- Edging: With Color D, attach yarn at the bottom right front edge. Single crochet evenly around the entire front opening and neckline. Work 2 more rows of single crochet, working 3 single crochet in each corner to keep the edging flat. Fasten off.
- Finishing: Weave in all ends securely. Block the cardigan to the specified measurements to open up the stitch pattern and even out the fabric.
Your Sunset Strip Crochet Cardigan is now complete! Enjoy your cozy, handmade piece of wearable art that captures the magic of a California sunset.