The Petal Pond Shawl Free Pattern – A Knitted Ripple of Floating Blooms

The Petal Pond Shawl Free Pattern – A Knitted Ripple of Floating Blooms
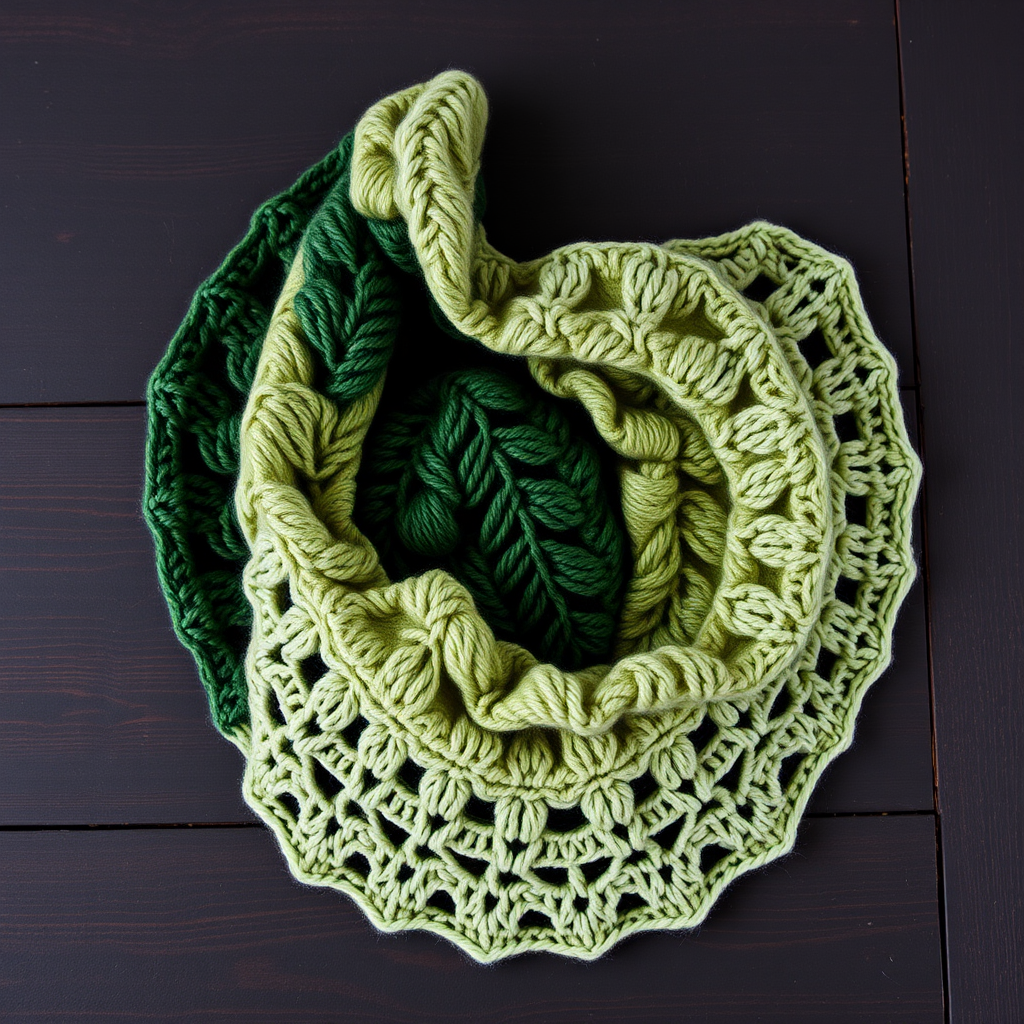
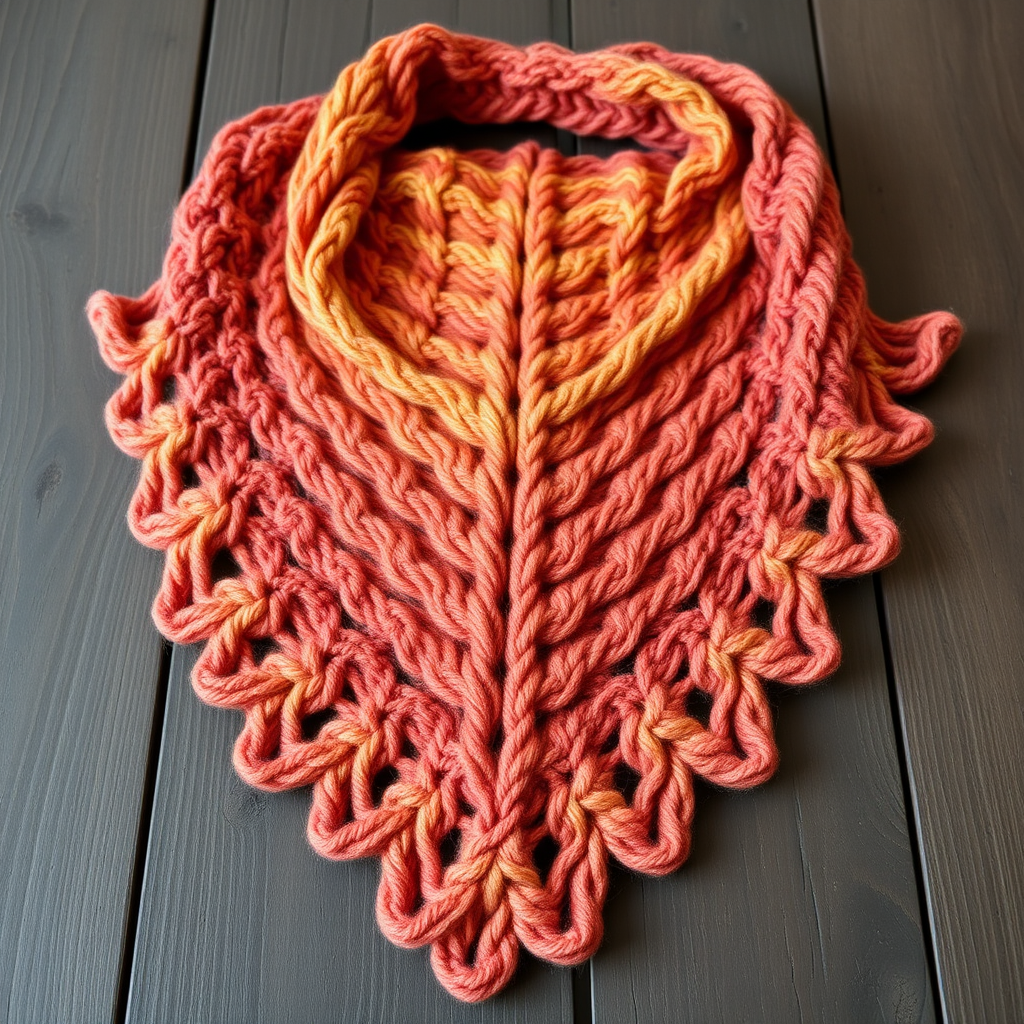
Dive into a serene garden of textured petals with this crescent-shaped shawl, where soft gradient yarns mimic the gentle surface of a koi pond. Each knitted ripple is adorned with delicate leaf and flower motifs, creating a wearable piece of art that drapes elegantly over the shoulders. This pattern is perfect for intermediate knitters looking to expand their skills while creating something truly breathtaking.
The Petal Pond Shawl combines the soothing rhythm of lace knitting with the satisfaction of creating dimensional floral embellishments. The crescent shape is achieved through strategic increases, while the ripple pattern evokes the gentle movement of water. Whether you're a seasoned knitter or a confident beginner ready for a challenge, this pattern will guide you through every step to create a stunning, one-of-a-kind accessory.
Materials Needed
Before you begin your knitting journey, gather the following materials:
Yarn
- Worsted weight yarn in gradient shades of soft teal, dusty rose, and cream (approximately 600-700 yards total)
- For the main body: gradient yarn transitioning from teal through dusty rose to cream
- For the leaf border: slightly darker teal yarn (can be from the same gradient set)
- For the flower embellishments: contrasting dusty rose and cream yarn
Needles
- US 7 (4.5 mm) circular knitting needle, 32-inch or longer (to accommodate the growing stitch count)
Notions
- Stitch markers (at least 4, preferably locking or removable)
- Yarn needle for weaving in ends and attaching flowers
- Scissors
- Blocking mats and pins (for finishing)
Gauge
- 18 stitches and 24 rows = 4 inches in stockinette stitch (blocked)
Note: Gauge is important for achieving the correct drape and size. Always knit a swatch and block it before measuring.
Step-by-Step Instructions
Pattern Notes
This shawl is worked from the top center down, increasing on each side to form a crescent shape. Stitch markers are used to separate the center and edge sections. All lace and motif patterns are provided in written form. The shawl consists of four main sections: the setup, the increase section, the body pattern, and the leaf motif border.
Abbreviations
- k = knit
- p = purl
- yo = yarn over
- k2tog = knit two together
- ssk = slip, slip, knit (decrease)
- pm = place marker
- sm = slip marker
- rep = repeat
Setup Section
Begin by casting on 3 stitches. This will form the starting point of your shawl.
Row 1 (RS): k1, yo, k1, yo, k1 (5 stitches)
Row 2 (WS): k2, p1, k2
Row 3 (RS): k2, yo, k1, yo, k2 (7 stitches)
Row 4 (WS): k2, p3, k2
Row 5 (RS): k2, yo, k3, yo, k2 (9 stitches)
Row 6 (WS): k2, p5, k2
Row 7 (RS): k2, yo, k5, yo, k2 (11 stitches)
Row 8 (WS): k2, p7, k2
Row 9 (RS): k2, yo, k7, yo, k2 (13 stitches)
Row 10 (WS): k2, p9, k2
You should now have 13 stitches on your needle. The garter stitch edges (k2 on each side) will form the neat borders of your shawl.
Increase Section
Now we'll work the increase section that will shape the crescent. This section creates a gentle curve by adding stitches at each edge.
Row 11 (RS): k2, yo, k to last 2 sts, yo, k2 (2 stitches increased)
Row 12 (WS): k2, p to last 2 sts, k2
Repeat Rows 11-12 until you have 61 stitches, ending with a wrong side row. This will take approximately 24 repeats. The garter stitch edges are maintained throughout, while the stockinette center grows evenly.
Tip: Count your stitches after each repeat to ensure accuracy. The pattern should feel rhythmic and meditative.
Body Pattern
Now we begin the beautiful ripple and motif pattern that gives the shawl its water-like texture. First, place your markers to organize the sections:
Marker Placement: k2, pm, yo, k1, yo, pm, k to last 5 sts, pm, yo, k1, yo, pm, k2
You will now have 4 markers creating these sections: edge (2 sts), increase section (1 st), center section, increase section (1 st), edge (2 sts). The increases will continue at the markers on every right side row.
Row 1 (RS): k2, sm, yo, k1, yo, sm, *k2tog, yo* rep to 1 st before center marker, k1, sm, yo, k1, yo, sm, *k2tog, yo* rep to 1 st before last marker, k1, sm, yo, k1, yo, sm, k2
Row 2 (WS): k2, sm, p to next marker, sm, p to next marker, sm, p to next marker, sm, k2
Row 3 (RS): k2, sm, yo, k1, yo, sm, *k1, yo, k2tog* rep to 1 st before center marker, k1, sm, yo, k1, yo, sm, *k1, yo, k2tog* rep to 1 st before last marker, k1, sm, yo, k1, yo, sm, k2
Row 4 (WS): same as Row 2
Repeat Rows 1-4 until the shawl measures 12 inches from the cast-on edge, or your desired length, ending with a wrong side row.
Note: The stitch count will increase by 4 every right side row due to the yarn over increases at the markers. This is expected and creates the crescent shape.
Leaf Motif Border
Now we'll add the beautiful leaf border that frames the shawl. This section continues the same pattern but will be worked for 3 inches to create a distinct border.
Row 1 (RS): k2, sm, yo, k1, yo, sm, *k2tog, yo* rep to 1 st before center marker, k1, sm, yo, k1, yo, sm, *k2tog, yo* rep to 1 st before last marker, k1, sm, yo, k1, yo, sm, k2
Row 2 (WS): k2, sm, p to next marker, sm, p to next marker, sm, p to next marker, sm, k2
Row 3 (RS): k2, sm, yo, k1, yo, sm, *k1, yo, k2tog* rep to 1 st before center marker, k1, sm, yo, k1, yo, sm, *k1, yo, k2tog* rep to 1 st before last marker, k1, sm, yo, k1, yo, sm, k2
Row 4 (WS): same as Row 2
Repeat these 4 rows until the border measures 3 inches. The leaf motifs will emerge naturally from the lace pattern, creating a botanical edge that frames the shawl beautifully.
Flower Motif Embellishments (Optional but Recommended)
After blocking, you can add small knitted flowers to the shawl for that extra special touch. These three-dimensional blooms bring the "floating petals" concept to life.
To make one flower:
- Cast on 5 stitches
- Knit 1 row
- Next row: k2tog, k1, k2tog (3 stitches remain)
- Next row: k3tog (1 stitch remains)
- Cut yarn, leaving a long tail, and pull through the remaining stitch
- Roll the resulting strip into a spiral, starting from the cast-on edge
- Sew the base securely to maintain the spiral shape
Make 5-7 flowers and attach them at random intervals along the leaf border, using a contrasting yarn color like dusty rose. For variety, you can make some flowers in cream and others in dusty rose. Position them where they look most natural, as if petals have drifted onto the water's surface.
Finishing
Complete your shawl with these final steps:
- Bind off loosely on a right side row. To ensure a stretchy edge, use a larger needle or a loose bind-off method like the yarn-over bind-off.
- Weave in all ends carefully, using a yarn needle to hide them within the fabric.
- Block the shawl gently to open up the lace and motifs. Pin the edges to create a smooth crescent shape, stretching slightly to emphasize the ripple pattern.
- Allow to dry completely before removing pins. This may take 24-48 hours depending on humidity.
- Once dry, attach the flowers if you haven't already, and give your shawl a final gentle steam if needed.
Care Instructions
To keep your Petal Pond Shawl beautiful for years to come:
- Hand wash in cool water with a gentle wool wash
- Press out excess water gently (never wring)
- Lay flat to dry on a towel, reshaping as needed
- Store folded in a drawer or on a hanger with padded shoulders
Your Petal Pond Shawl is now complete! This wearable piece of art captures the serenity of a garden pond, with its gradient colors flowing like water and its floral motifs floating like petals. The crescent shape drapes beautifully over shoulders, making it perfect for cool evenings, special occasions, or simply wrapping yourself in handmade beauty.
We'd love to see your finished shawl! Share your creation on social media with the hashtag #PetalPondShawl and inspire others to dive into this meditative knitting project. Happy knitting!