Solar Flare Mosaic Shawl Free Pattern – Knit a Radiant Desert Bloom Wrap

Solar Flare Mosaic Shawl Free Pattern – Knit a Radiant Desert Bloom Wrap
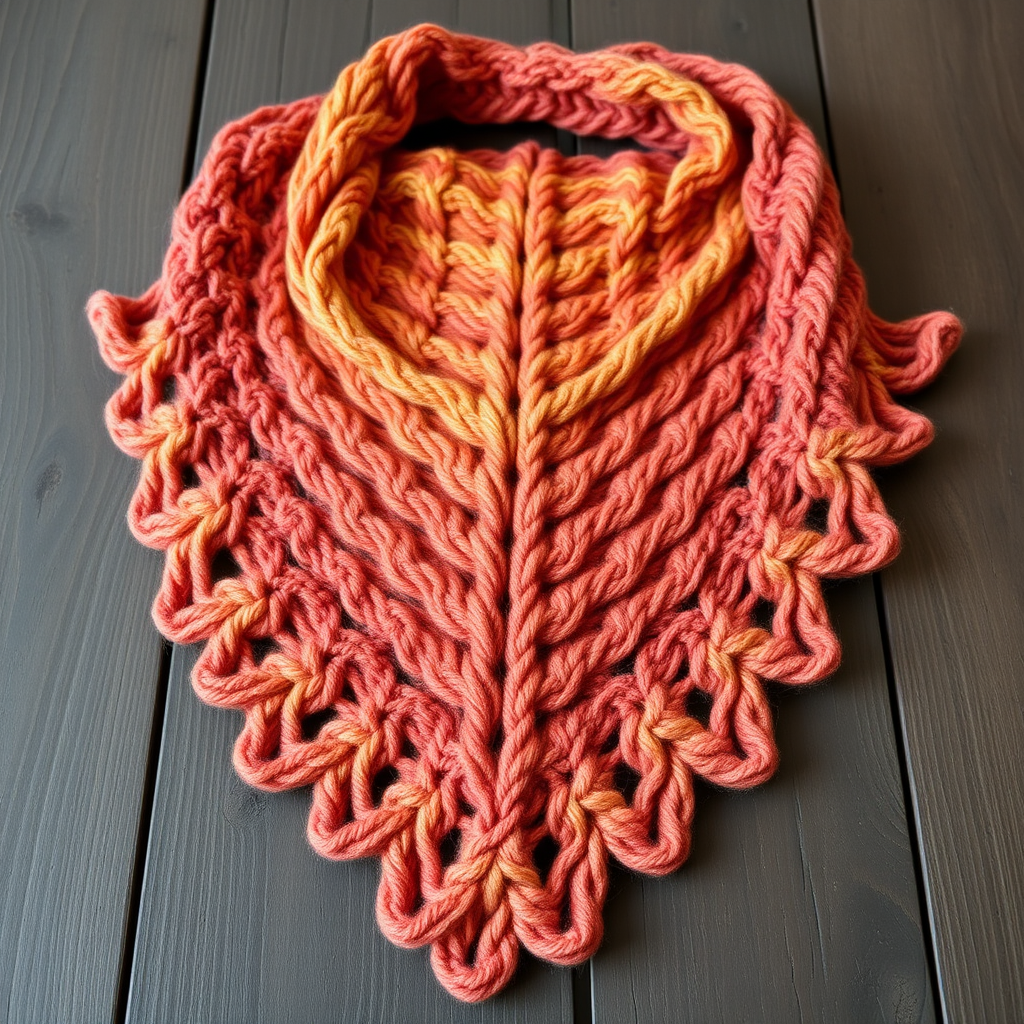
Wrap yourself in the warmth of a hand-knit shawl that captures the fiery hues of a desert sunset. This mosaic knitting pattern creates a stunning geometric bloom that is both modern and timeless. The Solar Flare Mosaic Shawl is the perfect project for knitters looking to explore colorwork without the complexity of stranded knitting. Using a simple slip-stitch technique, you'll create bold diamond and zigzag motifs that shimmer across the fabric, evoking the layered colors of sandstone, sun-baked clay, and golden hour light.
Whether you're a confident beginner ready to try something new or an experienced knitter seeking a meditative, rhythmic project, this free pattern delivers. The top-down triangular construction means you can easily customize the size, and the worsted weight yarn ensures a cozy, drapey finish that works beautifully as a shoulder wrap or a stylish scarf. Let's dive into this radiant project!
Materials Needed
Before you begin, gather the following supplies. This pattern uses worsted weight yarn in four harmonious colors to create the desert sunset effect.
Yarn
- Color A (Saffron Yellow): 1 skein (approx. 200-250 yards) – worsted weight
- Color B (Burnt Orange): 1 skein (approx. 200-250 yards) – worsted weight
- Color C (Terracotta): 1 skein (approx. 200-250 yards) – worsted weight
- Color D (Cream): 1 skein (approx. 200-250 yards) – worsted weight
Note: The exact yardage will depend on how large you make your shawl. The amounts listed above are sufficient for a shawl measuring approximately 60 inches across the top edge.
Needles & Notions
- US 7 (4.5 mm) 32-inch circular knitting needle – The long cable is essential for accommodating the growing number of stitches.
- Stitch markers (optional, but helpful for marking the center increase point)
- Tapestry needle for weaving in ends
- Blocking mats and pins (for the final finishing step)
Gauge
18 stitches and 24 rows = 4 inches in stockinette stitch (knit flat). Gauge is important for achieving the correct drape and size, but since this is a shawl, a slight variation won't ruin the project. Just be aware that a tighter gauge will produce a smaller, denser shawl, while a looser gauge will yield a larger, drapier one.
Step-by-Step Instructions
This shawl is worked from the top down in a triangular shape. Mosaic knitting is worked with two colors per row, slipping stitches from the previous row to create geometric patterns. Don't be intimidated – the technique is simple and repetitive once you get the rhythm.
Abbreviations
- CO: cast on
- K: knit
- P: purl
- Sl: slip stitch purlwise (unless otherwise noted)
- K2tog: knit two together (decrease)
- Yo: yarn over (increase)
- St(s): stitch(es)
- RS: right side
- WS: wrong side
Getting Started: The Foundation
We'll begin by casting on and establishing the center spine of the shawl. The increases happen at the edges and at the center, creating the triangular shape.
Row 1 (RS): With Color A, CO 3 sts. K1, yo, k1, yo, k1. (5 sts)
Row 2 (WS): With Color A, k2, p1, k2. (5 sts)
Row 3 (RS): With Color A, k2, yo, k1, yo, k2. (7 sts)
Row 4 (WS): With Color A, k2, p3, k2. (7 sts)
Row 5 (RS): With Color B, k2, yo, k1, yo, k1, yo, k1, yo, k2. (11 sts)
Row 6 (WS): With Color B, k2, p7, k2. (11 sts)
Tip: The first and last 2 stitches of every row are always knit. This creates a neat, garter stitch edge that prevents curling and makes the shawl look polished.
The Mosaic Pattern Body
Now we begin the mosaic pattern. The shawl increases by 4 stitches every 2 rows (one on each edge and two in the center). The pattern below is a 4-row repeat. You'll repeat these 4 rows, changing colors in a specific sequence.
Row 7 (RS): With Color C, k2, yo, k1, yo, *sl 1, k1* repeat from * to * until 3 sts remain, yo, k1, yo, k2. (15 sts)
Row 8 (WS): With Color C, k2, p to last 2 sts, k2. (15 sts)
Row 9 (RS): With Color D, k2, yo, k1, yo, *k1, sl 1* repeat from * to * until 3 sts remain, yo, k1, yo, k2. (19 sts)
Row 10 (WS): With Color D, k2, p to last 2 sts, k2. (19 sts)
Understanding the Mosaic Technique: On the RS rows, you will knit the stitches in the current color and slip the stitches that were knit in the previous color. This creates vertical bars of color that form the geometric pattern. When slipping, always slip the stitch purlwise with the yarn in the back (on RS rows) or in front (on WS rows) to keep the slipped stitch loose and even.
Continuing the Pattern
Repeat Rows 7-10, alternating colors in the sequence: C, D, A, B. Each repeat adds 4 stitches. Continue until the shawl measures approximately 60 inches across the top edge, ending with a WS row.
Color Sequence Chart:
- Repeat 1: Row 7-8 with Color C, Row 9-10 with Color D
- Repeat 2: Row 7-8 with Color A, Row 9-10 with Color B
- Repeat 3: Row 7-8 with Color C, Row 9-10 with Color D
- Repeat 4: Row 7-8 with Color A, Row 9-10 with Color B
Continue this alternating sequence until you reach your desired size. The shawl will grow quickly, and you'll see the beautiful mosaic pattern emerge as the colors stack in horizontal bands.
Pro Tip: Place a stitch marker in the center stitch of the shawl (the stitch between the two center increases). This will help you keep track of your increases and ensure your triangle remains symmetrical.
Final Edging: A Delicate Lace Border
Once your shawl reaches the desired size, it's time to add the finishing touch – a delicate lace border that softens the geometric body and adds a touch of airy elegance.
Row 1 (RS): With Color A, k2, yo, k1, yo, *k2tog, yo* repeat from * to * until 3 sts remain, yo, k1, yo, k2.
Row 2 (WS): With Color A, k2, p to last 2 sts, k2.
Row 3 (RS): With Color A, k2, yo, k1, yo, *k1, yo, k2tog* repeat from * to * until 3 sts remain, yo, k1, yo, k2.
Row 4 (WS): With Color A, k2, p to last 2 sts, k2.
Note: The lace edging rows maintain the same increase structure (yo at edges and center) to keep the shawl lying flat. The k2tog and yo pairs create the eyelet pattern.
Binding Off and Finishing
Bind off loosely on the RS with Color A. A loose bind-off is crucial for a shawl – if it's too tight, the edge will pucker and the shawl won't drape properly. You can use a larger needle to bind off, or use a stretchy bind-off method like the "Jeny's Surprisingly Stretchy Bind-Off" if you prefer.
Weave in all ends with your tapestry needle. Take your time with this step – secure ends will ensure your shawl lasts for years.
Blocking: The Magic Step
Blocking is essential for this project. It opens up the mosaic pattern, evens out the stitches, and gives the shawl its final, beautiful drape.
- Soak the shawl in lukewarm water with a gentle wool wash for 15-20 minutes.
- Gently squeeze out excess water (do not wring or twist).
- Roll the shawl in a clean towel to remove additional moisture.
- Lay the shawl flat on blocking mats. Gently stretch it to the desired dimensions, pinning the top edge and the bottom point. You can also pin out the lace edging points to emphasize the scalloped effect.
- Allow it to dry completely – this may take 24-48 hours depending on humidity.
Once dry, unpin and enjoy your stunning Solar Flare Mosaic Shawl! The rich, earthy colors and geometric pattern will make it a cherished piece in your wardrobe – a wearable work of art that captures the beauty of a desert sunset.
Happy knitting! We'd love to see your finished shawl – share your progress and photos in the comments below or tag us on social media with #SolarFlareShawl.