The Frost-Kissed Snowman Wine Cozy: A Free Knitting Pattern for a Textured, Festive Bottle Cover
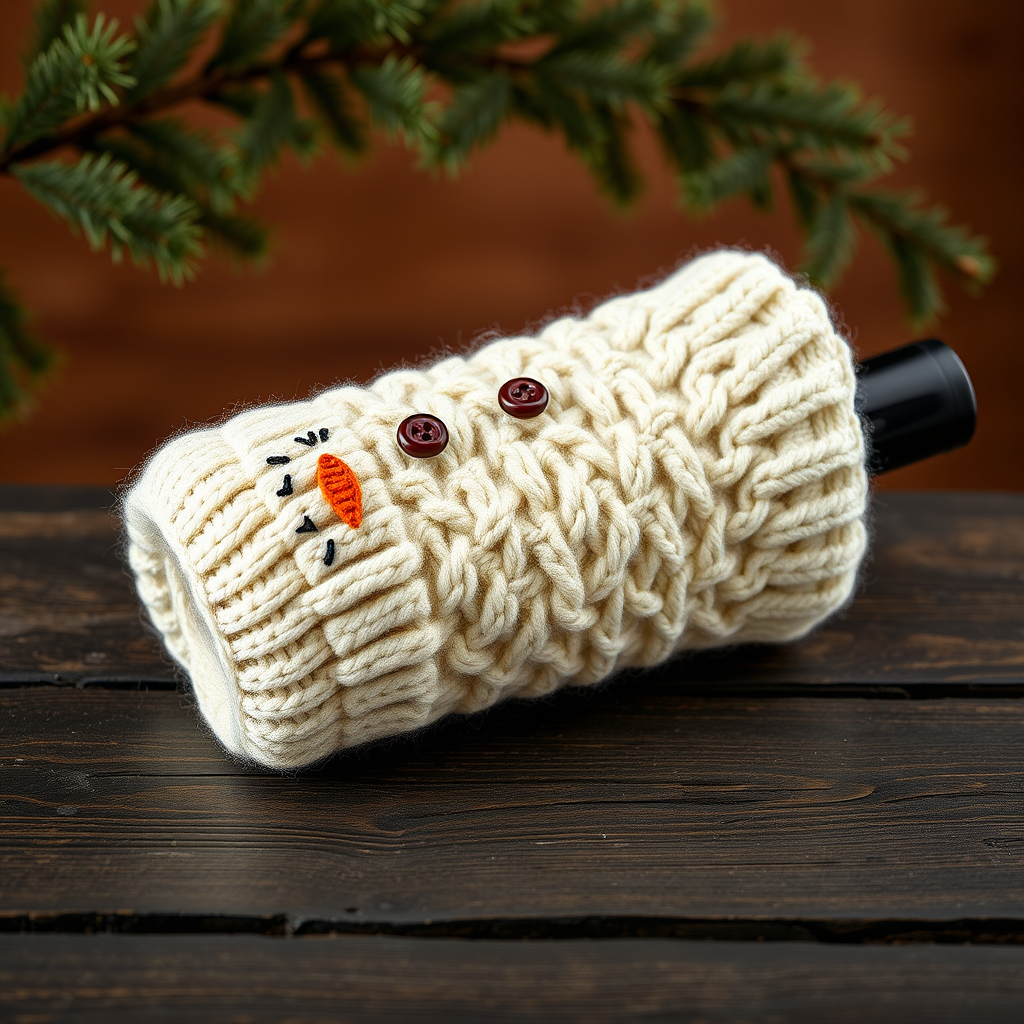
Introducing the Frost-Kissed Snowman Wine Cozy
Wrap your favorite bottle in winter charm with this textured snowman wine cozy, featuring a chunky cable-knit body and delicate embroidered details. This free pattern creates a cozy, reusable cover that transforms any wine bottle into a delightful holiday centerpiece. Perfect for gifting or as a festive table decoration, this project is beginner-friendly yet yields a professional-looking result.
Materials Needed
To create this charming snowman wine cozy, gather the following materials:
- Yarn: Lion Brand Wool-Ease Thick & Quick (80% acrylic, 20% wool; 106 yds / 97 m per 6 oz / 170 g skein) in the following colors:
- Fisherman (MC) – 1 skein
- Black (CC1) – small amount for eyes and mouth
- Orange (CC2) – small amount for nose
- Dark brown scrap – for buttons
- Needles:
- US 11 (8 mm) straight knitting needles
- US 10 (6 mm) straight knitting needles
- Notions:
- Tapestry needle
- Stitch markers
- Cable needle (optional, can use a spare double-pointed needle)
- Gauge: 12 sts x 16 rows = 4 inches in stockinette stitch with US 11 needles (after blocking)
Step-by-Step Instructions
Important Notes Before You Begin
- The cozy is worked flat from bottom to top, then seamed.
- The snowman face is embroidered after knitting.
- All rows are worked in pattern as written; do not skip any rows.
Bottom Ribbing (with US 10 needles)
- Cast on 36 stitches using your preferred method.
- Row 1 (RS): *K2, P2; repeat from * to end of row.
- Row 2 (WS): *P2, K2; repeat from * to end of row.
- Repeat Rows 1-2 until piece measures 2 inches from cast-on edge, ending with a WS row.
Body (switch to US 11 needles)
- Row 1 (RS): Knit across all 36 stitches.
- Row 2 (WS): Purl across all 36 stitches.
- Repeat Rows 1-2 until piece measures 8 inches from cast-on edge, ending with a WS row.
Cable Panel (center 12 stitches)
Note: The cable panel is worked over the center 12 stitches. The remaining stitches on each side are worked in stockinette (knit on RS, purl on WS).
- Row 1 (RS): K12, P2, (K2, P2) twice, K12. (Total: 36 sts)
- Row 2 (WS): P12, K2, (P2, K2) twice, P12.
- Row 3 (RS): K12, P2, C4F (slip 2 stitches to cable needle, hold to front, K2 from left needle, then K2 from cable needle), P2, C4B (slip 2 stitches to cable needle, hold to back, K2 from left needle, then K2 from cable needle), P2, K12.
- Row 4 (WS): P12, K2, (P2, K2) twice, P12.
- Repeat Rows 1-4 for cable pattern until piece measures 10 inches from cast-on edge, ending with a WS row.
Top Shaping
- Row 1 (RS): K2tog, K14, K2tog, K2tog, K14, K2tog. (32 stitches remain)
- Row 2 (WS): Purl across all 32 stitches.
- Row 3 (RS): K2tog, K12, K2tog, K2tog, K12, K2tog. (28 stitches remain)
- Row 4 (WS): Purl across all 28 stitches.
- Row 5 (RS): K2tog, K10, K2tog, K2tog, K10, K2tog. (24 stitches remain)
- Row 6 (WS): Purl across all 24 stitches.
- Bind off all stitches loosely. Do not cut yarn yet if you plan to add a hanging loop.
Finishing
- Fold piece in half with right sides together, matching cast-on and bind-off edges.
- Using mattress stitch and tapestry needle, seam the side edges together, leaving the bottom open. Weave in the seam yarn securely.
- Turn the cozy right side out.
Snowman Face Embroidery
Using tapestry needle and CC1 (black), CC2 (orange), and brown scrap yarn:
- Eyes: With CC1 (black), embroider two French knots or small satin stitches about 1.5 inches from the top edge, centered over the cable panel, spaced 1 inch apart.
- Nose: With CC2 (orange), embroider a small triangle (carrot shape) directly below the eyes, about 0.5 inches long. Use satin stitches to fill the shape.
- Mouth: With CC1 (black), embroider a curved line of small backstitches below the nose, forming a smile. Make about 5-6 stitches in a gentle curve.
- Buttons: With brown yarn, embroider three small French knots or satin stitches in a vertical line below the mouth, spaced 0.5 inches apart.
Optional Hanging Loop
- Cut a 6-inch length of MC yarn.
- Fold in half and thread through the top center of the cozy using a tapestry needle.
- Tie the ends in a knot to form a loop, then weave in the ends.
Final Steps
- Weave in all remaining ends using a tapestry needle.
- Block gently to shape: lightly mist with water and lay flat to dry, smoothing out any uneven edges.
Your Frost-Kissed Snowman Wine Cozy is now complete! Slip it over a wine bottle and enjoy the festive charm it brings to your holiday table or gift-giving.