The Emberfall Twisted Cowl Free Pattern – A Knitted Hearthside Wrap

The Emberfall Twisted Cowl: Your New Favorite Cozy Knit
There’s something magical about wrapping yourself in a hand-knit accessory that feels like a warm hug. The Emberfall Twisted Cowl is exactly that—a luxurious, dense, and beautifully textured piece that captures the flickering warmth of a hearthside fire. Designed with simplicity in mind, this pattern is perfect for beginners who want to create something stunning without complicated techniques. The twisted rib stitch creates an elegant, braided effect that looks far more intricate than it actually is, making this cowl a rewarding project that you'll be proud to wear or gift.
Whether you're curled up with a book on a chilly autumn evening or braving a winter commute, this cowl delivers both style and function. The super bulky yarn ensures quick knitting, so you'll have a finished piece in no time. Let's dive into everything you need to create your own Emberfall Twisted Cowl.
Materials Needed
Before you begin, gather the following supplies. All items are readily available at your local yarn shop or online.
Yarn
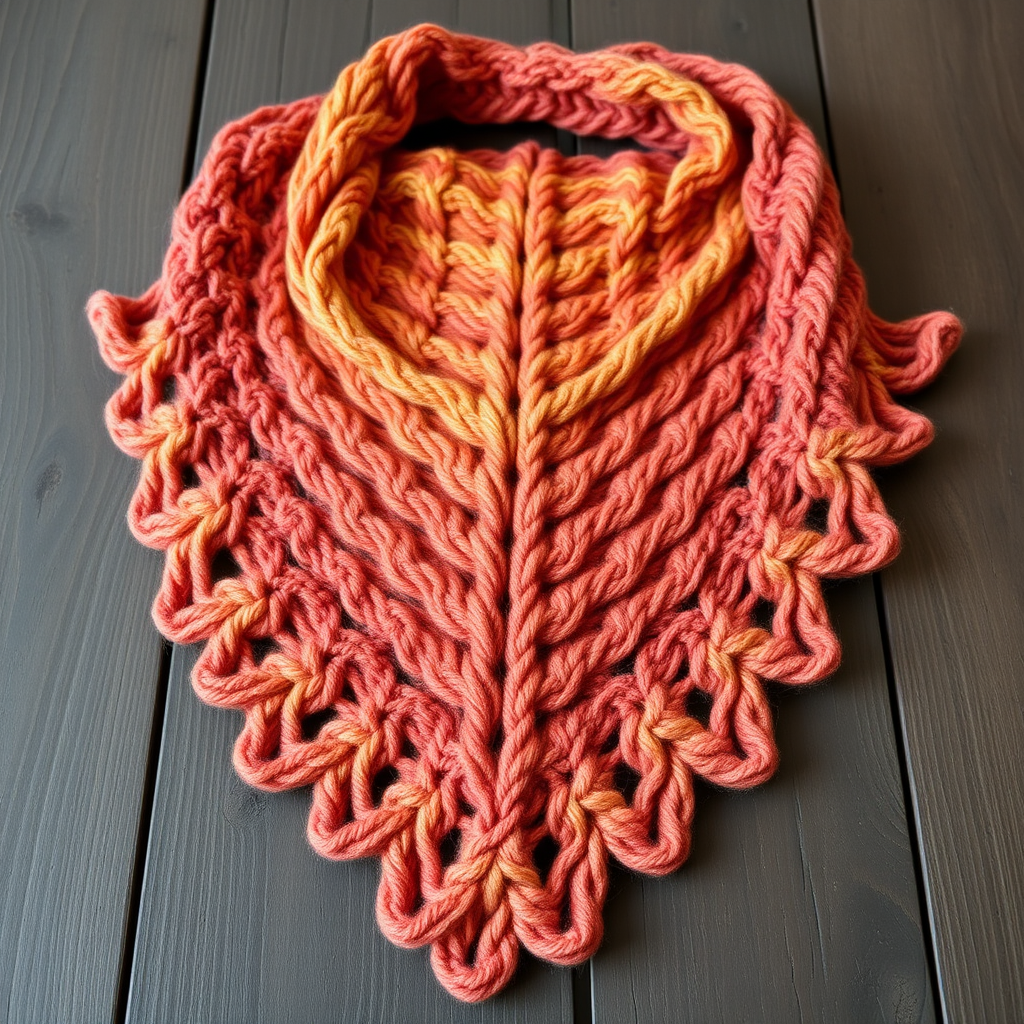
- Super bulky weight yarn (approximately 200–250 yards). The sample shown uses a gorgeous gradient of burnt orange, deep red, and warm brown—perfect for fall and winter. However, feel free to choose any colorway that speaks to you!
Needles & Notions
- US Size 13 (9 mm) 24-inch circular knitting needle – The circular needle is essential for working in the round.
- Stitch marker – To mark the beginning of your round.
- Tapestry needle – For weaving in ends.
- Scissors – For cutting yarn.
Gauge
10 stitches and 14 rows = 4 inches in twisted rib stitch (k1tbl, p1). Always knit a gauge swatch to ensure your cowl matches the intended measurements. If your gauge is off, adjust your needle size accordingly.
Step-by-Step Instructions
This pattern is rated Easy and is perfect for confident beginners. The finished cowl measures approximately 24 inches in circumference (laid flat) and 10 inches in height.
Abbreviations
- CO: cast on
- K: knit
- P: purl
- K1TBL: knit 1 stitch through the back loop
- P1TBL: purl 1 stitch through the back loop
- Rep: repeat
- St(s): stitch(es)
Pattern Notes
- The cowl is worked in the round on a circular needle, creating a seamless tube.
- The twisted rib stitch produces a dense, stretchy, and reversible fabric—both sides look great!
- To change colors, simply join the new yarn at the beginning of a round and weave in the ends later. No need for complicated colorwork.
Cast On and Setup
Step 1: CO 120 stitches using your preferred method (long-tail cast on works well).
Step 2: Place a stitch marker on your right needle to mark the beginning of the round.
Step 3: Join in the round by knitting the first stitch from the left needle with the working yarn. Critical: Ensure your stitches are not twisted around the needle before joining. Take a moment to check that the cast-on edge lies flat and all stitches face the same direction.
Round 1 – Establishing the Twisted Rib
Step 4: *K1TBL, P1; rep from * to end of round.
Step 5: This single round establishes the twisted rib pattern. The K1TBL creates a twisted, braided effect, while the P1 adds elasticity and structure.
Rounds 2–10 – Bottom Edge
Step 6: Repeat Round 1 for Rounds 2 through 10. This creates a neat, defined bottom edge for your cowl. Keep your tension consistent—not too tight, not too loose—for an even fabric.
Color Transition (Optional)
Step 7: If you're using multiple colors, change to the next color at the start of Round 11. Simply drop the old yarn and pick up the new one, leaving a tail to weave in later.
Step 8: Continue repeating Round 1, changing colors every 10–12 rounds as desired. The sample uses three colors: burnt orange, deep red, and warm brown, transitioning gradually for a gradient effect.
Continue in Pattern
Step 9: Keep repeating Round 1 until your cowl measures approximately 9 inches from the cast-on edge. Use a measuring tape to check periodically. Remember, the fabric is stretchy, so measure it laid flat without pulling.
Finishing
Step 10: Bind off all stitches loosely in pattern (K1TBL, P1). To bind off in pattern: knit the first stitch (K1TBL), purl the second (P1), then pass the first stitch over the second. Continue this way across the round. Important: Bind off loosely to maintain the stretchiness of the cowl—use a larger needle if needed.
Step 11: Cut your yarn, leaving a 6-inch tail. Pull the tail through the last loop to secure.
Step 12: Weave in all loose ends using a tapestry needle. Thread the needle with each tail and weave it through the wrong side of the fabric for about 2 inches, then trim the excess.
Step 13: Block lightly to even out the stitches and enhance the twisted texture. To block, soak the cowl in lukewarm water with a gentle wool wash, gently squeeze out excess water (do not wring), lay flat on a towel, and shape to the desired measurements. Allow to dry completely.
Wear It With Pride
Your Emberfall Twisted Cowl is now complete! Slip it over your head and enjoy the cozy, textured warmth it provides. The dense twisted rib makes it perfect for windy days, while the reversible design means you can style it however you like. This pattern is also a fantastic canvas for experimenting with different yarns—try a solid color for a classic look, or a self-striping yarn for a fun twist.
Happy knitting, and may your days be filled with warmth and creativity!