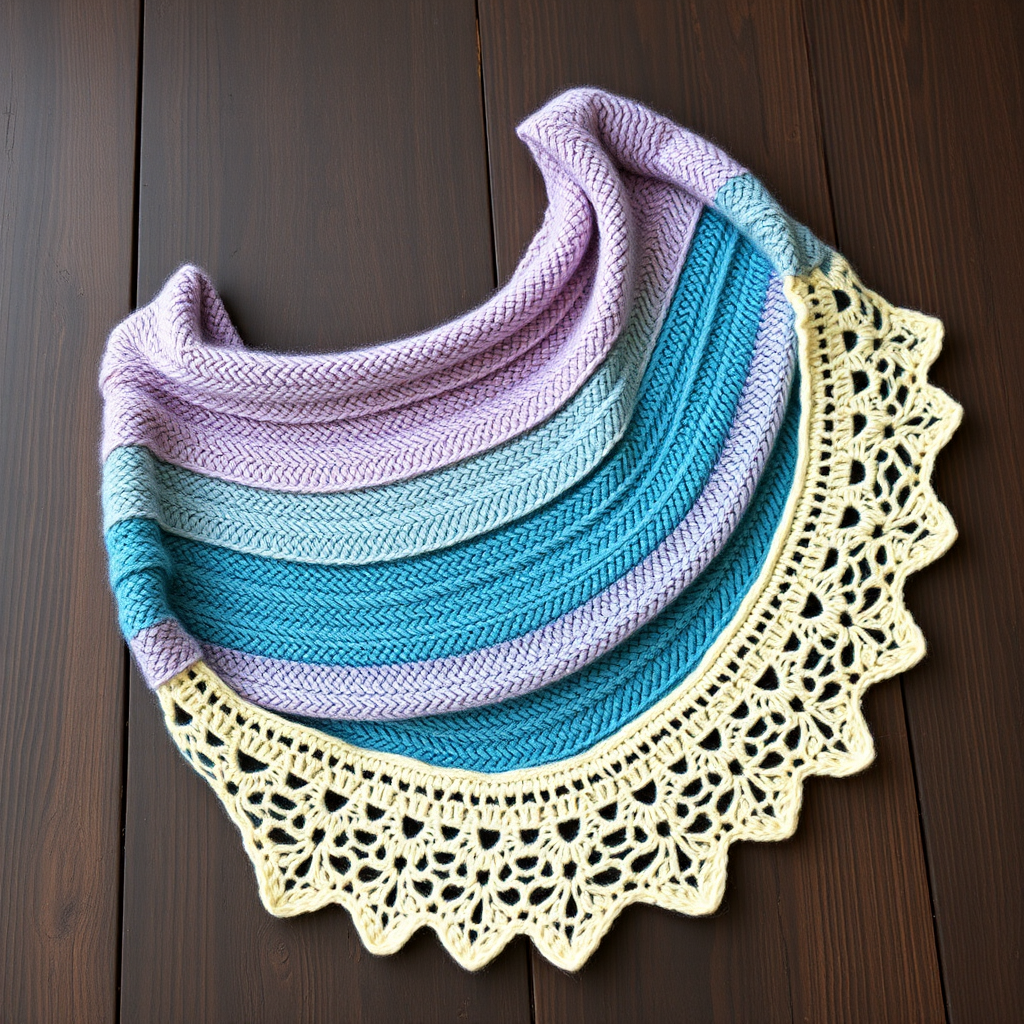
The Ember Glow Crescent Shawl: A Free Knitting Pattern for a Textured, Asymmetrical Wrap

Wrap Yourself in Sunset: The Ember Glow Crescent Shawl
Wrap yourself in the warmth of a sunset with this uniquely shaped crescent shawl, featuring a mesmerizing interplay of slipped stitches and garter ridges. The asymmetrical design creates a modern, drapey silhouette that is both cozy and elegant. This free knitting pattern is perfect for adventurous beginners and intermediate knitters looking to add a stunning, textured piece to their wardrobe. The variegated yarn creates a beautiful, heathered effect that mimics the colors of a glowing ember.
Materials Needed
- Yarn: Worsted weight yarn (approx 450-550 yards). Sample shown in Malabrigo Rios in 'Piedras' (a variegated rust, amber, and charcoal).
- Needle: US 8 (5.0 mm) 32-inch circular needle (or longer) for working flat.
- Notions: Stitch markers, tapestry needle for weaving in ends.
- Gauge: 18 stitches and 28 rows = 4 inches in garter stitch (blocked).
Step-by-Step Instructions
Abbreviations
- k = knit
- p = purl
- sl1 wyif = slip 1 stitch purlwise with yarn in front
- yo = yarn over
- k2tog = knit 2 together
- ssk = slip, slip, knit (decrease)
- pm = place marker
- sm = slip marker
Getting Started: The Center Point
This shawl is worked from the top center point outward, increasing on one side to create the crescent shape.
Cast on 3 stitches.
- Row 1 (WS): k1, yo, k1, yo, k1. (5 stitches)
- Row 2 (RS): k1, sl1 wyif, k1, yo, k1, yo, k1, sl1 wyif, k1. (7 stitches)
- Row 3 (WS): k1, sl1 wyif, k to last 2 stitches, sl1 wyif, k1.
- Row 4 (RS): k1, sl1 wyif, k1, yo, k to last 3 stitches, yo, k1, sl1 wyif, k1. (9 stitches)
- Row 5 (WS): k1, sl1 wyif, k to last 2 stitches, sl1 wyif, k1.
Repeat Rows 4 and 5 until you have 31 stitches on your needle, ending with a WS row.
Begin Texture Section
Now we'll create the beautiful slipped stitch texture. Remember to maintain the edge stitches (k1, sl1 wyif at the beginning and end of RS rows, and k1, sl1 wyif at the beginning and end of WS rows) throughout.
- Row 1 (RS): k1, sl1 wyif, k1, yo, *k1, sl1 wyif, k2, sl1 wyif, k1* repeat from * to * until last 3 stitches, yo, k1, sl1 wyif, k1.
- Row 2 (WS): k1, sl1 wyif, purl to last 2 stitches, sl1 wyif, k1.
- Row 3 (RS): k1, sl1 wyif, k1, yo, *k2, sl1 wyif, k1, sl1 wyif, k2* repeat from * to * until last 3 stitches, yo, k1, sl1 wyif, k1.
- Row 4 (WS): k1, sl1 wyif, purl to last 2 stitches, sl1 wyif, k1.
- Row 5 (RS): k1, sl1 wyif, k1, yo, *k3, sl1 wyif, k3* repeat from * to * until last 3 stitches, yo, k1, sl1 wyif, k1.
- Row 6 (WS): k1, sl1 wyif, purl to last 2 stitches, sl1 wyif, k1.
- Row 7 (RS): k1, sl1 wyif, k1, yo, *k4, sl1 wyif, k4* repeat from * to * until last 3 stitches, yo, k1, sl1 wyif, k1.
- Row 8 (WS): k1, sl1 wyif, purl to last 2 stitches, sl1 wyif, k1.
- Row 9 (RS): k1, sl1 wyif, k1, yo, *k5, sl1 wyif, k5* repeat from * to * until last 3 stitches, yo, k1, sl1 wyif, k1.
- Row 10 (WS): k1, sl1 wyif, purl to last 2 stitches, sl1 wyif, k1.
- Row 11 (RS): k1, sl1 wyif, k1, yo, *k6, sl1 wyif, k6* repeat from * to * until last 3 stitches, yo, k1, sl1 wyif, k1.
- Row 12 (WS): k1, sl1 wyif, purl to last 2 stitches, sl1 wyif, k1.
- Row 13 (RS): k1, sl1 wyif, k1, yo, *k7, sl1 wyif, k7* repeat from * to * until last 3 stitches, yo, k1, sl1 wyif, k1.
- Row 14 (WS): k1, sl1 wyif, purl to last 2 stitches, sl1 wyif, k1.
- Row 15 (RS): k1, sl1 wyif, k1, yo, *k8, sl1 wyif, k8* repeat from * to * until last 3 stitches, yo, k1, sl1 wyif, k1.
- Row 16 (WS): k1, sl1 wyif, purl to last 2 stitches, sl1 wyif, k1.
- Row 17 (RS): k1, sl1 wyif, k1, yo, *k9, sl1 wyif, k9* repeat from * to * until last 3 stitches, yo, k1, sl1 wyif, k1.
- Row 18 (WS): k1, sl1 wyif, purl to last 2 stitches, sl1 wyif, k1.
- Row 19 (RS): k1, sl1 wyif, k1, yo, *k10, sl1 wyif, k10* repeat from * to * until last 3 stitches, yo, k1, sl1 wyif, k1.
- Row 20 (WS): k1, sl1 wyif, purl to last 2 stitches, sl1 wyif, k1.
Repeat Rows 1-20 until the shawl measures approximately 24 inches from the cast-on edge along the straight side, ending with a WS row. You will have about 200-250 stitches.
Edging
This delicate eyelet border adds a beautiful finish.
- Row 1 (RS): k1, sl1 wyif, k1, yo, *k2tog, yo* repeat from * to * until last 3 stitches, yo, k1, sl1 wyif, k1.
- Row 2 (WS): k1, sl1 wyif, purl to last 2 stitches, sl1 wyif, k1.
- Row 3 (RS): k1, sl1 wyif, k1, yo, *k2tog, yo* repeat from * to * until last 3 stitches, yo, k1, sl1 wyif, k1.
- Row 4 (WS): Bind off loosely in purl.
Finishing
Weave in ends with a tapestry needle. Block gently to open up the lace and texture, pinning the crescent shape to your desired dimensions. Allow to dry completely before wearing.