The Ember & Ash Throw: A Free Knitting Pattern for a Modern Buffalo Plaid Blanket
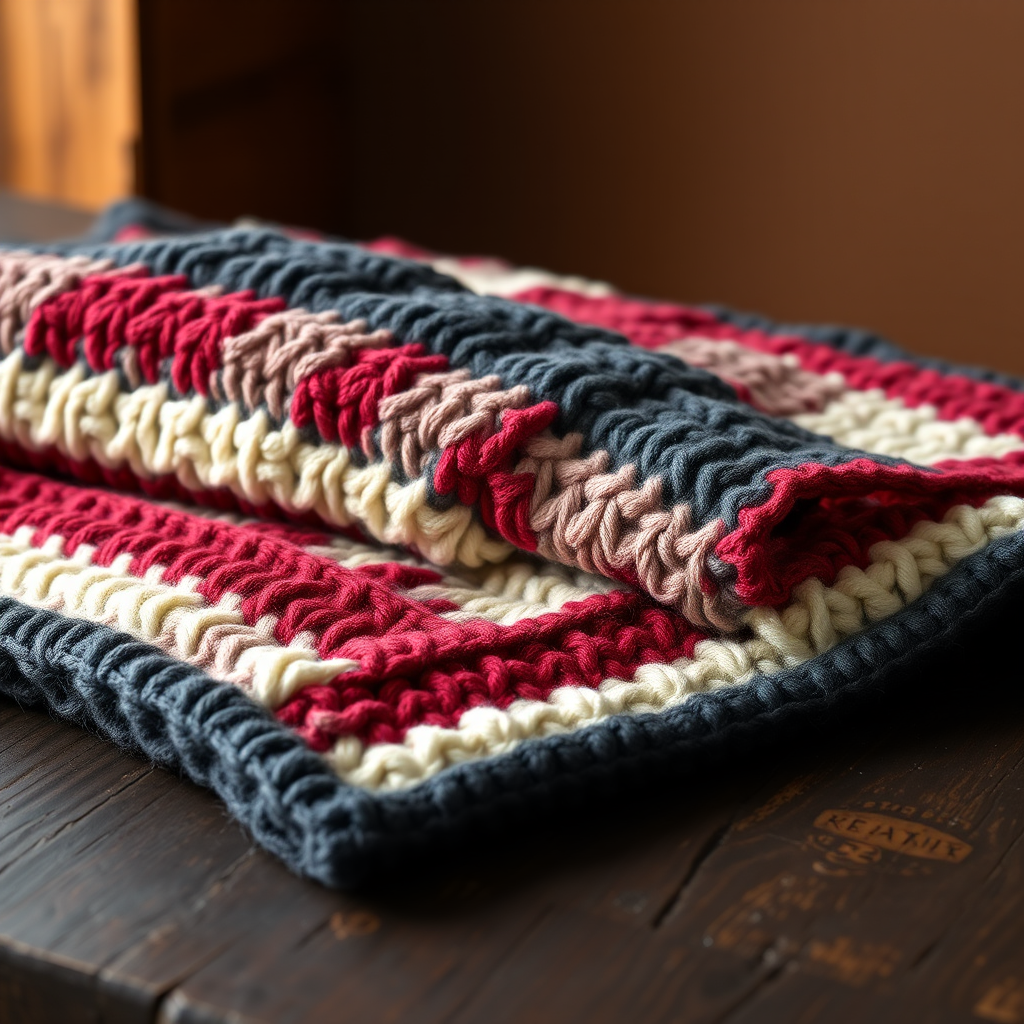
Wrap Yourself in Modern Comfort: The Ember & Ash Throw
There's nothing quite like the feeling of a warm, hand-knit blanket on a chilly evening. The Ember & Ash Throw brings a fresh, modern twist to the classic buffalo plaid, using rich, heathered tones of charcoal, creamy fisherman, and deep cranberry. This free knitting pattern is designed for adventurous beginners and intermediate knitters alike, offering a satisfying project that builds quickly with super bulky yarn. The oversized check pattern creates a stunning visual impact, making this throw a statement piece for any room. Let's dive into creating your own cozy masterpiece.
Materials Needed
Before you begin, gather the following supplies. Using the exact yarn recommended will ensure your blanket matches the gauge and look of the original, but any super bulky weight (category 6) yarn will work.
- Yarn: Lion Brand Wool-Ease Thick & Quick (or any super bulky weight yarn, 6):
- 3 skeins in 'Charcoal' (Main Color, MC)
- 2 skeins in 'Fisherman' (Contrast Color 1, CC1)
- 2 skeins in 'Cranberry' (Contrast Color 2, CC2)
- Needles: US 15 (10 mm) circular knitting needles, 36-inch cable (or longer for comfort)
- Notions: Tapestry needle for weaving in ends, scissors, stitch markers (optional)
Gauge & Sizing
Gauge: 8 stitches and 12 rows = 4 inches in stockinette stitch (knit on RS, purl on WS). Always check your gauge to ensure your blanket matches the finished dimensions.
Finished Size: Approximately 50 inches wide by 60 inches long.
Pattern Notes & Abbreviations
Pattern Notes:
- The blanket is worked flat in one piece from side to side.
- The buffalo plaid pattern is created by alternating blocks of color in a checkerboard pattern.
- A simple slipped-stitch edge is not used here; instead, the first and last stitch of every row is knit with the Main Color (MC) to create a clean, stable border.
- When changing colors, carry the unused yarn loosely up the side of the work. Do not cut the yarn between sections; simply drop it and pick up the new color.
Abbreviations:
- CO: Cast on
- K: Knit
- P: Purl
- St(s): Stitch(es)
- MC: Main Color (Charcoal)
- CC1: Contrast Color 1 (Fisherman)
- CC2: Contrast Color 2 (Cranberry)
- Rep: Repeat
- RS: Right Side
- WS: Wrong Side
Step-by-Step Instructions
Cast On & Bottom Border
With MC, cast on 120 stitches using a long-tail or cable cast-on method. This will be the bottom edge of your blanket.
Border (worked in MC only):
- Row 1 (RS): Knit all stitches.
- Row 2 (WS): Knit all stitches.
- Row 3 (RS): Knit all stitches.
- Row 4 (WS): Knit all stitches.
You have now completed 4 rows of garter stitch border.
Begin Plaid Pattern
Now you will start the checkerboard pattern. Each "block" of color is 10 stitches wide and 12 rows tall. The first and last stitch of every row is always knit with MC to maintain the border.
Section 1 (Rows 5-16): Charcoal & Fisherman Blocks
In this section, you will alternate 10-stitch blocks of MC and CC1.
- Row 5 (RS): With MC, K1 (edge stitch). *K10 with MC, K10 with CC1; rep from * to last stitch, K1 with MC.
- Row 6 (WS): With MC, K1. *P10 with MC, P10 with CC1; rep from * to last stitch, K1 with MC.
- Row 7 (RS): With MC, K1. *K10 with MC, K10 with CC1; rep from * to last stitch, K1 with MC.
- Row 8 (WS): With MC, K1. *P10 with MC, P10 with CC1; rep from * to last stitch, K1 with MC.
- Row 9 (RS): With MC, K1. *K10 with MC, K10 with CC1; rep from * to last stitch, K1 with MC.
- Row 10 (WS): With MC, K1. *P10 with MC, P10 with CC1; rep from * to last stitch, K1 with MC.
- Row 11 (RS): With MC, K1. *K10 with MC, K10 with CC1; rep from * to last stitch, K1 with MC.
- Row 12 (WS): With MC, K1. *P10 with MC, P10 with CC1; rep from * to last stitch, K1 with MC.
- Row 13 (RS): With MC, K1. *K10 with MC, K10 with CC1; rep from * to last stitch, K1 with MC.
- Row 14 (WS): With MC, K1. *P10 with MC, P10 with CC1; rep from * to last stitch, K1 with MC.
- Row 15 (RS): With MC, K1. *K10 with MC, K10 with CC1; rep from * to last stitch, K1 with MC.
- Row 16 (WS): With MC, K1. *P10 with MC, P10 with CC1; rep from * to last stitch, K1 with MC.
Section 2 (Rows 17-28): Cranberry & Charcoal Blocks
In this section, you will alternate 10-stitch blocks of CC2 and MC. Notice the pattern shifts: where you had MC, you now use CC2, and where you had CC1, you now use MC.
- Row 17 (RS): With MC, K1. *K10 with CC2, K10 with MC; rep from * to last stitch, K1 with MC.
- Row 18 (WS): With MC, K1. *P10 with CC2, P10 with MC; rep from * to last stitch, K1 with MC.
- Row 19 (RS): With MC, K1. *K10 with CC2, K10 with MC; rep from * to last stitch, K1 with MC.
- Row 20 (WS): With MC, K1. *P10 with CC2, P10 with MC; rep from * to last stitch, K1 with MC.
- Row 21 (RS): With MC, K1. *K10 with CC2, K10 with MC; rep from * to last stitch, K1 with MC.
- Row 22 (WS): With MC, K1. *P10 with CC2, P10 with MC; rep from * to last stitch, K1 with MC.
- Row 23 (RS): With MC, K1. *K10 with CC2, K10 with MC; rep from * to last stitch, K1 with MC.
- Row 24 (WS): With MC, K1. *P10 with CC2, P10 with MC; rep from * to last stitch, K1 with MC.
- Row 25 (RS): With MC, K1. *K10 with CC2, K10 with MC; rep from * to last stitch, K1 with MC.
- Row 26 (WS): With MC, K1. *P10 with CC2, P10 with MC; rep from * to last stitch, K1 with MC.
- Row 27 (RS): With MC, K1. *K10 with CC2, K10 with MC; rep from * to last stitch, K1 with MC.
- Row 28 (WS): With MC, K1. *P10 with CC2, P10 with MC; rep from * to last stitch, K1 with MC.
Repeat Sections for Length
Continue repeating Section 1 (Rows 5-16) and Section 2 (Rows 17-28) until your blanket measures approximately 60 inches from the cast-on edge. It's best to end after completing a full Section 2 (Row 28) to maintain pattern symmetry.
Top Border & Bind Off
Once you've reached your desired length, work the top border in MC only, just like the bottom border.
- Row 1 (RS): Knit all stitches.
- Row 2 (WS): Knit all stitches.
- Row 3 (RS): Knit all stitches.
- Row 4 (WS): Knit all stitches.
Bind Off: On the next right-side row, bind off all stitches loosely in knit. To do this, knit the first two stitches, then pass the first stitch over the second and off the needle. Knit the next stitch, pass the previous stitch over, and repeat until one stitch remains. Cut the yarn, pull the tail through the last loop, and tighten.
Finishing
Weave in all ends securely with a tapestry needle. Be sure to weave in the ends on the wrong side of the blanket, following the path of the yarn to keep them invisible. Block the blanket gently by laying it flat, misting with water, and shaping it to the correct dimensions. Allow it to dry completely before using or gifting.
Your Ember & Ash Throw is now complete! Enjoy the warmth and modern charm of your handmade buffalo plaid blanket.