The Cascade Peaks Shawlette Free Pattern – A Knitted Ode to Mountain Streams

The Cascade Peaks Shawlette Free Pattern – A Knitted Ode to Mountain Streams
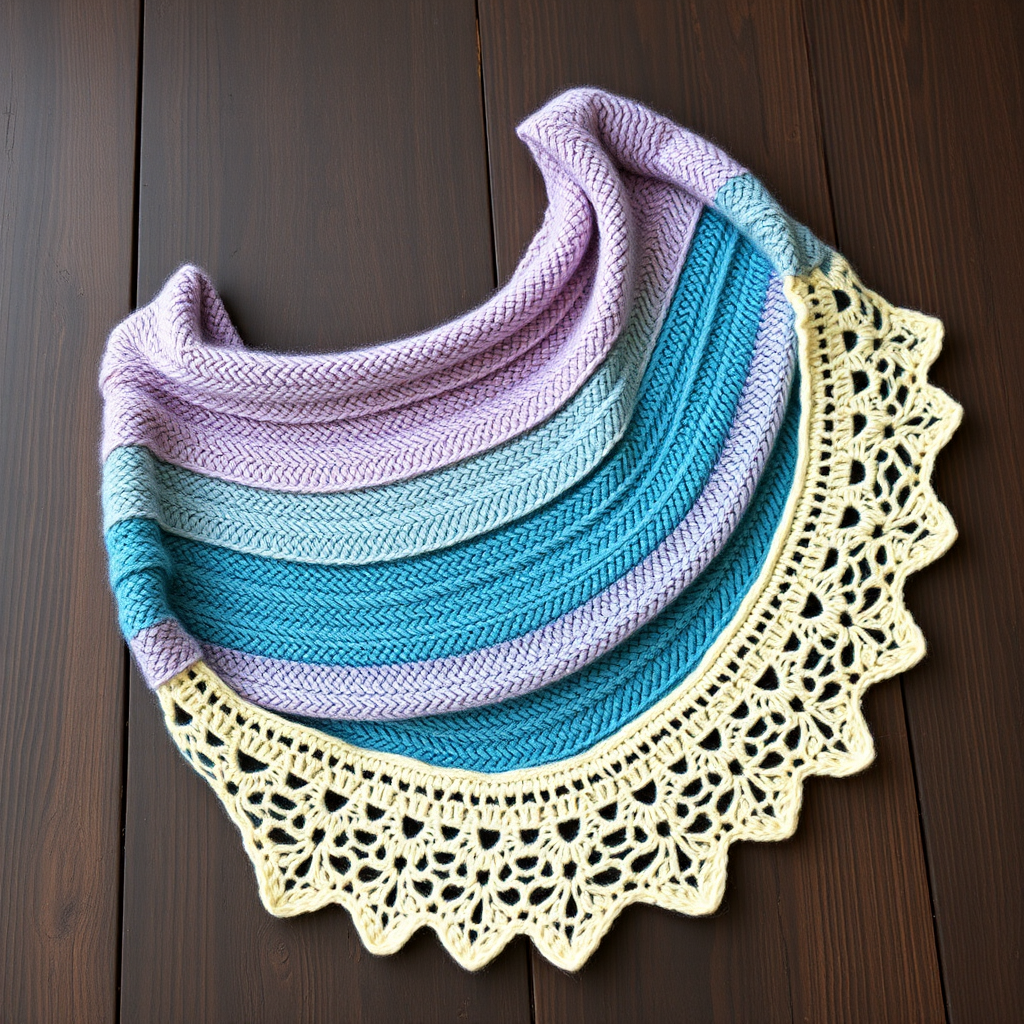
Wrap yourself in the tranquil flow of a mountain brook with this exquisite triangular shawlette. The Cascade Peaks Shawlette features undulating lace that mimics cascading water over smooth stones, creating a serene, nature-inspired accessory perfect for cool evenings. The soft gradient of misty blues and sage greens transitions beautifully into a creamy white edge, making this piece a true wearable work of art.
Whether you're an experienced knitter looking for a meditative project or a confident beginner ready to tackle lace, this pattern offers a rewarding journey. The gentle rhythm of yarn overs and decreases is both soothing and addictive, and the result is a stunning, lightweight shawl that drapes beautifully over the shoulders.
Materials Needed
Before you begin, gather the following supplies to ensure a smooth knitting experience:
- Yarn: Fingering weight yarn in 3 colors:
- Color A (misty blue): 220 yards
- Color B (sage green): 220 yards
- Color C (soft white): 110 yards
- Needle: US 6 (4.0 mm) circular knitting needle, 24-inch or longer (to accommodate the growing stitch count)
- Notions: Stitch markers (at least 2), tapestry needle for weaving in ends, blocking pins and mats
Gauge: 20 stitches and 28 rows = 4 inches in stockinette stitch (blocked). Gauge is important for achieving the correct drape and size, so take a moment to swatch before beginning.
Step-by-Step Instructions
This shawlette is worked from the top center down, increasing at the edges and center to form a triangle. Use a circular needle to accommodate the growing number of stitches. The pattern is surprisingly simple once you understand the rhythm, and the lace repeat is easy to memorize.
Abbreviations
k = knit, p = purl, yo = yarn over, k2tog = knit two together, ssk = slip slip knit, pm = place marker, sm = slip marker, RS = right side, WS = wrong side.
Setup
Using Color A, cast on 3 stitches.
Row 1 (RS): k1, yo, k1, yo, k1 (5 stitches).
Row 2 (WS): k1, p3, k1.
Row 3 (RS): k1, yo, k1, yo, pm, k1, yo, k1, yo, k1 (9 stitches).
Row 4 (WS): k1, p7, k1.
Row 5 (RS): k1, yo, k1, yo, k2, sm, yo, k1, yo, k2, yo, k1, yo, k1 (13 stitches).
Row 6 (WS): k1, p11, k1.
Begin Lace Pattern (Worked over 4-row repeat)
Row 7 (RS): k1, yo, k1, yo, k2, yo, ssk, k1, k2tog, yo, sm, yo, k1, yo, k2, yo, ssk, k1, k2tog, yo, yo, k1, yo, k1 (17 stitches).
Row 8 (WS): k1, p15, k1.
Row 9 (RS): k1, yo, k1, yo, k3, yo, ssk, k1, k2tog, yo, sm, yo, k1, yo, k3, yo, ssk, k1, k2tog, yo, yo, k1, yo, k1 (21 stitches).
Row 10 (WS): k1, p19, k1.
Row 11 (RS): k1, yo, k1, yo, k4, yo, ssk, k1, k2tog, yo, sm, yo, k1, yo, k4, yo, ssk, k1, k2tog, yo, yo, k1, yo, k1 (25 stitches).
Row 12 (WS): k1, p23, k1.
Repeat Rows 7-12, but each repeat adds 4 stitches to each side section (before and after the center marker). Continue until the piece measures approximately 12 inches from the cast-on edge, ending with a WS row. You will have about 100 stitches on each side of the center marker.
Color Transitions
After 4 inches of Color A, switch to Color B for the next 4 inches, then to Color C for the final 4 inches. To create a beautiful, seamless blend, work 2 rows of Color A with 2 rows of Color B for a gradual shift, then similarly for the transition from B to C. This subtle striping technique creates a gorgeous ombre effect that mimics the natural gradient of a mountain stream.
Edging
With Color C, work 6 rows of garter stitch (knit all stitches on RS and WS) across all stitches, maintaining the center marker but no increases. This simple border provides a clean, finished edge that contrasts beautifully with the delicate lace. Bind off loosely on the next RS row to ensure the edge remains stretchy and drapes well.
Finishing
Weave in all ends carefully with a tapestry needle, being sure to secure them well so they don't show through the lace. Block the shawlette gently, pinning out the lace points to open up the pattern and reveal the beautiful eyelet details. Allow it to dry completely before removing the pins.
Tips for Success
- Use lifelines: If you're new to lace knitting, thread a lifeline through the stitches every few repeats. This will save you hours of frustration if you need to rip back.
- Count your stitches: After each repeat, count your stitches to ensure you haven't accidentally dropped a yarn over or missed a decrease.
- Block generously: Lace truly comes alive after blocking. Don't be shy—stretch those points and let the pattern shine.
The Cascade Peaks Shawlette is more than just a knitting project; it's a meditation on nature's beauty. As you work the rhythmic lace pattern, you'll feel the calm of a mountain stream flowing through your hands. The finished piece is a stunning accessory that will be treasured for years to come—a handmade ode to the wild, beautiful places we love.
Happy knitting, and may your stitches always flow like water over smooth stones!