Crochet Christmas Ornament Patterns
Snowy Pinecone Jumbo Yarn Ornament Free Pattern
Anonymous
•
July 18, 2026
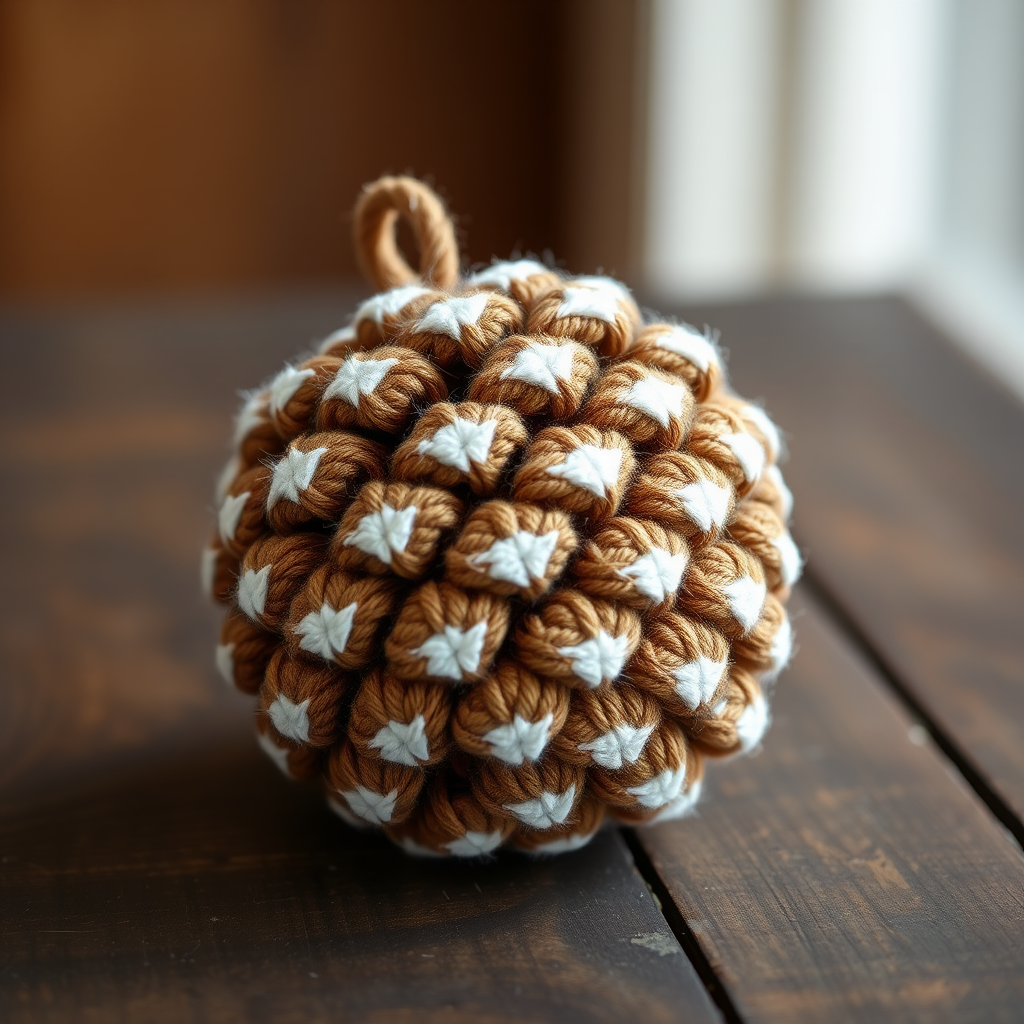
Snowy Pinecone Jumbo Yarn Ornament Free Pattern
Introduction
Bring the rustic charm of a snowy forest into your home with this delightful Snowy Pinecone Ornament. Crocheted with jumbo yarn, this cozy and textured piece is perfect for adding a touch of nature-inspired elegance to your holiday decor. Whether you're a beginner or an experienced crocheter, this pattern is designed to guide you through each step, ensuring a beautiful finished ornament that will enhance your festive decorations.
Materials Needed
- Jumbo weight yarn in natural brown (for the body of the pinecone)
- Jumbo weight yarn in white (for the snow accents)
- 12mm crochet hook
- Fiberfill stuffing (for a cozy, plush finish)
- Scissors
- Tapestry needle (for weaving in ends)
Step-by-Step Instructions
- Start with a Magic Ring: Using the brown yarn, create a magic ring. This will be the foundation of your ornament.
- Round 1: Inside the magic ring, crochet 6 single crochets (sc). Pull the ring tight to close it.
- Round 2: Crochet 2 sc in each sc around. You should have a total of 12 stitches at the end of this round.
- Round 3: *Crochet 1 sc in the next stitch, then 2 sc in the following stitch.* Repeat this pattern around. You will have 18 stitches at the end of this round.
- Round 4: *Crochet 1 sc in the next 2 stitches, then 2 sc in the following stitch.* Repeat this pattern around. You will have 24 stitches at the end of this round.
- Round 5: *Crochet 1 sc in the next 3 stitches, then 2 sc in the following stitch.* Repeat this pattern around. You will have 30 stitches at the end of this round.
- Rounds 6-8: For these rounds, simply crochet 1 sc in each stitch around. This will help build the body of the pinecone.
- Round 9: *Crochet 1 sc in the next 3 stitches, then crochet 2 stitches together (sc2tog).* Repeat this pattern around. You will have 24 stitches at the end of this round.
- Round 10: *Crochet 1 sc in the next 2 stitches, then crochet 2 stitches together (sc2tog).* Repeat this pattern around. You will have 18 stitches at the end of this round.
- Round 11: *Crochet 1 sc in the next stitch, then crochet 2 stitches together (sc2tog).* Repeat this pattern around. You will have 12 stitches at the end of this round.
- Stuff the Ornament: Lightly stuff the ornament with fiberfill to give it a plush and cozy feel.
- Round 12: Crochet 2 stitches together (sc2tog) around until you have 6 stitches left. This will close the top of your ornament.
- Finish Off: Cut the yarn, leaving a long tail. Pull the tail through the last stitch to secure it. Weave in any loose ends with a tapestry needle.
- Create a Hanging Loop: Attach the white yarn to the top of the pinecone. Crochet a small loop (about 5-6 chains) for hanging.
- Add Snow Accents: Using the white yarn, lightly dust the tips of each scale on the pinecone to mimic freshly fallen snow. This adds a beautiful finishing touch to your ornament.
Congratulations! You have successfully created your very own Snowy Pinecone Jumbo Yarn Ornament. Hang it on your tree or use it as a charming decoration throughout your home this holiday season!


