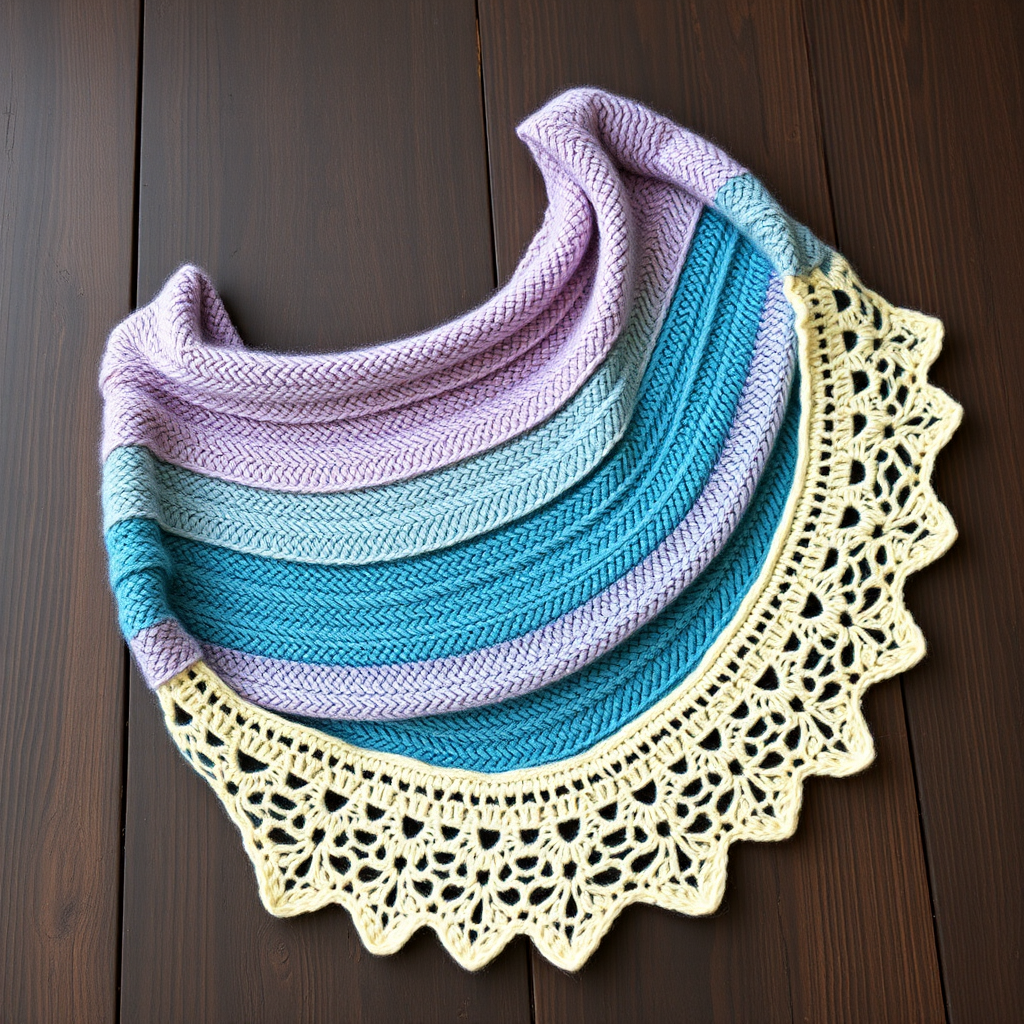
Midnight Bloom Crescent Shawl Free Knitting Pattern

Midnight Bloom Crescent Shawl: A Free Knitting Pattern for Beginners
Wrap yourself in the ethereal beauty of a crescent-shaped shawl that blooms with delicate lace petals against a deep twilight sky. The Midnight Bloom Crescent Shawl is a captivating knitting project that combines a soothing garter stitch base with an intricate floral lace border. This pattern is perfect for knitters who want to expand their skills while creating a stunning, wearable piece of art. Whether you're curling up with a good book or heading out for an evening stroll, this shawl adds a touch of romance and sophistication to any outfit.
In this comprehensive guide, we'll walk you through every step—from casting on to the final blocking—so you can confidently create this heirloom-quality accessory. Let's dive in!
Materials Needed
Before you begin, gather the following supplies. Having everything ready will make your knitting experience smooth and enjoyable.
Yarn
- Main Color (MC): Fingering weight yarn (approx. 300-350 yards) in a deep midnight blue. Look for a soft, pliable yarn with good stitch definition—merino or a merino blend works beautifully.
- Contrast Color (CC): Fingering weight yarn (approx. 100-150 yards) in a soft silver-grey for the lace border. Choose a yarn with a slight sheen to mimic moonlight on petals.
Total yardage: approximately 400-450 yards of fingering weight yarn.
Needles & Notions
- Circular Knitting Needle: US 6 (4.0 mm), 32 inches or longer. The long cable is essential to accommodate the growing number of stitches.
- Stitch Markers: At least 2 (though you may not need them for this pattern, they're handy for tracking repeats).
- Tapestry Needle: For weaving in ends.
- Blocking Mats & Pins: To shape and set the final dimensions.
Gauge
20 stitches and 28 rows = 4 inches in stockinette stitch (blocked). While gauge isn't critical for a shawl's fit, matching it ensures you use the correct amount of yarn and achieve the intended drape. Always knit a swatch and block it before measuring!
Step-by-Step Instructions
This shawl is knit from the top center down to the scalloped lace edge. The main body is worked in garter stitch (knit every row) with increases to create the crescent shape, then the lace border is added. Follow along carefully, and you'll have a gorgeous shawl in no time.
Abbreviations
- k = knit
- p = purl
- yo = yarn over
- k2tog = knit two together (right-leaning decrease)
- ssk = slip, slip, knit (left-leaning decrease)
- kfb = knit front and back (increase)
- pm = place marker
- sm = slip marker
- rep = repeat
Setup: Casting On & Initial Increases
With your main color (MC), cast on 3 stitches using a long-tail cast on.
- Row 1: kfb, k1, kfb (5 stitches)
- Row 2: Knit all stitches.
- Row 3: kfb, k3, kfb (7 stitches)
- Row 4: Knit all stitches.
- Row 5: kfb, k5, kfb (9 stitches)
- Row 6: Knit all stitches.
You now have 9 stitches. This forms the top center of your shawl.
Body: Garter Stitch with Increases
Now we'll work the main body in garter stitch (knit every row) while increasing 2 stitches every other row. This creates the gentle crescent curve.
- Row 7: kfb, knit to last 2 stitches, kfb, k1 (11 stitches)
- Row 8: Knit all stitches.
Repeat Rows 7-8 until you have 101 stitches on your needle. Important: End with a wrong-side row (a knit row). This means your last row should be a Row 8 repeat. Count your stitches carefully—101 is your target.
Pro Tip: Place a stitch marker after the first stitch and before the last stitch. This helps you quickly identify where to make your increases without counting every time.
Lace Border: Switching to Contrast Color
Now it's time to introduce the silver-grey contrast color (CC). Cut the main color, leaving a 6-inch tail, and join the contrast color at the beginning of a right-side row.
Rows 1-4 (Prep Rows):
- Row 1 (right side): k1, *yo, k2tog, k1; rep from * to end (101 stitches)
- Row 2 (wrong side): Purl all stitches.
- Row 3: k1, *yo, k2tog, k1; rep from * to end
- Row 4: Purl all stitches.
These rows create a delicate eyelet foundation for the lace pattern.
Main Lace Pattern
Now we begin the floral lace motif. This pattern creates a beautiful leaf-and-petal design. Work the following 10-row repeat three times total.
- Row 5: k1, *yo, ssk, k3, k2tog, yo, k1; rep from * to end
- Row 6: Purl all stitches.
- Row 7: k1, *yo, ssk, k1, k2tog, yo, k3; rep from * to end
- Row 8: Purl all stitches.
- Row 9: k1, *yo, ssk, k2tog, yo, k5; rep from * to end
- Row 10: Purl all stitches.
- Row 11: k1, *yo, ssk, k1, k2tog, yo, k3; rep from * to end
- Row 12: Purl all stitches.
- Row 13: k1, *yo, ssk, k3, k2tog, yo, k1; rep from * to end
- Row 14: Purl all stitches.
Repeat Rows 5-14 two more times (for a total of 3 lace repeats). After completing the third repeat, you'll have worked 30 rows of the lace pattern.
Scalloped Edge
To finish the shawl with a beautiful scalloped edge, work the following 8 rows:
- Row 1: k1, *yo, ssk, k1, k2tog, yo, k1; rep from * to end
- Row 2: Purl all stitches.
- Row 3: k1, *yo, ssk, k2tog, yo, k1; rep from * to end
- Row 4: Purl all stitches.
- Row 5: k1, *yo, ssk, k1, k2tog, yo, k1; rep from * to end
- Row 6: Purl all stitches.
- Row 7: k1, *yo, ssk, k2tog, yo, k1; rep from * to end
- Row 8: Purl all stitches.
Bind Off Loosely: Use a larger needle (e.g., US 8 or 9) or a stretchy bind-off method like the Jeny's Surprisingly Stretchy Bind-Off to ensure the edge remains elastic and doesn't pucker.
Finishing Touches
- Weave in all ends using a tapestry needle. Be sure to weave in securely but loosely enough not to distort the fabric.
- Block the shawl gently to open up the lace pattern and create the crescent shape. Soak the shawl in lukewarm water with a drop of mild wool wash for 20-30 minutes. Gently squeeze out excess water (never wring!).
- Pin the scalloped edge to form points. Lay the shawl flat on blocking mats, shaping the crescent curve. Pin each scallop point outward to emphasize the floral design. Also pin the top edge straight.
- Allow to dry completely before unpinning. This can take 24-48 hours depending on humidity.
Tips for Success
- Count your stitches after each lace repeat to catch mistakes early. The stitch count should remain constant at 101 throughout the lace section.
- Use lifelines before starting the lace border. Thread a contrasting scrap yarn through all stitches on your needle. If you make a mistake, you can easily rip back to the lifeline without losing your work.
- Blocking is essential for lace. Don't skip it! The magic of the Midnight Bloom truly appears after blocking, when the yarn overs open up and the scallops take shape.
Your Midnight Bloom Crescent Shawl is now complete! This stunning accessory makes a thoughtful handmade gift or a luxurious treat for yourself. The contrast between the deep midnight blue and the silver-grey lace evokes a night sky filled with blooming flowers—a true work of art you'll cherish for years.
Happy knitting, and may your stitches always bloom beautifully!