Highland Ridge Cable Mitts Free Pattern – A Knitted Tweed Adventure
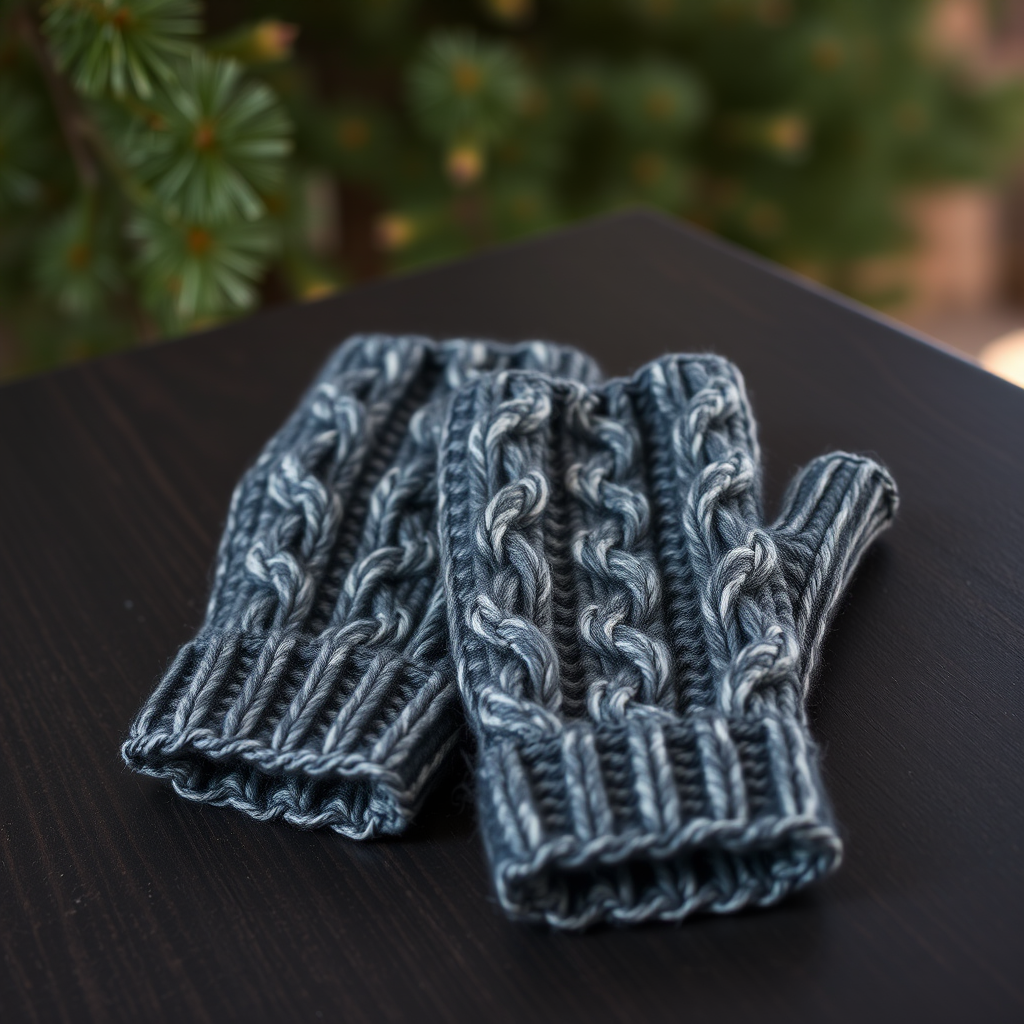
Highland Ridge Cable Mitts Free Pattern – A Knitted Tweed Adventure
There's something deeply satisfying about knitting a pair of rugged, handsome mitts that combine classic craftsmanship with modern outdoor style. The Highland Ridge Cable Mitts are exactly that—a rich, heathered tweed adventure that will keep your hands warm on crisp morning hikes or cozy evenings by the fire. With a bold, sculptural cable running along the back of the hand and a smooth stockinette palm, these mitts are as functional as they are beautiful. Whether you're a seasoned knitter or a brave beginner ready for a cable challenge, this pattern will guide you through every step to create a pair of mitts you'll treasure for years.
This free pattern is designed for men's hands but can easily be adjusted for anyone. The slightly negative ease ensures a snug, comfortable fit that traps warmth without feeling bulky. The tweed yarn adds a homespun, textured feel that photographs beautifully and wears even better. Let's dive into this knitting adventure!
Materials Needed
Before you begin, gather the following materials. Having everything ready will make your knitting experience smooth and enjoyable.
Yarn
- Worsted weight wool or wool blend yarn (approx. 180-220 yards) in a heathered charcoal or deep forest green. The sample uses a heathered charcoal with subtle flecks of green and brown for that rugged, outdoorsy look.
Needles and Tools
- US 6 (4.0 mm) double-pointed needles (or a circular needle for the magic loop method, if you prefer)
- Cable needle
- Stitch markers (at least 4)
- Waste yarn or stitch holders for the thumb stitches
- Tapestry needle for weaving in ends
- Scissors
Gauge
20 stitches and 28 rows = 4 inches in stockinette stitch (after blocking). Adjust needle size if necessary to achieve this gauge for the correct fit.
Step-by-Step Instructions
Follow these detailed instructions carefully. The pattern is written for two sizes: S/M (M/L) to fit hand circumference 7.5 (8.5) inches. Numbers in parentheses refer to the larger size.
Abbreviations
- CO: cast on
- K: knit
- P: purl
- K2tog: knit two together (decrease)
- SSK: slip, slip, knit (decrease)
- C4F: slip 2 stitches to cable needle, hold in front, knit 2, knit 2 from cable needle
- C4B: slip 2 stitches to cable needle, hold in back, knit 2, knit 2 from cable needle
- PM: place marker
- RM: remove marker
- M1L: make one left (increase)
- M1R: make one right (increase)
Pattern Notes
- Mitts are worked in the round from the cuff to the fingers.
- The cable panel is on the back of the hand; the palm is in stockinette.
- For a snug fit, the mitts are slightly negative ease.
Cuff
CO 40 (44) stitches. Distribute evenly on double-pointed needles (or use magic loop). Join in the round, being careful not to twist your stitches. Work in K2, P2 ribbing for 2.5 inches. This creates a snug, stretchy cuff that will keep the cold out.
Hand (Increase Round)
Next round: *K2, P2* repeat to end, increasing 4 (4) stitches evenly spaced by working into the front and back of a knit stitch. You now have 44 (48) stitches on your needles.
Set Up Pattern
This is where the magic begins. Follow this round carefully to establish your cable panel and palm sections.
Round 1: K1, P1, K2, P1, K1 (palm side – 6 stitches), PM, work cable panel over next 12 stitches as follows: P2, C4F, C4B, P2, PM, then K to end of round (back of hand).
Cable Pattern (Repeat Every 8 Rounds)
Now you'll work the cable pattern that gives these mitts their sculptural, braided look.
- Rounds 1-7: Work as set: palm stitches in stockinette (knit all), cable panel: P2, K8, P2, then knit remaining back-of-hand stitches.
- Round 8: Palm stitches knit; cable panel: P2, C4F, C4B, P2; knit remaining stitches.
Continue in this pattern until the mitt measures 3.5 (4) inches from the cuff, ending on an even round (non-cable round). This ensures your thumb gusset starts at a clean point in the pattern.
Thumb Gusset (Left Mitt)
Now we'll create the thumb opening. Work this section carefully—it's the trickiest part but essential for a comfortable fit.
- Round 1: K1, PM, M1L (make one left), K1, M1R (make one right), PM, knit to end of round.
- Round 2: Knit all stitches.
- Round 3: K1, M1L, knit to marker, M1R, knit to end.
- Round 4: Knit all.
Repeat Rounds 3-4 until you have 9 (11) stitches between the thumb markers. Work one more plain round (knit all stitches) to even things out.
Separate Thumb
Next round: Knit to first thumb marker, RM, place 9 (11) thumb stitches on waste yarn, CO 1 stitch (for the gap), RM, knit to end of round. You now have 44 (48) stitches on your needles.
Continue Hand
Work in the established pattern (cable every 8th round) until the mitt reaches the base of your fingers (approx. 1.5 inches from thumb separation). End on a non-cable round. This ensures your top shaping doesn't interrupt a cable twist.
Top Shaping
Time to shape the top of the mitt. Follow these decrease rounds carefully.
- Round 1: *K2, K2tog* repeat to end (33 (36) stitches).
- Round 2: Knit.
- Round 3: *K1, K2tog* repeat to end (22 (24) stitches).
- Round 4: Knit.
- Round 5: *K2tog* repeat to end (11 (12) stitches).
Cut yarn, leaving a 6-inch tail. Thread through remaining stitches, pull tight, and weave in end securely.
Thumb
Place the 9 (11) thumb stitches back on your needles. Pick up 1 stitch from the gap, and 1 stitch from the cast-on stitch. Total 11 (13) stitches. Knit in the round for 1.5 inches or until the thumb covers the base of your thumb. Decrease: *K2tog* around (6 (7) stitches). Cut yarn, pull through, and secure.
Right Mitt
Work as for the left mitt, but place the thumb gusset on the opposite side (after the cable panel, before the palm stitches). Mirror the increases. This ensures the thumb is on the correct side for your right hand.
Finishing
Weave in all ends with your tapestry needle. Block gently to shape—this helps the cable pattern relax and look its best. Lay flat to dry. Enjoy your new favorite mitts!
Final Thoughts
These Highland Ridge Cable Mitts are more than just a knitting project—they're an adventure in texture, color, and craftsmanship. The heathered tweed yarn, the bold cable, and the snug fit all come together to create a pair of mitts that are as practical as they are beautiful. Whether you're knitting them for yourself or as a gift, the recipient will feel the love and care stitched into every row.
Happy knitting, and may your trails be warm and your cables always twist in the right direction!


