Baby Clothes
Crochet Cozy Textured V-Neck Cardigan with Buttons Free Pattern
Anonymous
•
June 29, 2026
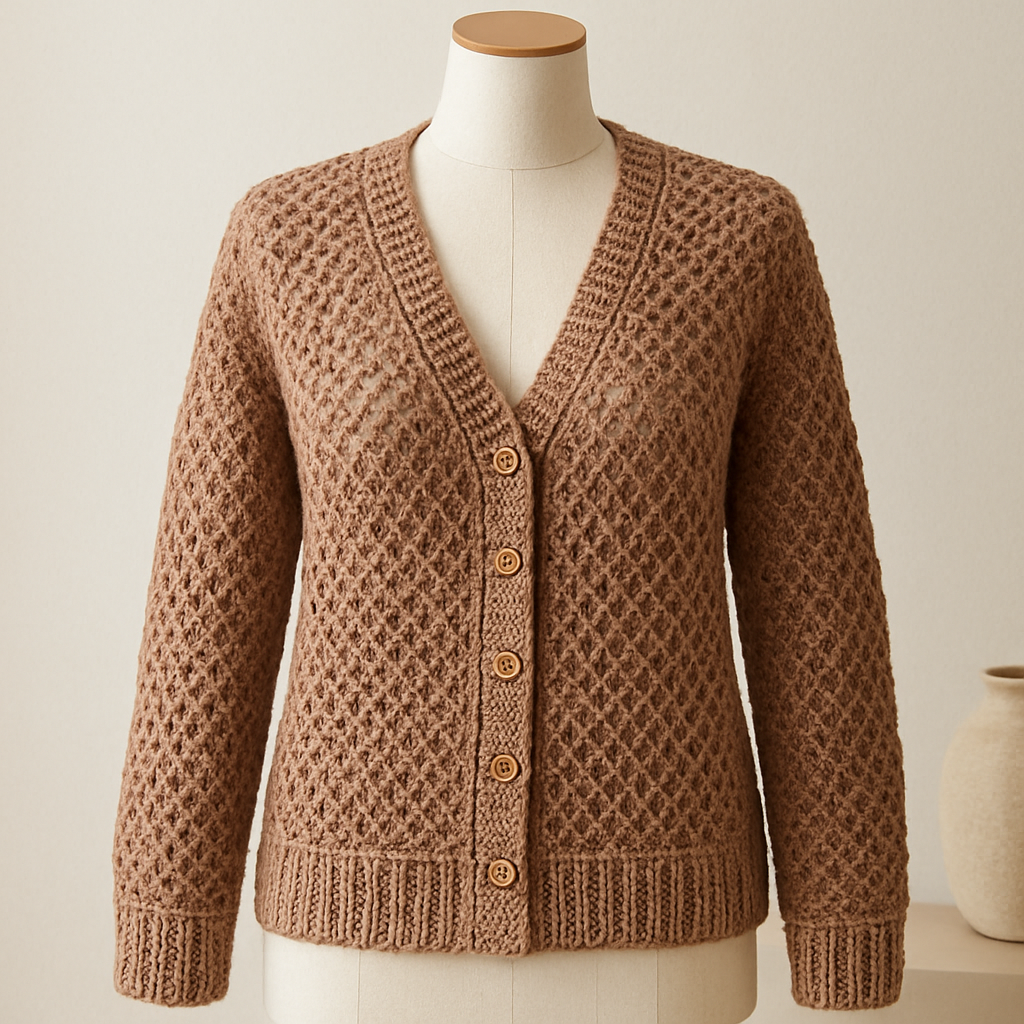
Crochet Cozy Textured V-Neck Cardigan with Buttons Free Pattern
Introduction
Welcome to your next crochet project! This beautifully textured crochet cardigan features a stylish V-neck and a classic button closure, making it perfect for layering in any season. Crafted from soft, bulky yarn, this cardigan is not only comfortable but also chic. Whether you're a beginner or looking to refine your skills, this free pattern will guide you step-by-step to create your very own cozy cardigan.
Materials Needed
- Yarn: Bulky weight yarn (approx. 100-120 yards per 100g)
- Crochet Hook: 6.5 mm (K) crochet hook
- Gauge: 12 stitches x 14 rows = 4 inches in pattern stitch
- Scissors: For cutting yarn
- Tapestry Needle: For weaving in ends
- Buttons: 3 wooden buttons for closure
Step-by-Step Instructions
1. Back Panel
- Begin by chaining 70 stitches (or your desired width).
- Row 1: Double crochet (dc) in the 4th chain from the hook, then dc across the entire row. You should have 68 dc at the end of this row.
- Row 2: Chain 3 (this counts as your first dc), turn your work. *Dc in the next stitch, chain 1, skip 1 stitch; repeat from * across the row. You will end with a dc in the last stitch.
- Repeat Row 2 until your piece measures 24 inches from the beginning. This will form the back of your cardigan.
2. Front Panels
- Make two front panels. Start by chaining 70 stitches (or your desired width).
- Row 1: Dc in the 4th chain from the hook, then dc across the row.
- Row 2: Chain 3, turn your work. *Dc in the next stitch, chain 1, skip 1 stitch; repeat from * across the row.
- Continue repeating Row 2 until each front panel measures 20 inches. This will create the front sections of your cardigan.
3. Sleeves
- Chain 40 stitches (or your desired width for the sleeves).
- Row 1: Dc in the 4th chain from the hook, then dc across the row.
- Row 2: Chain 3, turn your work. *Dc in the next stitch, chain 1, skip 1 stitch; repeat from * across the row.
- Continue repeating Row 2 until each sleeve measures 18 inches. This will form the sleeves of your cardigan.
4. Assembly
- Begin by sewing the shoulder seams of the back panel to the front panels.
- Next, attach the sleeves to the armholes, ensuring they are evenly aligned.
- Sew the side seams from the hem to the underarm, securing the cardigan's shape.
5. Ribbing
- At the bottom edge of the cardigan and the cuffs of the sleeves, work in half double crochet (hdc) for 5 rows. This will create a nice ribbed finish.
6. Button Band
- Along the front edge of the cardigan, work 5 rows of hdc to create the button band.
- On the 3rd row, add buttonholes by chaining 2 and skipping 2 stitches where you want the buttons to go.
7. Finishing
- Weave in any loose ends using a tapestry needle to ensure a clean finish.
- Sew on the buttons at the corresponding buttonholes created in the button band.
- Block your cardigan as needed to achieve the desired shape and drape.
Congratulations! You have now completed your cozy textured V-neck cardigan. Enjoy wearing your handmade creation or gifting it to someone special!
Also Check Out: We think you'd love this beautiful pattern on our sister site: Elegant Crochet Edging with Openwork Design


