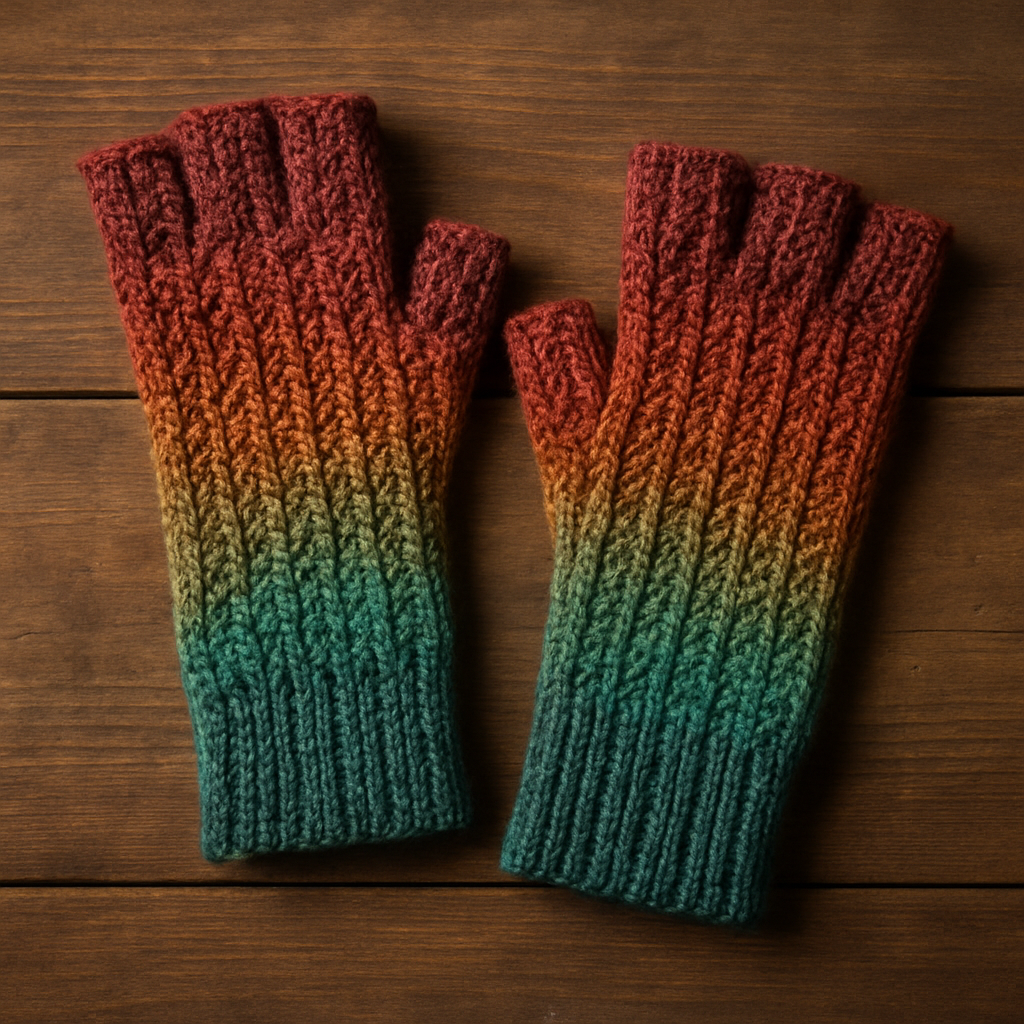
Crimson Bloom Fingerless Mitts Free Pattern – A Textured Crochet Garden

Crimson Bloom Fingerless Mitts Free Pattern – A Textured Crochet Garden
Wrap your hands in a lush, ruby-red garden of crocheted petals and vines. These fingerless mitts feature a unique all-over textured stitch that mimics delicate blossoms, keeping you cozy without sacrificing dexterity. Perfect for chilly mornings, typing at your desk, or sipping hot cocoa by the fire, this pattern is beginner-friendly yet yields a stunning, professional-looking result. The deep crimson color and dimensional puff stitches create a truly one-of-a-kind accessory that will have everyone asking where you bought them.
In this comprehensive guide, I'll walk you through every single step—from gathering your materials to weaving in those final ends. By the time you finish, you'll have a gorgeous pair of mitts that look like they came straight from a boutique. Let's dive into this textured crochet garden!
Materials Needed
Before we begin, let's gather everything you'll need. Having all your supplies ready will make the process smooth and enjoyable.
Yarn
- Main Color: Worsted weight yarn in deep ruby red – approximately 200 grams (about 400 yards). I recommend a soft acrylic or wool blend for durability and warmth.
- Accent Color: A small amount of emerald green yarn (approximately 10-15 grams) for the vine tie and leaves.
Hook and Notions
- Crochet Hook: 5.0 mm (US H-8) hook
- Yarn needle for weaving in ends
- Scissors
- Stitch markers (optional, but helpful for keeping track of rounds)
Gauge
16 stitches x 20 rows = 4 inches in pattern stitch. Be sure to check your gauge before starting—this ensures your mitts will fit properly. If your gauge is off, adjust your hook size accordingly.
Step-by-Step Instructions
Now, let's get to the fun part! This pattern uses two special stitches that create the beautiful floral texture. Don't worry if you've never tried them before—I'll explain each one in detail.
Special Stitches
Puff Stitch (PS): This is the star of the show, creating those gorgeous petal-like bumps.
- Yarn over, insert hook into the designated stitch.
- Yarn over and pull up a loop (you'll have 3 loops on your hook).
- Repeat this process 3 more times into the same stitch (you'll now have 7 loops on your hook).
- Yarn over and pull through all 7 loops at once.
- Chain 1 to close the puff stitch securely.
Front Post Double Crochet (FPdc): This creates the ribbed cuff texture.
- Yarn over.
- Insert your hook from front to back around the post (the vertical part) of the next stitch—not through the top loops.
- Yarn over and pull up a loop.
- Complete the stitch exactly as you would a regular double crochet (yarn over, pull through 2 loops, yarn over, pull through 2 loops).
MITT (Make 2)
You'll make two identical mitts. Let's start with the first one!
Part 1: The Ribbed Cuff
Row 1: Chain 30. Double crochet in the 4th chain from your hook (the first 3 chains count as your first double crochet). Work 1 double crochet in each chain across. You should have 28 double crochet stitches total.
Row 2: Chain 3 (this counts as your first double crochet), turn your work. Work 1 Front Post Double Crochet (FPdc) around each double crochet from the previous row. You'll have 28 stitches.
Rows 3-6: Repeat Row 2 exactly. This creates a lovely ribbed cuff that will stretch comfortably around your wrist. After Row 6, you'll have a nice textured band.
Part 2: The Textured Blossom Body
Now we begin the magical floral pattern!
Row 7: Chain 3 (counts as first dc), turn. Work 1 double crochet in each of the next 2 stitches. Now for the pattern repeat: Work 1 Puff Stitch (PS) in the next stitch, skip the following stitch, then 1 double crochet in the next stitch. Repeat from * to * across the row, ending with 1 double crochet in the last 2 stitches. You'll have 14 puff stitches and 14 double crochets.
Row 8: Chain 3, turn. Work 1 double crochet in each stitch across the row. Important: When you come to a puff stitch, work 1 double crochet into the chain-1 space at the top of that puff stitch. This keeps your stitch count at 28 double crochets.
Row 9: Chain 3, turn. Work 1 double crochet in the first stitch. Now repeat: Work 1 PS in the next stitch, skip the next stitch, 1 double crochet in the next stitch. Continue across, ending with 1 double crochet in the last stitch. You'll again have 14 puff stitches and 14 double crochets—but notice how the puffs are now offset from Row 7, creating a beautiful staggered blossom effect!
Row 10: Repeat Row 8 (all double crochets, working into the chain-1 spaces of the puffs).
Rows 11-18: Repeat Rows 7-10 two more times. This gives you a total of four rows of puff stitch texture, creating that lush, dimensional floral surface. Your mitt body is really taking shape now!
Part 3: The Thumb Opening
This is where we create the hole for your thumb—it's easier than you think!
Row 19: Chain 3, turn. Work 1 double crochet in each of the next 4 stitches. Now, chain 6 (this skips the next 6 stitches and creates the thumb opening). Work 1 double crochet in each remaining stitch across the row. You'll have 22 double crochets + 6 chains.
Row 20: Chain 3, turn. Work 1 double crochet in each double crochet across, and 1 double crochet in each chain of the thumb opening. You're back to 28 double crochets—the opening is complete!
Part 4: The Upper Hand
Let's add a bit more texture above the thumb.
Rows 21-24: Repeat Rows 7-10 once. This adds another beautiful band of puff stitches above the thumb opening, keeping the design cohesive.
Row 25: Chain 1, turn. Work 1 single crochet in each stitch across the row. This creates a neat, finished edge at the top of the mitt. Fasten off and weave in this end.
Part 5: The Thumb
Now let's give that thumb some coverage!
Round 1: Attach your ruby red yarn to the edge of the thumb opening. Work 12 single crochets evenly around the entire opening. Join with a slip stitch to the first single crochet.
Rounds 2-5: Chain 1, work 1 single crochet in each stitch around. Join with a slip stitch at the end of each round. After Round 5, fasten off and weave in the ends. Your thumb is complete!
Part 6: Finishing Touches
Now for the charming vine detail that makes these mitts truly special.
Create the Vine: With your emerald green yarn, chain 20. Fasten off. This creates a simple, elegant chain.
Weave the Vine: Thread the green chain through the bottom ribbed cuff, weaving it in and out between the front post double crochets. This creates a lovely vine-like effect wrapping around your wrist.
Optional Leaves: To add tiny leaves at each end of the vine, chain 4 from the end of the vine. Work 1 single crochet in the 2nd chain from hook, 1 half double crochet in the next chain, 1 single crochet in the last chain. Slip stitch back to the vine. Repeat on the other end. This creates a small, cute leaf shape!
Weave in All Ends: Using your yarn needle, carefully weave in any remaining loose ends on the inside of the mitt. Trim any excess yarn.
Repeat for Second Mitt
Congratulations! You've completed one beautiful Crimson Bloom mitt. Now repeat all the steps to create the second one. Since you've already mastered the pattern, the second mitt will fly by!
Final Thoughts
And there you have it—a stunning pair of Crimson Bloom Fingerless Mitts that look like a crocheted garden for your hands! The combination of puff stitches and front post crochet creates a rich, textured fabric that's both warm and flexible. These mitts make wonderful gifts for friends and family, or a lovely treat for yourself.
Remember, the beauty of crochet is that you can customize! Try different color combinations—a soft lavender with sage green, or a warm mustard with deep forest green. The pattern is versatile and forgiving, so don't be afraid to experiment.
I'd love to see your finished mitts! Share your creations on social media with the hashtag #CrimsonBloomMitts and tag me so I can admire your handiwork. Happy crocheting, and may your hands always be wrapped in beautiful blooms!