Candyfloss Cloudwalker Boots: Free Beginner Crochet Slipper Pattern

Candyfloss Cloudwalker Boots: Free Beginner Crochet Slipper Pattern
Introduction
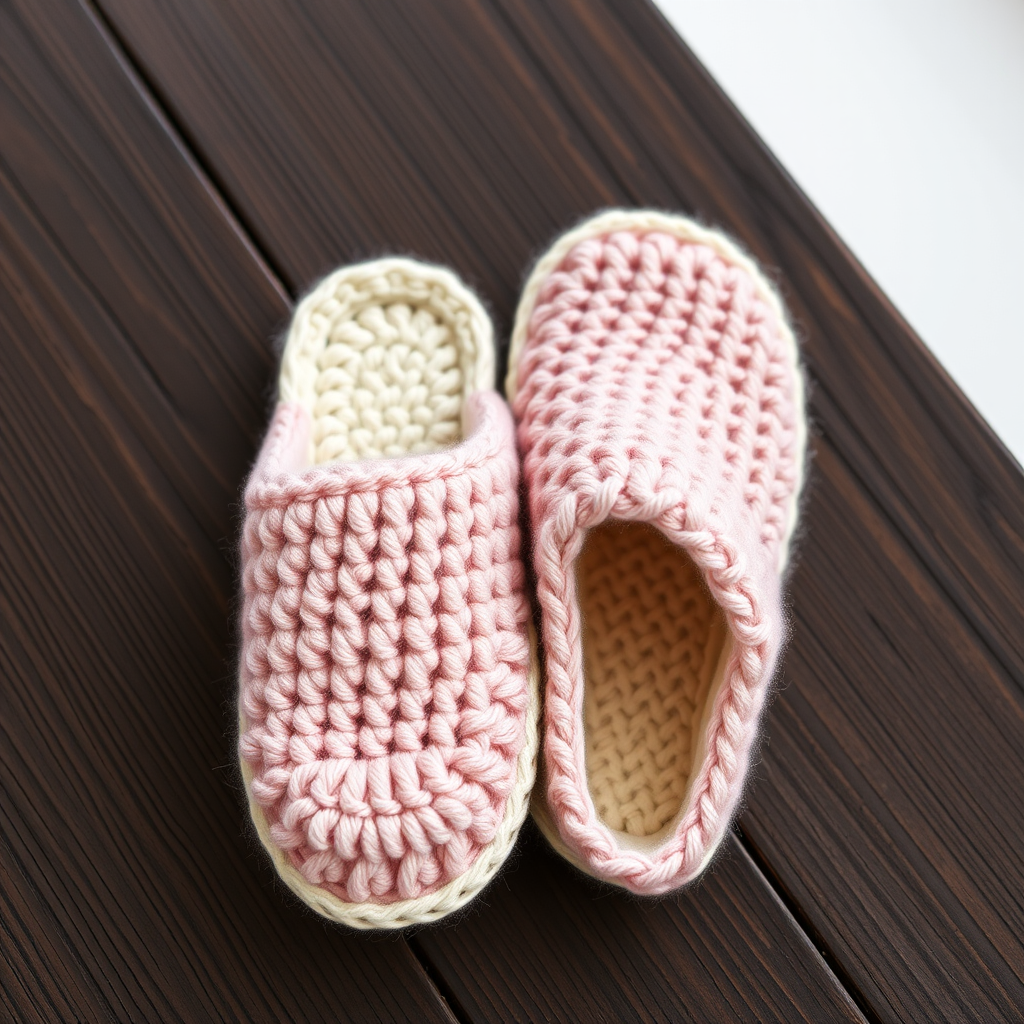
If you have never held a crochet hook before, these Candyfloss Cloudwalker Boots are the perfect first project to fall in love with. Each boot is made from just two simple granny squares — one baby blue square becomes the foot and toe, and one cotton candy pink square folds over the ankle as a cozy cuff. Because the square is the boot, there is no complicated shaping, no counting dozens of tiny stitches, and no separate sole to wrestle with. The finished slippers are soft, squishy, and slightly slouchy, with a rounded pointed toe, a flat whipstitched sole seam, and a tiny blue pompom bobbing at each heel. They feel like walking on a cloud and look like a little scoop of fairy-floss candy for your feet.
Materials Needed
- Yarn: Super bulky (weight 6) chenille-style yarn — approximately 130 yds baby blue and 110 yds cotton candy pink per pair (about 240 yds total).
- Crochet hook: Size I/9 (5.5 mm).
- Stitch marker (one is enough; a scrap of contrasting yarn works too).
- Tapestry needle (a large-eyed, blunt-tipped needle for sewing seams and weaving in ends).
- Scissors.
- Small amount of baby blue yarn for the pompoms, or a 1-inch pompom maker.
- Finished size: Women's US shoe size 5/6 (7/8, 9/10). Each finished boot measures approximately 8 (9, 10) inches long from heel to toe and 6 (6.5, 7) inches tall at the ankle.
Abbreviations and Beginner Glossary
- ch — chain. Make a loop of yarn on your hook, wrap the yarn over the hook, and pull it through the loop. That is one chain stitch. Chains form the foundation and the little gaps in a granny square.
- sl st — slip stitch. Insert your hook into the stitch, wrap yarn over the hook, and pull it through both the stitch and the loop on your hook at the same time. It makes an almost invisible join.
- sc — single crochet. Insert hook into stitch, pull up a loop (2 loops on hook), wrap yarn over, pull through both loops. (Used only in the optional instep tip.)
- dc — double crochet. Wrap yarn over hook, insert hook into stitch, pull up a loop (3 loops on hook), wrap yarn over and pull through 2 loops, wrap yarn over and pull through the last 2 loops. This is the tall stitch that makes the puffy granny clusters.
- sp — space. The little gap created by a chain (for example, a "ch-2 sp" is the hole made by two chains).
- st / sts — stitch / stitches.
- beg — beginning.
- ring — a circle made by joining a short chain with a slip stitch; you work your first stitches into the middle of it.
- corner sp — the ch-2 space at each corner of the square, where you work two clusters to turn the corner.
- fasten off — cut the yarn a few inches from your work and pull the tail all the way through the last loop to lock it.
- whipstitch — a simple sewing stitch: bring the needle up through both edges, wrap over the top, and go back down, making small diagonal stitches that hold two edges together.
- right side — the "pretty" front face of your work that you want showing on the outside.
Gauge
Gauge: one granny square worked through Round 4 = 6 x 6 inches (15 x 15 cm). Within the square, 4 dc = 2 inches and 2 dc rows = 1 inch.
Why gauge matters: here the square is the boot, so if your square comes out too big the slipper will flop off your foot, and if it is too small it will pinch. How to check: work one complete square exactly as written, then lay it flat and measure across the middle from edge to edge. If it is larger than 6 inches, go down one hook size; if smaller, go up one hook size. Make a fresh test square and measure again before you commit to all four squares.
Beginner Tips Before You Start
- Count your clusters out loud. Every round of a granny square has exactly four corners. If you ever lose your place, find the four corner spaces first — they are the biggest holes — and the rest will make sense.
- Do not pull the yarn too tight. Chenille yarn is fluffy and forgiving, but tight tension makes stiff, small squares. Let the yarn flow and keep your stitches relaxed and puffy.
- Use your stitch marker. Place it in the top of the beginning ch-3 of each round so you always know where to join. Move it up every round.
- Keep your turning chains consistent. The ch 3 at the start of each round counts as your first double crochet — do not also work a dc into the same spot, or your corners will grow.
- Make all four squares before you sew anything. Lay them side by side and check that the two blues match each other and the two pinks match each other in size.
- Leave a long tail. The 24-inch tail at the end of Round 4 is your sewing thread for assembly — do not trim it short.
Step-by-Step Instructions
Construction Note
Each boot is made from two granny squares. The blue square becomes the foot and toe. The pink square becomes the ankle cuff. Each square is folded diagonally (corner to corner) and joined along one edge to form the boot. No separate sole, heel, or cuff pieces are needed.
Granny Square (make 2 blue, 2 pink — one of each color per boot)
Round 1: With chosen color, ch 4; join with sl st to first ch to form a ring. Ch 3 (counts as first dc), work 2 dc into ring, ch 2, [3 dc into ring, ch 2] 3 times. Join with sl st to top of beg ch-3. (12 dc, 4 ch-2 sps)
Round 2: Sl st into next 2 dc and into first ch-2 sp. Ch 3, work 2 dc into same sp, ch 2, 3 dc into same sp (first corner made). *Ch 1, skip next 3 dc, work (3 dc, ch 2, 3 dc) into next ch-2 sp. Repeat from * around, ending ch 1. Join with sl st to top of beg ch-3. (24 dc, 4 ch-2 corner sps, 4 ch-1 sps)
Round 3: Sl st into next 2 dc and into first corner sp. Ch 3, 2 dc into same sp, ch 2, 3 dc into same sp. *Ch 1, 3 dc into next ch-1 sp, ch 1, work (3 dc, ch 2, 3 dc) into next corner sp. Repeat from * around, ending ch 1. Join with sl st to top of beg ch-3. (36 dc)
Round 4: Sl st into next 2 dc and into first corner sp. Ch 3, 2 dc into same sp, ch 2, 3 dc into same sp. *[Ch 1, 3 dc into next ch-1 sp] twice, ch 1, work (3 dc, ch 2, 3 dc) into next corner sp. Repeat from * around, ending ch 1. Join with sl st to top of beg ch-3. Fasten off, leaving a 24-inch tail for seaming. (48 dc)
Your square should measure 6 x 6 inches. Make 2 blue squares and 2 pink squares.
Assembly (repeat for each boot)
Step 1 — Fold the blue square: Lay one blue square flat with right side facing up. Fold it diagonally so the top-right corner meets the bottom-left corner, creating a triangle with the fold running from top-left to bottom-right. The fold line becomes the toe ridge of the boot and the two open edges become the sole and the instep opening.
Step 2 — Form the foot: Whipstitch the two short open edges of the folded blue triangle together along the bottom (this is the sole seam, running heel to toe). Leave the long diagonal opening (the instep) unsewn for now. Turn right side out. You now have a soft triangular foot pocket with a pointed toe.
Step 3 — Prepare the pink cuff: Fold one pink square diagonally the same way. Whipstitch its two short open edges together to form a matching triangular pocket. Turn right side out.
Step 4 — Join cuff to foot: Slip the pink triangle over the blue foot so the pink point sits at the front of the ankle and the pink open diagonal edge aligns with the blue instep opening. Using the blue tail and a tapestry needle, whipstitch the pink diagonal edge to the blue instep edge all the way around, easing the pink cuff to sit slightly higher at the back (about 1 inch above the blue heel). Fasten off and weave in ends.
Step 5 — Shape the cuff: Fold the top point of the pink cuff down toward the back of the ankle and tack it in place with 3–4 small stitches to create a soft rolled cuff edge. This also hides the pink square's center ring.
Step 6 — Pompom: Make a 1-inch pompom from baby blue yarn (or use a small purchased pompom). Sew securely to the back of the heel, just below the rolled pink cuff.
Step 7 — Finishing: Weave in all remaining ends. Gently steam-block the boots over a rolled towel to relax the granny squares into shape. Repeat all assembly steps for the second boot.
Tip: If the instep opening feels tight, work one round of sc evenly around the opening in blue before joining the pink cuff, spacing 24–28 sc around.
Assembly and Finishing
Seaming: Thread your 24-inch tail onto the tapestry needle. Hold the two edges you want to join together, right sides facing out, and work small whipstitches about 1/4 inch apart, catching one loop from each edge with every stitch. Pull each stitch snug but not tight — you want a soft, flat seam that will not rub against your foot. When you reach the end, take one small stitch back through the last loop to lock it, then fasten off.
Weaving in ends: Thread each loose tail onto the tapestry needle and run it through the back of several stitches (about 2 inches' worth), then change direction and run it back through a few more stitches before trimming. This hides the tail and stops it from working loose in the wash.
Blocking: Lay a rolled towel on a flat surface and slip each boot over it so the slipper holds its shape. Hold a steam iron a few inches above the yarn (never press it directly onto chenille) and let the steam relax the stitches. Leave to dry completely. This softens the granny-square texture and helps the pointed toe and rolled cuff settle into their final shape.
Pro Tips and Variations
- Change the colors: Swap the blue and pink for any two shades you love — mint and cream, lilac and grey, or a single color for a minimalist look. You can also change color at Round 3 of each square for a striped, layered effect.
- Adjust the size: The square size controls the fit. For a smaller slipper, work only through Round 3 (about 4.5 inches) and add one more round for a larger size. Always measure your square against the finished-size guide before assembling.
- Substitute yarn: Any super bulky (weight 6) yarn works — velvet, chunky acrylic, or a thick wool blend. Just check your gauge square again, because different fibers behave differently.
- Add grip: For slippery floors, sew a few small dots of puffy fabric paint or a piece of non-slip shelf liner to the sole seam after finishing.