Aurora Bloom Wrist Warmers Free Pattern – A Cozy Knit Ombre Glove
Aurora Bloom Wrist Warmers: A Beginner-Friendly Ombre Knitting Project
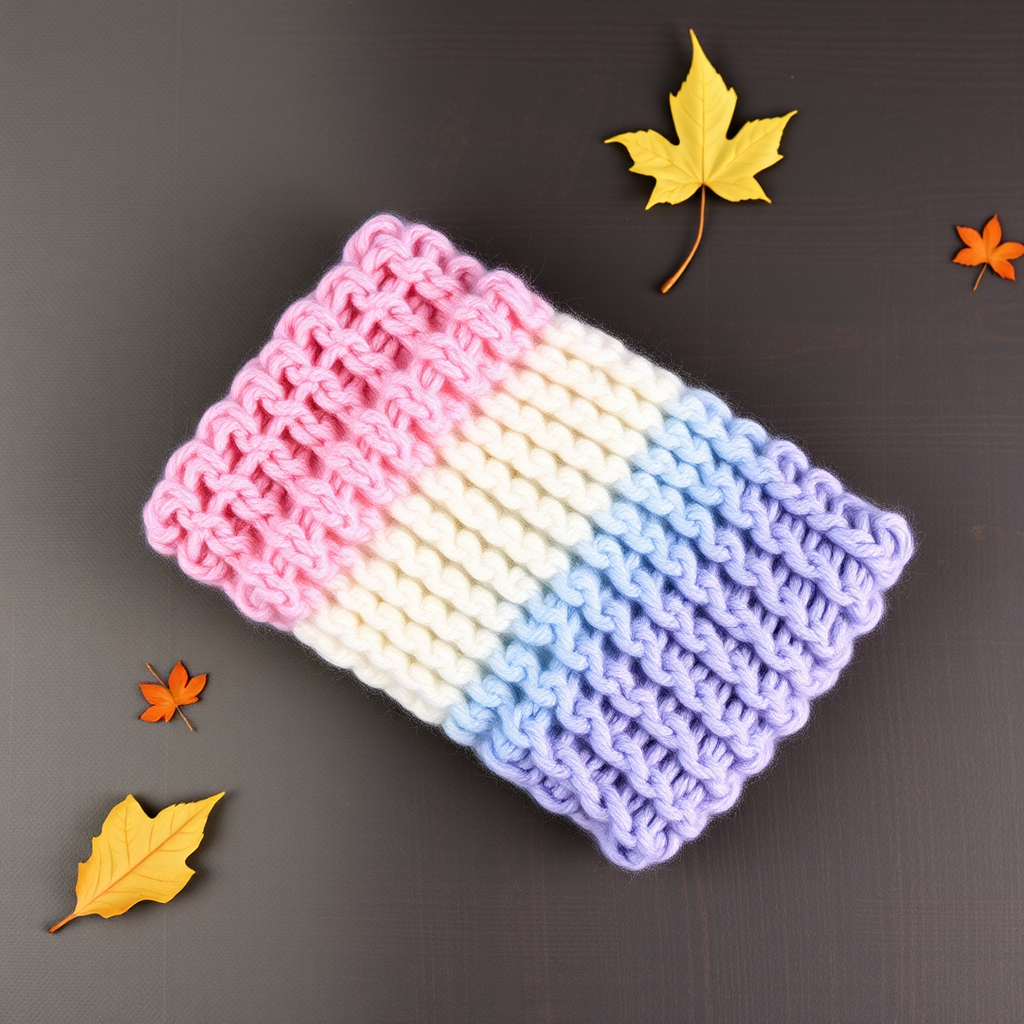
There's something magical about wrapping your hands in warmth that echoes the colors of a winter sunrise. The Aurora Bloom Wrist Warmers are designed to bring that dreamy, gradient beauty right to your fingertips. This free knitting pattern is perfect for beginners who want to practice color changes, simple increases, and ribbing—all while creating a stylish, cozy accessory that's as practical as it is pretty.
With a smooth transition from blush pink to soft lavender and dusty blue, these wrist warmers mimic the ethereal glow of an aurora sky. The ribbed cuffs and top edges provide a snug, comfortable fit, while the thumb opening ensures full mobility—ideal for typing, sipping coffee, or simply enjoying a crisp autumn walk. Let's dive into this delightful project!
Why You'll Love This Pattern
- Beginner-Friendly: Uses basic knit and purl stitches, simple increases, and straightforward color changes.
- Quick to Make: Each wrist warmer works up in just a few hours—perfect for a weekend project.
- Customizable: Swap the colors to match your wardrobe or the season.
- Practical & Stylish: The thumb opening and ribbed edges make these both functional and fashionable.
Materials Needed
Before you begin, gather the following supplies. All items are readily available at your local craft store or online.
- Yarn: Worsted weight yarn in 3 shades—Yarn A (blush pink), Yarn B (soft lavender), Yarn C (dusty blue). Approximately 100g total (about 33g per color).
- Needles: US 7 (4.5 mm) knitting needles—straight or circular, whichever you prefer.
- Notions: Tapestry needle for weaving in ends, stitch markers (2), and a stitch holder or scrap yarn for the thumb stitches.
Gauge & Abbreviations
Gauge: 20 stitches x 26 rows = 4 inches in stockinette stitch (knit one row, purl one row). Always check your gauge to ensure a proper fit.
Abbreviations:
- CO: Cast on
- K: Knit
- P: Purl
- K2tog: Knit two stitches together (decrease)
- SSK: Slip, slip, knit (decrease)
- M1L: Make one left (increase—pick up the bar between stitches from front to back and knit through the back loop)
- M1R: Make one right (increase—pick up the bar between stitches from back to front and knit through the front loop)
- PM: Place marker
- RM: Remove marker
Step-by-Step Instructions (Make 2)
Follow these detailed instructions to create both wrist warmers. They are identical, so repeat the process for the second one.
Part 1: The Ribbed Cuff
With Yarn A (blush pink), cast on 40 stitches.
Rows 1–10: Work in ribbing: *K2, P2* repeat from * to end of row. This creates a stretchy, snug cuff that will hug your wrist comfortably.
Part 2: Main Body with Gradient Transition
Now we'll switch to Yarn B (soft lavender) and begin the smooth stockinette section.
Row 11: Switch to Yarn B. Knit all stitches.
Row 12: Purl all stitches. (You've now completed one full stockinette repeat.)
Row 13: Knit 20 stitches, place a stitch marker (PM), knit the remaining 20 stitches. This marker will help you keep track of the thumb gusset increases.
Row 14: Knit all stitches. (Continue in stockinette—knit on right side, purl on wrong side—but for simplicity, we'll knit every row for the main body to create a garter-like texture that's still smooth. If you prefer true stockinette, alternate knit and purl rows. This pattern uses knit-all rows for ease.)
Part 3: Thumb Gusset Increases
We'll now increase stitches on one side to create space for your thumb. The increases are worked on the right side of the marker.
Row 15: K1, M1L, K18, M1R, K1, then knit the remaining 20 stitches (total 42 stitches).
Row 16: Knit all stitches.
Row 17: K1, M1L, K20, M1R, K1, then knit the remaining 20 stitches (total 44 stitches).
Row 18: Knit all stitches.
Row 19: K1, M1L, K22, M1R, K1, then knit the remaining 20 stitches (total 46 stitches).
Row 20: Knit all stitches.
Row 21: K1, M1L, K24, M1R, K1, then knit the remaining 20 stitches (total 48 stitches).
Row 22: Knit all stitches.
Row 23: K1, M1L, K26, M1R, K1, then knit the remaining 20 stitches (total 50 stitches).
Row 24: Knit all stitches.
Part 4: Creating the Thumb Opening
Now we'll separate the thumb stitches from the main body.
Row 25: K1, then place the next 10 stitches onto a stitch holder or scrap yarn. These will become the thumb. Continue knitting the remaining 39 stitches (40 stitches remain on your needle).
Row 26–30: Knit all stitches. You're now working on the main body only, with Yarn B.
Part 5: Switching to Yarn C (Dusty Blue)
Time for the final color transition!
Row 31: Switch to Yarn C (dusty blue). Knit all stitches.
Row 32–40: Knit all stitches. This creates a smooth, solid section for the top of the wrist warmer.
Part 6: Top Ribbing & Bind Off
Finish with a ribbed edge that matches the cuff.
Row 41–50: Work in ribbing: *K2, P2* repeat from * to end of row.
Bind Off: Bind off loosely in pattern (knit the knits and purl the purls as you bind off). This ensures the edge remains stretchy.
Part 7: Knitting the Thumb
Let's finish the thumb piece.
Step 1: Transfer the 10 stitches from the holder back onto your knitting needle.
Step 2: With Yarn C, pick up and knit 2 stitches from the base of the thumb opening (where the main body meets the thumb). You now have 12 stitches.
Step 3: Knit 6 rows in stockinette stitch (knit one row, purl one row) or simply knit all rows for a garter texture. This pattern uses knit-all rows for consistency.
Step 4: Bind off loosely.
Part 8: Finishing Touches
Your wrist warmer is almost complete!
- Weave in Ends: Use a tapestry needle to weave in all loose yarn ends on the wrong side of the work. Be sure to secure them well.
- Block Gently: To shape the wrist warmer and even out the stitches, wet block or steam block lightly. Lay flat to dry.
Repeat the entire process to make the second wrist warmer. Once both are complete, you'll have a beautiful, gradient pair that's ready to wear!
Tips for Perfect Results
- Check Your Gauge: If your gauge is off, the wrist warmers may be too tight or too loose. Adjust needle size accordingly.
- Color Transitions: To make the gradient even smoother, you can overlap the yarns for a few stitches when switching colors. Simply knit the first few stitches of the new color while holding the old color alongside.
- Stitch Markers: Use a removable marker or a contrasting piece of yarn to mark the gusset increases—this helps you keep track of your progress.
- Custom Fit: If you have larger or smaller hands, adjust the number of cast-on stitches (in multiples of 4 for the ribbing) and the number of increase rows accordingly.
Wear Them with Pride
These Aurora Bloom Wrist Warmers are more than just a knitting project—they're a wearable piece of art. The ombre effect, from blush pink to dusty blue, captures the serene beauty of a winter sky. Whether you're treating yourself or gifting them to a loved one, these wrist warmers are sure to bring warmth and joy.
Happy knitting! Share your finished creations with the community—we'd love to see your color combinations and how you style them.