Whispering Pine Forest Baby Booties Free Pattern – Knit Cozy Woodland Socks
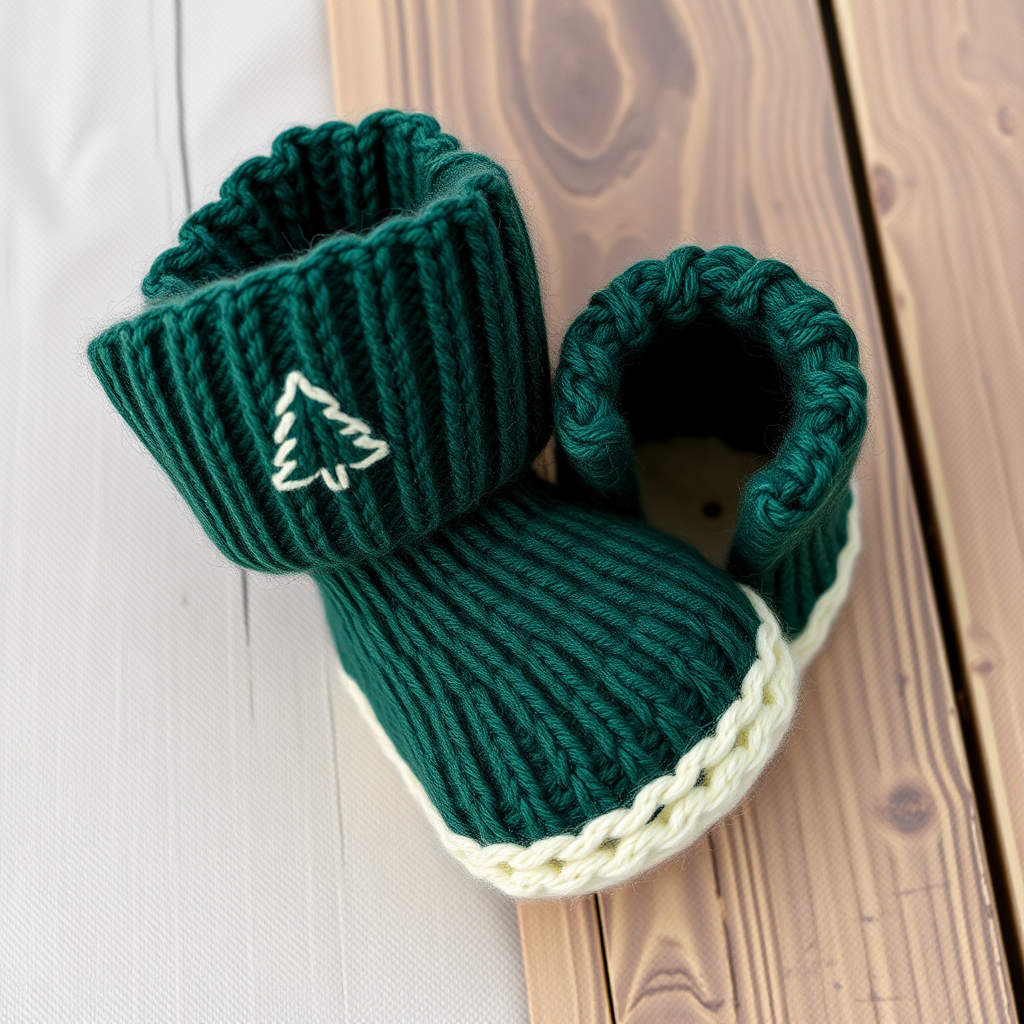
Whispering Pine Forest Baby Booties: A Cozy Woodland Knitting Pattern
There is something truly magical about creating a handmade gift for a new arrival. These Whispering Pine Forest Baby Booties are more than just footwear—they are a tiny embrace of warmth, crafted with love and a touch of woodland whimsy. Featuring a delicate moss stitch cuff and a gentle pine tree motif, this pattern is designed to wrap tiny toes in the softest charm. Whether you are a seasoned knitter or a beginner looking for a rewarding project, these booties are a perfect choice for a nature-loving family's newest addition. Let's pick up our needles and create something beautiful together.
Materials Needed
Before we begin, gather the following materials to ensure a smooth and enjoyable knitting experience. The quality of your materials will directly impact the final look and feel of the booties.
- Yarn: Worsted weight (100% merino wool, approx 100g / 200 yards) in Forest Green (MC) and Cream (CC). The merino wool provides a soft, squishy texture that is gentle on a baby's delicate skin.
- Needles: US 6 (4.0 mm) knitting needles. You will also need a tapestry needle for seaming and weaving in ends.
- Gauge: 20 stitches and 28 rows = 4 inches in stockinette stitch (blocked). Achieving the correct gauge is crucial for the perfect fit.
Step-by-Step Instructions
This pattern is broken down into manageable sections. Follow each step carefully, and you will have a beautiful pair of booties in no time. The instructions are written for two sizes: Newborn (0-3 months) with a sole length of 3.5 inches, and 0-3 months (4 inches). Where numbers differ, the larger size is shown in parentheses.
Abbreviations
- CO: Cast on
- K: Knit
- P: Purl
- K2tog: Knit two together (right-leaning decrease)
- SSK: Slip, slip, knit (left-leaning decrease)
- YO: Yarn over (creates an eyelet)
- St(s): Stitch(es)
- MC: Main color (Forest Green)
- CC: Contrast color (Cream)
Cuff (Make 2)
The cuff features a classic ribbed pattern that provides a snug, stretchy fit around the ankle.
- With MC, CO 32 (36) sts.
- Row 1 (RS): *K2, P2* repeat to end.
- Row 2 (WS): *P2, K2* repeat to end.
- Repeat rows 1-2 for 8 (10) rows total, ending with a WS row. This creates a neat, elastic ribbing.
Leg and Instep
Now we transition to the leg and begin shaping the instep, which forms the top of the foot.
- Switch to stockinette stitch (K on RS, P on WS) and work 4 (6) rows even. This creates a smooth, flat surface for the leg.
- Instep shaping:
- Row 1 (RS): K20 (22), turn (leave remaining 12 (14) sts on hold). You will now work only on these 20 (22) stitches.
- Row 2 (WS): Purl across.
- Row 3 (RS): K1, YO, K2tog, K to last 3 sts, SSK, YO, K1. This row adds decorative eyelets that will later hold a ribbon or cord.
- Repeat rows 2-3 for 6 (8) more rows, ending with a WS row. This creates a gently shaped instep.
- Cut the yarn, leaving a long tail (about 12 inches). Place the instep sts on a holder or spare needle.
Foot and Sole
This section brings all the stitches together to form the foot and sole of the bootie.
- With RS facing, rejoin MC at the right edge of the held sts. Knit across the 12 (14) held sts, pick up and knit 8 (10) sts along the instep edge, knit across the 20 (22) instep sts, pick up and knit 8 (10) sts along the other instep edge, then knit across the remaining 12 (14) held sts. Total: 60 (70) sts. Tip: When picking up stitches, insert your needle under both loops of the edge stitch for a clean finish.
- Work in stockinette stitch for 6 (8) rows even. This forms the main body of the foot.
- Toe shaping:
- Row 1 (RS): *K1, SSK, K to last 3 sts, K2tog, K1* repeat across both sides (decrease 4 sts).
- Row 2 (WS): Purl across.
- Repeat rows 1-2 until 20 (24) sts remain. This creates a rounded, comfortable toe.
- Cut the yarn, leaving a long tail (about 15 inches). Thread the tail through a tapestry needle, then thread it through the remaining stitches on your knitting needle. Slip the stitches off the needle, pull the yarn tight to gather the toe, and secure with a few stitches.
- Sew the back seam and the sole seam using mattress stitch. This creates an invisible, professional-looking seam.
Pine Tree Motif (Optional)
This charming detail adds the woodland touch that makes these booties truly special.
- With CC, embroider a small pine tree on the front of each cuff using duplicate stitch. To create the tree: work a vertical line for the trunk (about 3 stitches long), then add three horizontal V-shaped lines for branches, each slightly larger than the last. Center the motif on the front of the cuff, just above the ribbing.
Finishing
- Weave in all ends carefully using your tapestry needle, ensuring they are hidden within the fabric.
- Block gently to shape. To block, dampen the booties with lukewarm water, gently squeeze out excess (do not wring), and lay flat to dry on a towel, shaping them to the correct dimensions.
- If desired, add a small ribbon or cord through the eyelets for a snug fit. This is both functional and adds an extra touch of charm.
And there you have it—a pair of Whispering Pine Forest Baby Booties ready to warm the tiniest of toes. These booties are a labor of love, and the recipient will surely treasure them. Happy knitting!


