Twill & Texture Double Sided Scrubby Dishcloth Free Pattern
Twill & Texture Double Sided Scrubby Dishcloth: A Free Knit & Crochet Pattern
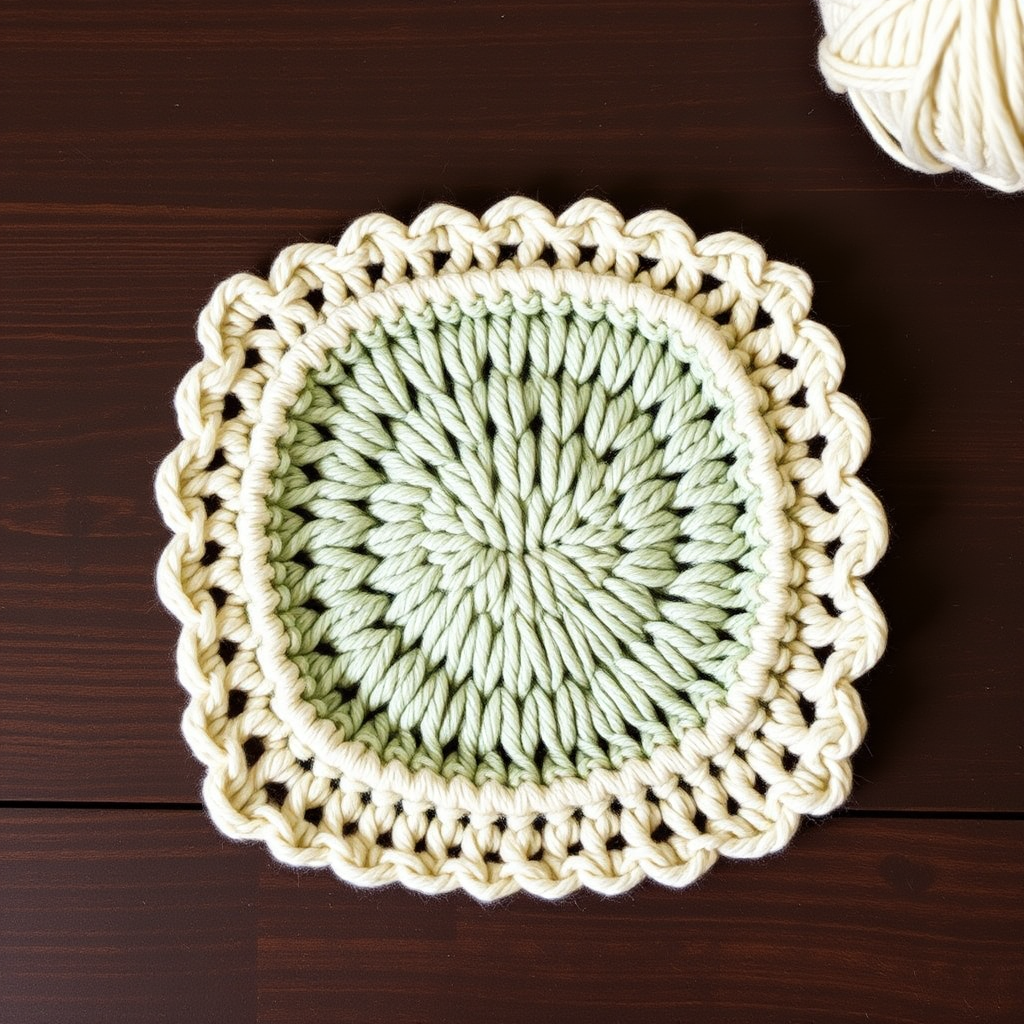
Are you tired of flimsy dishcloths that can't handle a dried-on mess? Meet your new kitchen workhorse: the Twill & Texture Double Sided Scrubby Dishcloth. This clever pattern combines the best of both worlds—a smooth, absorbent knitted center for gentle wiping and a bumpy, crocheted scrubby border for tackling stubborn grime. It's a beautiful, functional, and handmade addition to any modern kitchen, and the best part? It's a completely free pattern that's perfect for beginners looking to expand their skills.
This project is a fantastic way to use up worsted weight cotton yarn from your stash. The contrasting colors create a visually appealing, modern aesthetic that looks great hanging over your sink or folded on the counter. Plus, it makes a wonderful, practical gift for housewarmings, holidays, or just because. Let's dive into this delightful knit-and-crochet hybrid!
Materials Needed
Before you begin, gather your supplies. This pattern requires both knitting and crochet tools, but don't worry—the techniques are simple and beginner-friendly.
- Yarn: Worsted weight cotton yarn in two colors (e.g., Color A: Sage Green, Color B: Cream) - approximately 100 yards each. Cotton is essential for absorbency and durability.
- Knitting Needles: US Size 7 (4.5mm) knitting needles.
- Crochet Hook: US Size G/6 (4.0mm) crochet hook.
- Other Tools: Yarn needle for weaving in ends, scissors, and a tape measure.
Gauge:
- Knitting: 20 stitches and 28 rows = 4 inches in stockinette stitch.
- Crochet: 16 sc and 18 rows = 4 inches.
Note: Gauge is important for achieving the correct finished size, but for a dishcloth, slight variations are perfectly fine. This is a forgiving project!
Step-by-Step Instructions
This pattern creates a 9x9 inch dishcloth with a knitted base and a crocheted scrubby border. Follow these detailed instructions carefully, and you'll have a beautiful, functional dishcloth in no time.
Part 1: Knitted Center (Make with Color A)
We'll start with the smooth, absorbent knitted center. This is worked in simple stockinette stitch, which is just alternating knit and purl rows.
- Cast On: Using the long-tail cast-on method, cast on 45 stitches with Color A. This method creates a nice, stretchy edge that will be perfect for picking up stitches later.
- Row 1 (Right Side): Knit all stitches. This is the smooth side of the fabric.
- Row 2 (Wrong Side): Purl all stitches. This is the bumpy side that will face the inside.
- Repeat: Continue repeating Rows 1 and 2 (knit one row, purl one row) until the piece measures 8 inches from the cast-on edge. It's important to end with a Wrong Side row (a purl row) so that your next row is a Right Side row. This will make the edge look cleaner.
- Bind Off: Bind off all stitches knitwise. To do this, knit the first two stitches, then use the left needle to lift the first stitch over the second and off the needle. Knit one more stitch, lift the previous stitch over it, and repeat until one stitch remains. Cut the yarn, leaving a 6-inch tail, and pull it through the last loop.
- Weave in Ends: Use your yarn needle to weave in the cast-on and bind-off tails securely on the wrong side of the fabric. Trim any excess.
Part 2: Crocheted Scrubby Border (with Color B)
Now for the fun part—the textured, scrubby border! This is worked in the round around the entire knitted square. The combination of single crochet and chain spaces creates that wonderful, bumpy texture perfect for scrubbing.
- Attach Yarn: With the right side of the knitted square facing you, attach Color B with a slip stitch in any corner. To do this, insert your hook into the corner stitch, yarn over, and pull through both the stitch and the loop on your hook.
- Round 1 (Foundation Round): This round establishes the base for your border.
- Top Edge: Work 1 single crochet (sc) in each stitch across the top edge. You should have 45 sc.
- First Corner: Work 3 sc in the corner stitch. This creates a smooth turn.
- Side Edge: Work 1 sc in each row-end down the side edge. You should have approximately 56 sc. (Don't worry if it's not exact—just work evenly.)
- Second Corner: Work 3 sc in the next corner stitch.
- Bottom Edge: Work 1 sc in each stitch across the bottom edge (45 sc).
- Third Corner: Work 3 sc in the next corner stitch.
- Last Side Edge: Work 1 sc in each row-end up the last side edge (56 sc).
- Final Corner: Work 3 sc in the final corner stitch.
- Join: Join with a slip stitch to the first sc of the round. You should have a total of 214 sc.
- Round 2 (Textured Round): This is where the scrubby texture begins.
- Chain 1 (ch 1) and turn your work. Turning creates a nice, defined edge.
- *Work 1 sc in the next sc, ch 1, skip 1 sc.* Repeat from * to * around the entire border. When you reach a corner, work 3 sc in the middle corner sc (the center of the 3 sc you made in Round 1). This ensures the corner stays flat and doesn't curl.
- Join with a slip stitch to the first sc of the round.
- Round 3 (Finishing Round): This round solidifies the texture and creates a clean finish.
- Ch 1 and turn your work.
- Work 1 sc in each sc and 1 sc in each ch-1 space around the entire border. Again, work 3 sc in each corner sc (the middle corner sc).
- Join with a slip stitch to the first sc of the round.
- Fasten off by cutting the yarn, leaving a 6-inch tail. Pull the tail through the loop on your hook. Weave in all ends securely with your yarn needle.
Finishing Touches
- Blocking: Lay the dishcloth flat on a clean towel. Gently steam block to even out the edges. To do this, hold a steam iron about an inch above the cloth and release steam, or lightly mist with water and smooth with your hands. Let it dry completely. This step helps the corners lay flat and the stitches relax.
- Usage: Your dishcloth is now ready for action! The knitted side is smooth for gentle cleaning of delicate surfaces like glass or non-stick pans. The crocheted border provides a textured, scrubby surface on the edges, perfect for tackling stuck-on food. For a full scrubby side, you could crochet a separate textured square and seam it to the back, but this pattern keeps it simple and elegant with the border scrubby.
And there you have it—a beautiful, functional, and eco-friendly Twill & Texture Double Sided Scrubby Dishcloth! This pattern is a wonderful way to practice both knitting and crochet skills in one project. The result is a durable, attractive kitchen essential that you'll be proud to use or gift. Happy crafting!