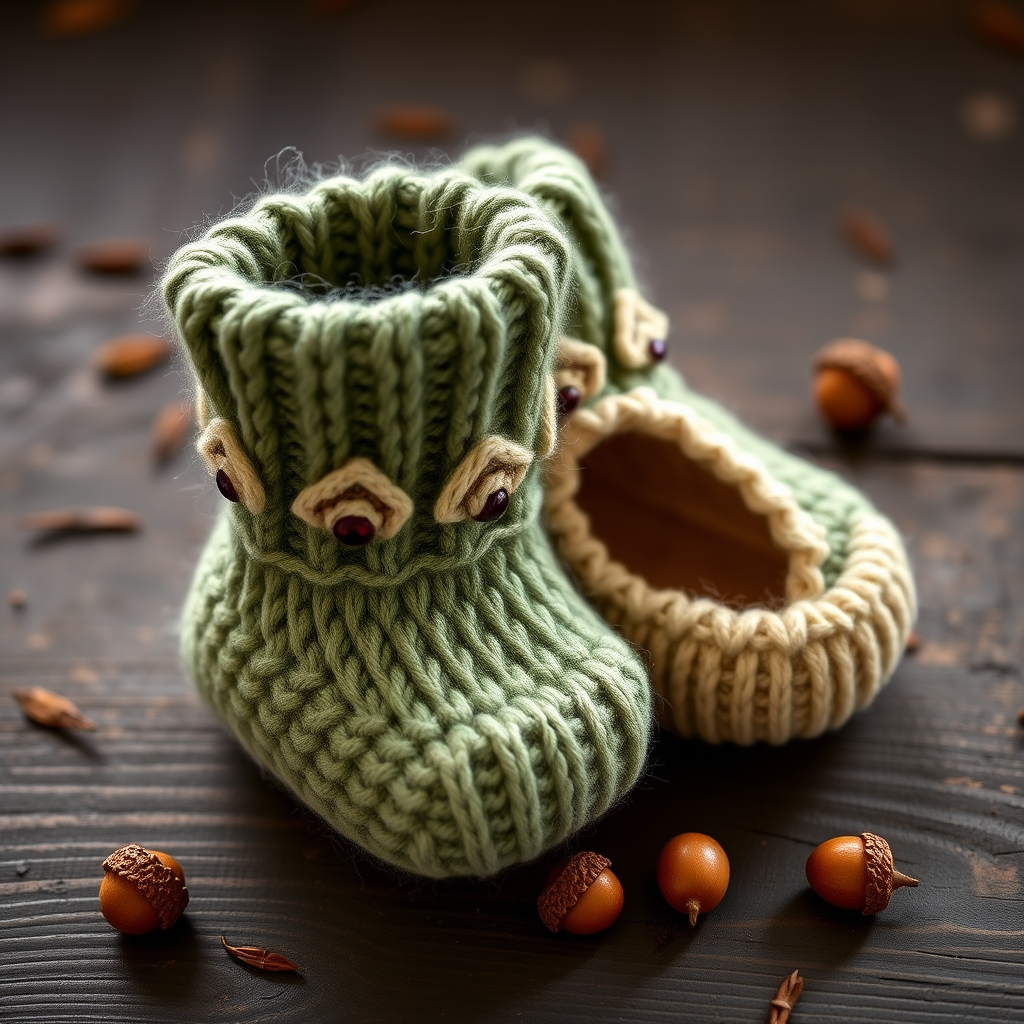
The Willow Wisp Button Flap Beanie Free Pattern – A Knitted Preemie Hat with Leaf-Stitch Flap

The Willow Wisp Button Flap Beanie: A Knitted Preemie Hat with Leaf-Stitch Flap
There is something profoundly tender about knitting for a tiny newborn, especially for the smallest fighters in the NICU. The Willow Wisp Button Flap Beanie is designed with these precious babies in mind. This delicate preemie hat features a softly textured leaf-stitch flap that buttons under the chin, keeping tiny heads warm without fuss or irritation. Knitted in gentle sage and cream, it’s a heartfelt handmade gift that wraps the smallest arrivals in love and comfort. Whether you are a seasoned knitter looking for a quick, meaningful project or a beginner ready to tackle your first garment, this pattern offers a beautiful balance of simple stockinette and an elegant, repeatable leaf motif.
This pattern is more than just a hat; it is a meditation on care. The button flap eliminates the struggle of keeping a hat on a wiggly baby, while the soft, superwash merino wool ensures it is gentle against delicate skin. Let’s dive into the materials and steps to create this heirloom-quality piece.
Materials Needed
Before you begin, gather the following supplies. The list is short, and the project is portable—perfect for knitting in a hospital waiting room or on the couch.
- Yarn: DK weight superwash merino wool (e.g., Cascade 220 Superwash) in Sage (MC) and Cream (CC), approx 50g each. The superwash treatment makes it machine-washable, a practical necessity for baby items.
- Needles: US 5 (3.75 mm) 16-inch circular needle and a set of double-pointed needles (DPNs) in the same size for the crown decreases. You will also need a tapestry needle for weaving in ends.
- Notions: 2 small buttons (wooden or plastic, about 1/2 inch in diameter), stitch markers (at least 4), and a row counter (optional but helpful).
- Gauge: 22 stitches and 30 rows = 4 inches in stockinette stitch, after blocking. Always knit a swatch! Gauge is crucial for achieving the correct preemie size (approx 12-13 inch head circumference).
Step-by-Step Instructions
This pattern is worked in the round from the bottom up. The leaf panels are charted in written form below. Take your time with the leaf pattern; it is simple once you see the rhythm of the yarn overs and decreases.
Abbreviations
- k = knit
- p = purl
- k2tog = knit two together (right-leaning decrease)
- ssk = slip, slip, knit (left-leaning decrease)
- yo = yarn over
- pm = place marker
- sm = slip marker
- st(s) = stitch(es)
- RS = right side
- WS = wrong side
Special Stitch – Leaf Panel (worked over 9 sts)
This is the heart of the design. The leaf panel is a 20-row repeat that creates a delicate, lacy leaf with a central vein. Work these rows exactly as written. All WS rows are purled, which means you will only be working with knit, purl, yarn over, and decrease stitches on the RS rows.
- Row 1 (RS): k3, yo, ssk, k1, k2tog, yo, k1
- Row 2 and all WS rows: purl all sts
- Row 3: k2, yo, k1, ssk, k1, k2tog, k1, yo, k1
- Row 5: k1, yo, k2, ssk, k1, k2tog, k2, yo, k1
- Row 7: k2, k2tog, yo, k1, ssk, yo, k2
- Row 9: k1, k2tog, yo, k3, yo, ssk, k1
- Row 11: k2tog, yo, k5, yo, ssk
- Row 13: k1, yo, ssk, k3, k2tog, yo, k1
- Row 15: k2, yo, ssk, k1, k2tog, yo, k2
- Row 17: k3, yo, ssk, k1, k2tog, yo, k3
- Row 19: k4, yo, ssk, k1, k2tog, yo, k4
- Row 20: purl
Hat Body
- Cast On: With MC, cast on 72 sts. Join in the round, being careful not to twist. Place a marker for the beginning of the round.
- Ribbing: Work in k2, p2 ribbing for 6 rounds. This creates a snug, stretchy edge that will sit comfortably on a tiny forehead.
- Increase Round: Next round, knit all sts, increasing 4 sts evenly around. You should now have 76 sts on your needles. Tip: To increase evenly, knit 18 sts, then M1 (make one), repeat this pattern around. This adds the extra stitches without distorting the fabric.
- Begin Leaf Pattern: This is where the magic happens. You will be placing markers to separate the leaf panels from the plain stockinette sections.
- Round 1: *k9, pm, work Leaf Panel Row 1 over next 9 sts, pm, k9, pm, work Leaf Panel Row 1 over next 9 sts, pm* repeat from * to * once more. You will have 4 leaf panels total, with 9 plain knit stitches between each. The markers help you keep track of where the pattern begins and ends.
- Continue: Continue working the leaf panels through Row 20, knitting the plain sts between them. Remember, the leaf panel rows are worked on the RS, but since you are knitting in the round, every round is a RS round. The "WS" purl rows from the written instructions are simply not worked; you will only work the RS rows (Rows 1, 3, 5, etc.) and then skip the purl rows. Wait, this is a critical correction: In the round, you will work the RS rows of the leaf pattern as written, but you will NOT purl the WS rows. Instead, you will knit all stitches on the "WS" rows. So, for the leaf panel, you will work Row 1, then knit one round even, then Row 3, then knit one round even, and so on. This creates the same fabric as knitting flat with purl WS rows.
- Repeat: After completing Row 20 of the leaf panels, repeat the leaf panel rows from Row 1 again, but this time work only Rows 1-10. This creates a slightly shorter second leaf repeat, which shapes the crown nicely.
- Even Rounds: After the last leaf row, knit 2 rounds even. This gives a smooth transition before the decreases.
Decrease for Crown
Now we shape the top of the hat. Switch to DPNs when the circular needle becomes too long for the number of stitches.
- Round 1: *k2tog, k17* repeat around (68 sts)
- Round 2 and all even rounds: knit
- Round 3: *k2tog, k15* repeat around (60 sts)
- Round 5: *k2tog, k13* repeat around (52 sts)
- Round 7: *k2tog, k11* repeat around (44 sts)
- Round 9: *k2tog, k9* repeat around (36 sts)
- Round 11: *k2tog, k7* repeat around (28 sts)
- Round 13: *k2tog, k5* repeat around (20 sts)
- Round 15: *k2tog, k3* repeat around (12 sts)
- Round 17: *k2tog* repeat around (6 sts)
- Finish: Cut yarn, leaving a 6-inch tail. Thread the tail through a tapestry needle, slide it through the remaining 6 sts, pull tight, and secure with a knot. Weave in the end.
Button Flap
This is the signature feature of the Willow Wisp Beanie. The flap is knitted flat, back and forth, and is attached to the front of the hat.
- Pick Up Stitches: With RS facing and using CC (Cream), pick up and knit 20 sts along the bottom edge of the hat, centered on the front (opposite the cast-on seam). Tip: To center it, fold the hat in half and mark the center front stitch. Pick up 10 sts to the right of the marker and 10 sts to the left.
- Work Flap: Work back and forth in stockinette stitch (knit on RS, purl on WS) for 8 rows. This creates a smooth, rolled edge that looks lovely against the sage green.
- Buttonhole Row (RS): k2, k2tog, yo, k12, yo, ssk, k2. This creates two buttonholes. The yarn overs will create holes, and the decreases keep the stitch count the same (20 sts).
- Finish Flap: Continue in stockinette for 4 more rows. Bind off loosely. Tip: Bind off on the WS to keep the RS smooth, or bind off on the RS for a slightly more defined edge. Either works.
Finishing
- Weave in Ends: Use your tapestry needle to weave in all loose ends securely, especially at the cast-on, bind-off, and where you picked up the flap stitches.
- Sew Buttons: Sew two small buttons on the underside of the flap, aligned with the buttonholes. The buttons should sit on the inside of the flap so they don't rub against the baby's chin. Place them about 1/2 inch from the bottom edge of the flap.
- Block: Block gently to shape. Since this is superwash wool, you can wet block it. Soak the hat in lukewarm water with a drop of baby shampoo, gently squeeze out excess water (do not wring), roll in a towel, and lay flat to dry. This will even out the stitches and open up the leaf pattern beautifully.
Optional Variation
If you prefer an even softer closure, you can add a small i-cord tie instead of buttons. Simply knit an i-cord about 6 inches long, attach it to one side of the flap, and tie it in a bow under the chin. This is a lovely alternative for parents who prefer no hardware on baby items.
Your Willow Wisp Button Flap Beanie is now complete. This little hat is more than just a knitting project; it is a tangible expression of hope and care for a family during a vulnerable time. The gentle leaf pattern evokes growth and new life, making it a perfect gift for a preemie or a full-term newborn. Enjoy the process, and know that your handmade creation will be treasured.