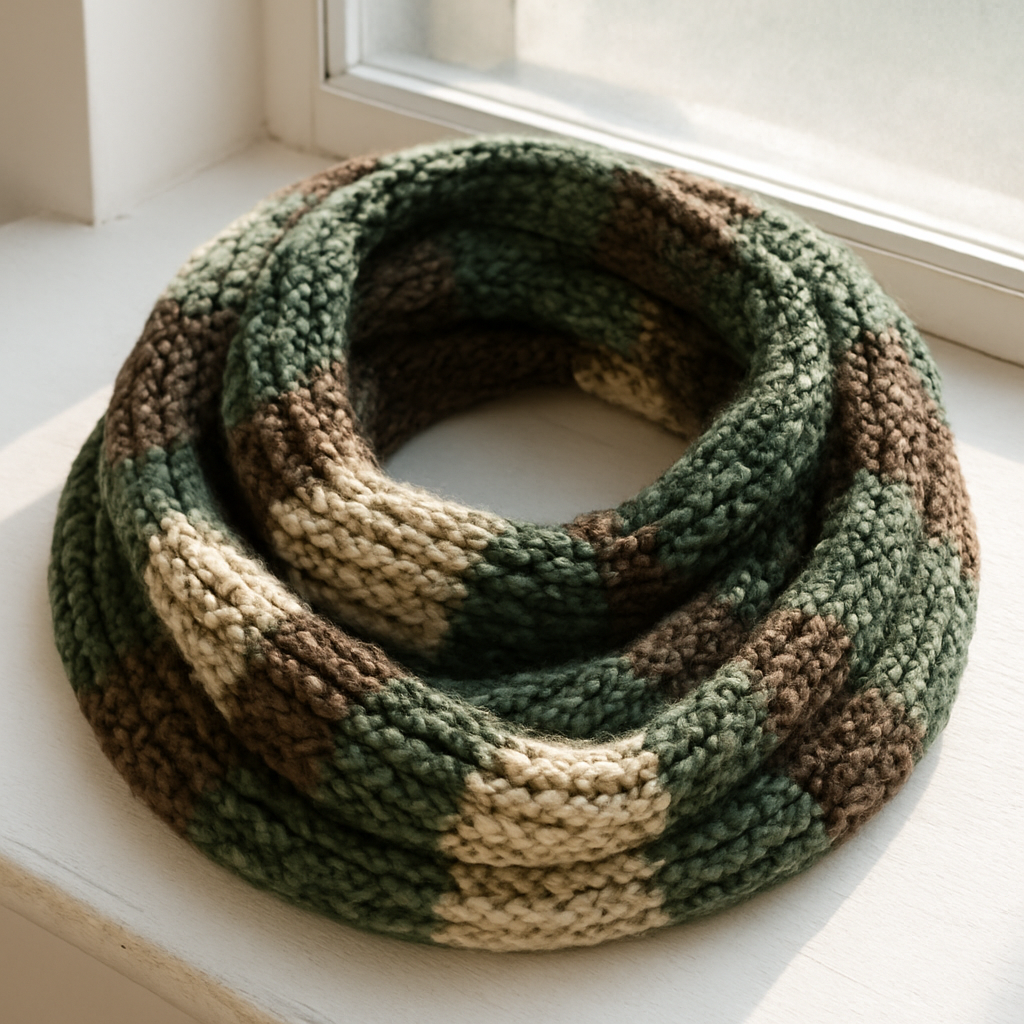
The Aurora Dune Infinity Scarf Free Pattern – Knit a Shifting Sand Ripple

The Aurora Dune Infinity Scarf: A Free Knitting Pattern for a Shifting Sand Ripple
Wrap yourself in the mesmerizing ripple of desert dunes and twilight skies with this uniquely textured infinity scarf. The alternating slipped-stitch ridges and soft gradient yarn create a cozy, sculptural accessory that feels like a warm breeze. This beginner-friendly pattern uses simple knit and purl stitches combined with slipped stitches to produce a stunning, woven-looking texture that mimics the shifting sands of a desert landscape. Whether you choose a three-color palette or a self-striping gradient yarn, this scarf is a joy to knit and even more delightful to wear.
Materials Needed
Before you begin, gather the following materials to ensure a smooth and enjoyable knitting experience:
- Yarn: Worsted weight yarn in 3 colors: Color A (sand/beige), Color B (dusty rose), Color C (deep teal) – approx. 220 yds each, or a self-striping gradient yarn (approx. 660 yds total). The sample uses a soft, plush worsted weight for excellent stitch definition.
- Needle: US 8 (5 mm) 24-inch circular knitting needle. The circular needle is essential for working in the round.
- Notions: Stitch marker, tapestry needle for weaving in ends, and blocking mats (optional but recommended).
Gauge: 18 stitches and 24 rows = 4 inches in stockinette stitch (after blocking). While gauge is not critical for a scarf, matching it will help you achieve the intended drape and dimensions.
Step-by-Step Instructions
This pattern is worked in the round, creating a seamless, continuous loop. The slipped stitches form beautiful vertical ridges, while the strategic decreases create a subtle diagonal ripple effect. Follow these instructions carefully, and you'll have a gorgeous scarf in no time.
Finished Size & Abbreviations
Finished Size: Approx. 60 inches circumference, 10 inches wide (adjustable by repeating pattern).
Abbreviations:
- CO: Cast on
- K: Knit
- P: Purl
- Sl: Slip stitch purlwise with yarn in back (unless noted)
- K2tog: Knit two together
- P2tog: Purl two together
- Rep: Repeat
- St(s): Stitch(es)
Pattern Notes
- Worked in the round on a circular needle.
- The slipped stitches create a beautiful ridged texture that mimics ripples in sand.
- Use a stretchy cast-on (like long-tail or knitted cast-on) to ensure the edge is flexible.
Getting Started: Cast On & Foundation Rounds
Step 1: CO 180 sts. Place a stitch marker and join in the round, being extremely careful not to twist your stitches. The join is the most critical part of working in the round; a twisted cast-on will ruin the entire project.
Step 2 (Round 1): Knit all stitches. This round establishes the smooth base of your scarf.
Step 3 (Round 2): Purl all stitches. This creates a garter stitch ridge at the edge, giving a neat, finished look.
Creating the Ripple Texture
Now we begin the main pattern. The sequence of colors and stitch patterns creates the stunning ripple effect.
Step 4 (Round 3 – Color A): *K1, Sl1 wyib, rep from * to end. This means you'll knit one stitch, then slip the next stitch purlwise with the yarn held in the back. Repeat this across the entire round.
Step 5 (Round 4 – Color A): *P1, Sl1 wyif, rep from * to end. Now you'll purl one stitch, then slip the next stitch purlwise with the yarn held in the front. This creates a beautiful horizontal bar across the slipped stitch.
Step 6 (Round 5 – Color B): Knit all stitches. This solid knit round separates the textured rows and adds stability.
Step 7 (Round 6 – Color B): Purl all stitches. This completes the second garter ridge.
Shifting the Pattern for the Diagonal Effect
This is where the magic happens. The decreases shift the stitch pattern, creating the diagonal ripple that mimics shifting sand.
Step 8 (Round 7 – Color C): *K2tog, K1, Sl1 wyib, K1, rep from * to end. The K2tog (knit two together) decreases the stitch count by one, which shifts the pattern's alignment. Don't worry about the decrease; it's intentional and creates the ripple.
Step 9 (Round 8 – Color C): *P2tog, P1, Sl1 wyif, P1, rep from * to end. This purl-side decrease complements the knit-side decrease, maintaining the pattern's integrity.
Continuing the Pattern Sequence
Now you'll repeat the sequence, alternating colors in the order A, B, C. Here's the full breakdown:
- Rounds 9-10 (Color A): Repeat Rounds 1-2 (Knit all, Purl all).
- Rounds 11-12 (Color B): Repeat Rounds 3-4, but with Color B (K1, Sl1 wyib / P1, Sl1 wyif).
- Rounds 13-14 (Color C): Repeat Rounds 7-8 (K2tog, K1, Sl1 wyib, K1 / P2tog, P1, Sl1 wyif, P1).
- Rounds 15-16 (Color A): Repeat Rounds 1-2 (Knit all, Purl all).
Continue alternating colors in this sequence (A, B, C) and repeating the 8-round pattern until the scarf measures approximately 9 inches from the cast-on edge, ending with a Round 8 or 16. This ensures you finish at a logical point in the pattern.
Finishing Touches
Step 10: Knit 1 round in Color A. This creates a clean, solid edge before binding off.
Step 11: Bind off loosely using a stretchy bind-off (e.g., Jeny's Surprisingly Stretchy Bind-Off). A tight bind-off will prevent the scarf from stretching properly over your head. If you're unfamiliar with this technique, a simple knit bind-off worked loosely will also suffice.
Step 12: Weave in all ends with a tapestry needle. Be sure to weave in securely, but not so tightly that it puckers the fabric.
Step 13: Block gently to even out the texture and enhance the ripple effect. Wet blocking is ideal for worsted weight yarn. Soak the scarf in lukewarm water with a drop of wool wash, gently squeeze out excess water (never wring), and lay flat to dry, shaping it to the desired dimensions. This step truly transforms the fabric, making the stitches crisp and the texture pop.
Customization Ideas
This pattern is incredibly versatile. Here are a few ways to make it your own:
- For a longer scarf: Simply repeat the 8-round pattern more times before finishing.
- For a wider scarf: CO additional multiples of 6 sts (e.g., 186, 192). The pattern repeat is 6 stitches, so any multiple of 6 will work perfectly.
- Color palette: Use any color combination that speaks to you – from sunset oranges to ocean blues. The pattern works beautifully with both high-contrast and subtle tonal palettes.
We hope you enjoy knitting this Aurora Dune Infinity Scarf as much as we enjoyed designing it. The rhythmic repetition of slipped stitches is meditative, and the result is a stunning, wearable piece of art. Happy knitting!