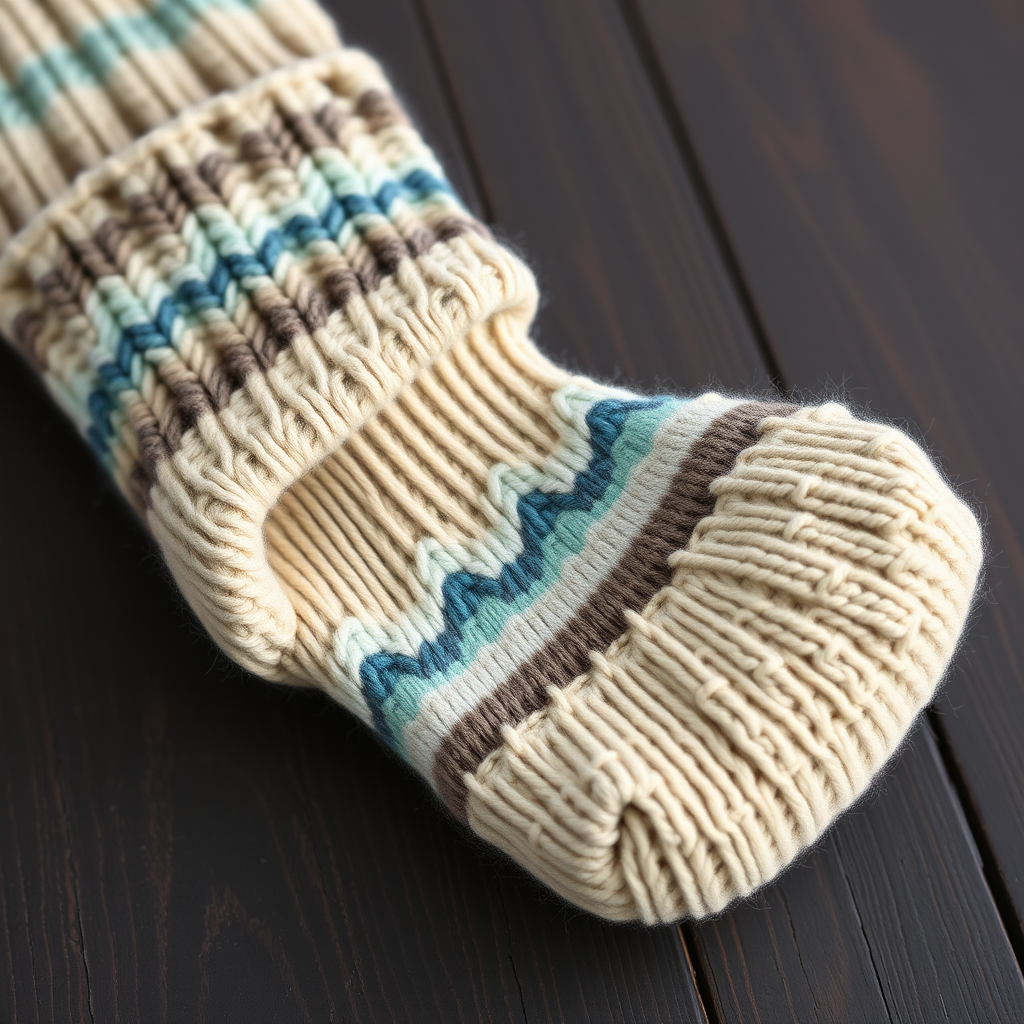
Jolly Fun Socks 63340 Free Knitting Pattern

Jolly Fun Striped Socks: A Beginner-Friendly Knitting Pattern
Kick up your heels with these cheerful, striped socks that bring a pop of color to any day. The playful zigzag color blocks and cozy ribbed cuff make them a joy to knit and wear. This pattern is designed with beginners in mind, using simple knit and purl stitches, basic decreases, and a classic heel flap construction. Whether you're knitting your first pair of socks or looking for a quick, satisfying project, these Jolly Fun Socks are the perfect way to add handmade warmth and vibrant style to your wardrobe.
Materials Needed
Before you begin, gather the following supplies to ensure a smooth knitting experience:
- Yarn: Worsted weight yarn in 3 colors:
- Color A: Bright Yellow (approx. 120 yards)
- Color B: Coral Pink (approx. 115 yards)
- Color C: Teal (approx. 115 yards)
- Needles: US 5 (3.75 mm) double-pointed needles (set of 4 or 5) OR a circular needle (32" or longer) for the magic loop method.
- Notions: Stitch markers, tapestry needle for weaving in ends, scissors.
- Gauge: 22 stitches and 30 rows = 4 inches in stockinette stitch (knit every round). Always knit a gauge swatch to ensure your socks fit correctly!
Step-by-Step Instructions
This pattern is written for a Women's Medium (fits US shoe size 7-9). To adjust the size, you can change your needle size (larger needles = bigger socks) or adjust the stitch count in multiples of 4. Let's get started!
Abbreviations
- CO: Cast on
- K: Knit
- P: Purl
- K2tog: Knit two stitches together (right-leaning decrease)
- SSK: Slip, slip, knit (left-leaning decrease)
- St(s): Stitch(es)
- Rnd(s): Round(s)
- SL1: Slip one stitch purlwise
- RS: Right side
- WS: Wrong side
Cuff: The Ribbed Foundation
- With Color A (Bright Yellow), CO 56 stitches. Distribute them evenly over 4 double-pointed needles (14 stitches on each needle). If using a circular needle, place a marker and join in the round, being very careful not to twist your stitches.
- Work K1, P1 ribbing for 1 inch. This creates a stretchy, snug edge.
- Switch to Color B (Coral Pink) and continue the K1, P1 ribbing for another 1 inch.
- Switch to Color C (Teal) and work the ribbing for 1 more inch. Your cuff should now measure about 3 inches total, with three distinct horizontal color bands.
Leg: Creating the Striped Pattern
- Begin working in stockinette stitch (knit every round) with Color A. Work 2 full rounds.
- Switch to Color B and work 2 rounds.
- Switch to Color C and work 2 rounds.
- Repeat these 6-round color blocks (2 rounds of A, 2 of B, 2 of C) until the leg measures 6 inches from the cast-on edge. Pro tip: End with a complete color block (finish on a Color C round) to keep the pattern tidy.
Heel Flap: The Sturdy Back
You will now work back and forth on only half of your stitches to create the heel flap.
- Work across the first 28 stitches (needles 1 and 2) for the heel. Leave the remaining 28 stitches (needles 3 and 4) on hold for the instep (top of foot).
- Row 1 (RS): With Color A, *SL1, K1*; repeat from * to * across all 28 stitches. Turn your work.
- Row 2 (WS): SL1, then purl across all 28 stitches. Turn.
- Repeat Rows 1 and 2 for a total of 28 rows. You should have 14 slipped stitches along each side edge of the heel flap. This creates a strong, reinforced fabric.
Turn Heel: Shaping the Curve
Continue with Color A. This short-row section shapes the bottom of your heel.
- Row 1 (RS): K18, SSK, K1. Turn your work (you will have 5 stitches left unworked on the needle).
- Row 2 (WS): SL1, P7, P2tog, P1. Turn.
- Row 3: SL1, K8, SSK, K1. Turn.
- Row 4: SL1, P9, P2tog, P1. Turn.
- Continue in this manner, working one more stitch before the decrease each time, until all heel stitches have been worked. You should now have 18 stitches remaining on your heel needle.
Gusset: Connecting Heel and Instep
- With Color A, pick up and knit 14 stitches along the left side of the heel flap (one stitch for each slipped stitch edge).
- Work across the 28 instep stitches (needles 3 and 4) in stockinette, maintaining the color block pattern (continue with the next color in your sequence: A, B, C).
- Pick up and knit 14 stitches along the right side of the heel flap.
- You now have 74 stitches total. Arrange them on your needles as follows:
- Needle 1: 18 stitches (heel)
- Needle 2: 14 stitches (left gusset)
- Needle 3: 28 stitches (instep)
- Needle 4: 14 stitches (right gusset)
- Begin working in the round again. Continue the color block pattern on the instep (Needle 3). For the gusset needles (2 and 4), simply knit with the current color you are using.
- Decrease Round:
- Needle 1: Knit to the last 3 stitches, K2tog, K1.
- Needle 2: Knit all stitches.
- Needle 3: Knit all stitches (maintaining pattern).
- Needle 4: K1, SSK, knit to end.
- Repeat this decrease round every other round until you are back to 56 stitches total (14 stitches on each needle). This shapes the gusset and reduces the foot to its proper circumference.
Foot: The Cozy Stretch
- Continue working in stockinette stitch in the round, maintaining the 2-round color block pattern (A, B, C).
- Knit until the foot measures 7 inches from the back of the heel, or 2 inches less than your desired total foot length. (For a size 9 foot, this is usually around 7 inches).
Toe: The Final Shaping
- Switch to Color A and knit 1 round even.
- Decrease Round:
- Needle 1: Knit to the last 3 stitches, K2tog, K1.
- Needle 2: K1, SSK, knit to end.
- Needle 3: Knit to the last 3 stitches, K2tog, K1.
- Needle 4: K1, SSK, knit to end.
- Repeat this decrease round every other round until you have 28 stitches remaining (7 stitches per needle).
- Now, repeat the decrease round every round until only 8 stitches remain.
- Cut the yarn, leaving a 12-inch tail. Thread the tail onto a tapestry needle, slide it through the remaining 8 stitches, pull tight to close the hole, and weave in the end securely.
Finishing: The Perfect Pair
- Weave in all loose ends with your tapestry needle, being careful to match the yarn colors to the corresponding stripes.
- Gently block your socks to shape. You can wet-block them by soaking in lukewarm water, gently squeezing out excess water, and laying them flat to dry on a towel.
- Repeat all steps to knit the second sock. Congratulations, you've just made a pair of Jolly Fun Socks!
These socks are as delightful to make as they are to wear. The bright yellow, coral pink, and teal stripes are sure to bring a smile to your face every time you slip them on. Happy knitting!